background image

TagTemp- NFC 


NOVUS AUTOMATION 

7/9


5.2.6


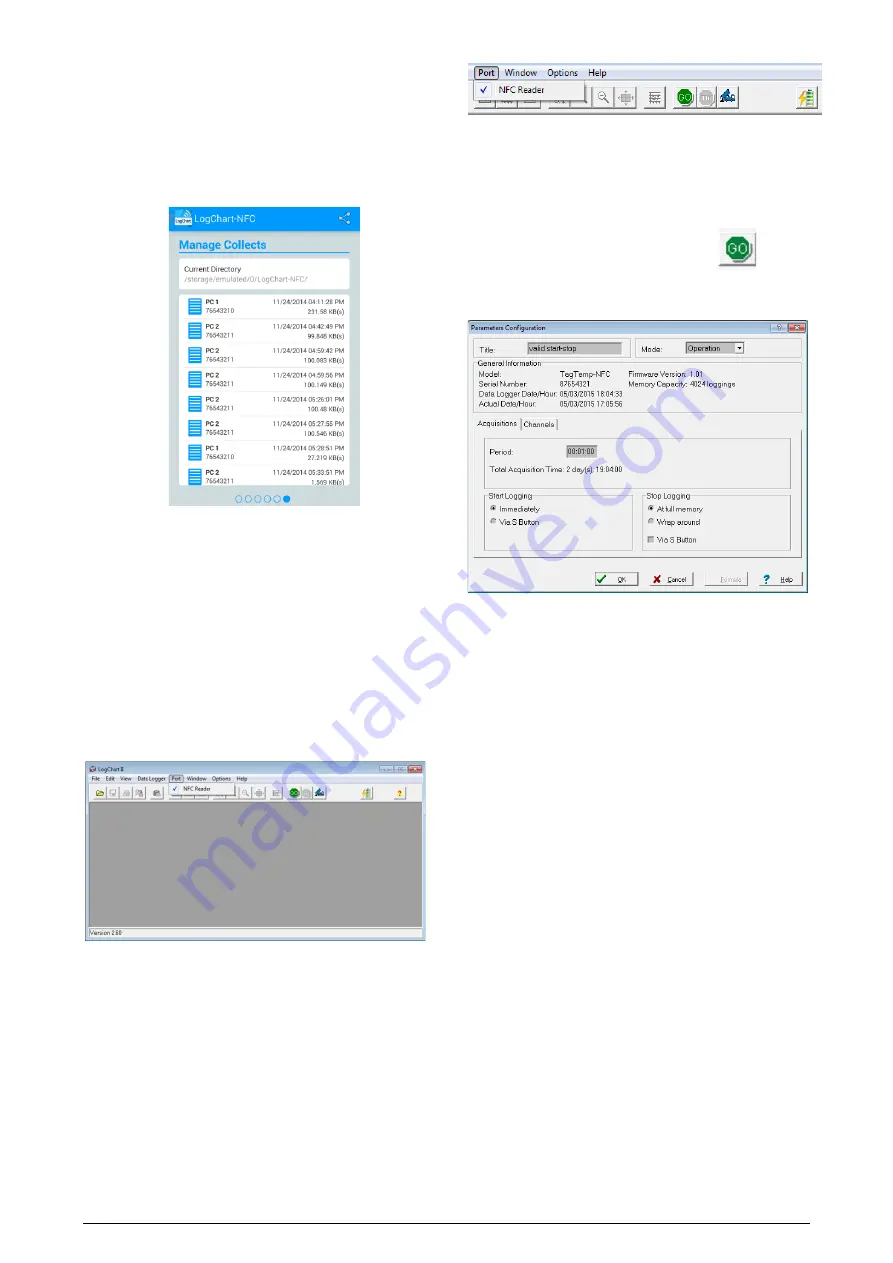
Manage Collects 

This screen  allows you to delete  and  share the data  previously 

acquired. It shown a list of data acquisitions and you can select one 

or more rows (files) to share or delete. 
To share the selected items, simply press the button on the top right. 
To delete a selected item, simply press and hold the item in the list to 

remove (long press), then it will emerge a message asking to confirm 

or not the deletion.  


Fig. 20 – Manage Collects screen 

You can get  this feature separately  directly by using  a 

smartphone. 


6


LOGCHART II SOFTWARE 

6.1


Installing LogChart II 

The LogChart II, application is used to configure the parameters for 

data transfer. To install the LogChart II, run the file LC_II_Setup.exe 

available on our web site. 

6.2


Running LogChart II 

When you open LogChart II the main window is displayed. 


Fig. 21 – LogChart II main window 

Next, select the serial port that the communication interface will use 

in the “Port” menu. 
It is required that USB-NFC reader connected to the computer and 

the USB driver installed. Select the port indicated by "NFC Reader". 

This port  will be as the default  the  next time the  program started 

again. After checking the proper functioning of the selected port, it 

will be marked. When the TagTemp-NFC is over the NFC reader and 

it is recognized, will enable the icons shown below. 


Fig. 22 – Icons enabled when the communication port selected is a valid port


6.3


Configuring the equipment 

In order to configure the device  is necessary  to place the 

TagTemp-NFC over the NFC-USB reader. 

After the serial port is selected, click on the button: 


The Parameters Configuration screen is displayed. In this screen 

the user can define the equipment operation mode and also obtains 

general information about the device. 


Fig. 23 – Parameters Configuration screen


Fields are: 
1- Title: In this field, the user identifies the equipment by assigning it 

a name. 
2- General information: Area with information about the equipment, 

such as Model, Serial Number, equipment Date/Time, PC Date/Time, 

firmware version, memory capacity and number of acquisitions 

stored in memory. 
In this field, time is constantly updated while the communication 

between equipment and computer is taking place. 
3-  Readings:  Presents a series of parameters that define the 

acquisition process. 

Interval:  Defines the interval between readings: The minimum 

interval is (1) minute and maximum is (4) hours. 
Estimated time: In this parameter, the equipment informs the 

user how long it will take to occupy the full memory, in the 

conditions set up during configuration. 
Start of Readings: Readings can be started in two  different 

modes: 


Immediately: start as soon as set up is ready and sent 

(OK) to the equipment. 


“S” button:  acquisitions  begin when the  "S" button is 

pressed. 

End of Readings: The options for the end of acquisitions are: 


Full memory: perform acquisitions up to the capacity of 

the available memory. 


“S” button: acquisitions  stops  when the  "S" button is 

pressed.  

Don’t stop (Wrap around): readings are continuous, replacing 

old records with new ones as the number of readings overpass 

the memory capacity. 

Summary of Contents for 8813700000

Page 1: ...he other way is to use a double sided adhesive tape on the back of the equipment avoiding placing it above the identification label In both cases the temperature sensor should be placed near the place where you want to measure the temperature Fig 01 Mounting holes on the TagTemp NFC 3 TECHNICAL DATA Measure Range Temperature 40 0 C to 70 0 C Accuracy 0 5 ºC 25 ºC 1 C max over the full measuring ra...

Page 2: ...lowed by a slow one beginning or ending of records If the LED is always off there are two possible reasons 1 The equipment is in low power mode 2 The battery is dead The LED flashing light is intentionally weak and can be difficult to be viewed in bright places 4 4 Button The S button on the front panel can be used to start and or stop the records depending on the configuration chosen To start the...

Page 3: ...takes a few seconds depending on the smartphone model The application has six screens 1 Status 2 Setup 3 Events 4 Data Visualization 5 Preferences 6 Manage Collects 5 2 1 Device Status Fig 04 Status Screen Last Recorded Value Displays the last recorded value performed by the TagTemp NFC Not necessarily the actual temperature Loggings Displays the basic information of the TagTemp NFC Log Interval D...

Page 4: ... digital input Digital Input Events Number of events occurred Last Event Indicates the time of the last event occurred Last State Indicates the state of the last event occurred Longest Period in ON Indicates the longest time that remained in ON state High Excursions Indicates when the measured value exceeds the upper limit specified First Occurrence Time and value of the first occurrence above the...

Page 5: ...nce as shown in Fig 10 Fig 11 and Fig 12 If there is no occurrences in the Digital input neither high or low Excursions messages appear in the Fig 13 Fig 14 and Fig 15 Fig 10 Digital Input Events Screen Fig 11 High Excursions Screen Fig 12 Low Excursions Screen Fig 13 Message for Events in the Digital Input screen for No event Fig 14 Message for High Excursions for No occurrences Fig 15 Message fo...

Page 6: ...ences screen Fig 18 Share Screen 5 2 5 Preference Settings Default share options The user can set the preferences screen according to the desired data received through sharing Keep downloaded data in smartphone Maintains files previously selected in the sharing options in a folder named LogChartNFCFiles in the internal memory of the smartphone Export Logs CSV Share a file in CSV format with all re...

Page 7: ...equipment In order to configure the device is necessary to place the TagTemp NFC over the NFC USB reader After the serial port is selected click on the button The Parameters Configuration screen is displayed In this screen the user can define the equipment operation mode and also obtains general information about the device Fig 23 Parameters Configuration screen Fields are 1 Title In this field th...

Page 8: ...zation Data collected are send from equipment to PC Data can be collected any time at the end of the acquisition process or while they are being acquired If data collection takes place during the acquisition process the process will not be interrupted following the equipment configuration It is important to wake up the equipment before starting communication 6 5 Offloading data Data offload is acc...

Page 9: ... displayed by pressing the icon Parameter Viewing Fig 27 General information 6 7 Exporting data Logged data can be exported to different file formats for further analysis To export access File Export or click the icon 6 8 Diagnostic Screen Battery Level Indicates the level of battery voltage When you observe that the battery level is low replace it immediately for proper device operation Device St...

Reviews: