MX40 Pro LED Display Controller User Manual
www.novastar.tech
11
a.
Choose
input source
> EDID. The
input source
is HDMI1, HDMI2, HDMI3 or DP.
b.
Set
Mode
to
Custom
or
Standard
, and then set the resolution and frame rate.
Custom: Set the resolution manually.
Standard: Select the desired resolution from the drop-down options.
c.
After the settings are done, click
Apply
.
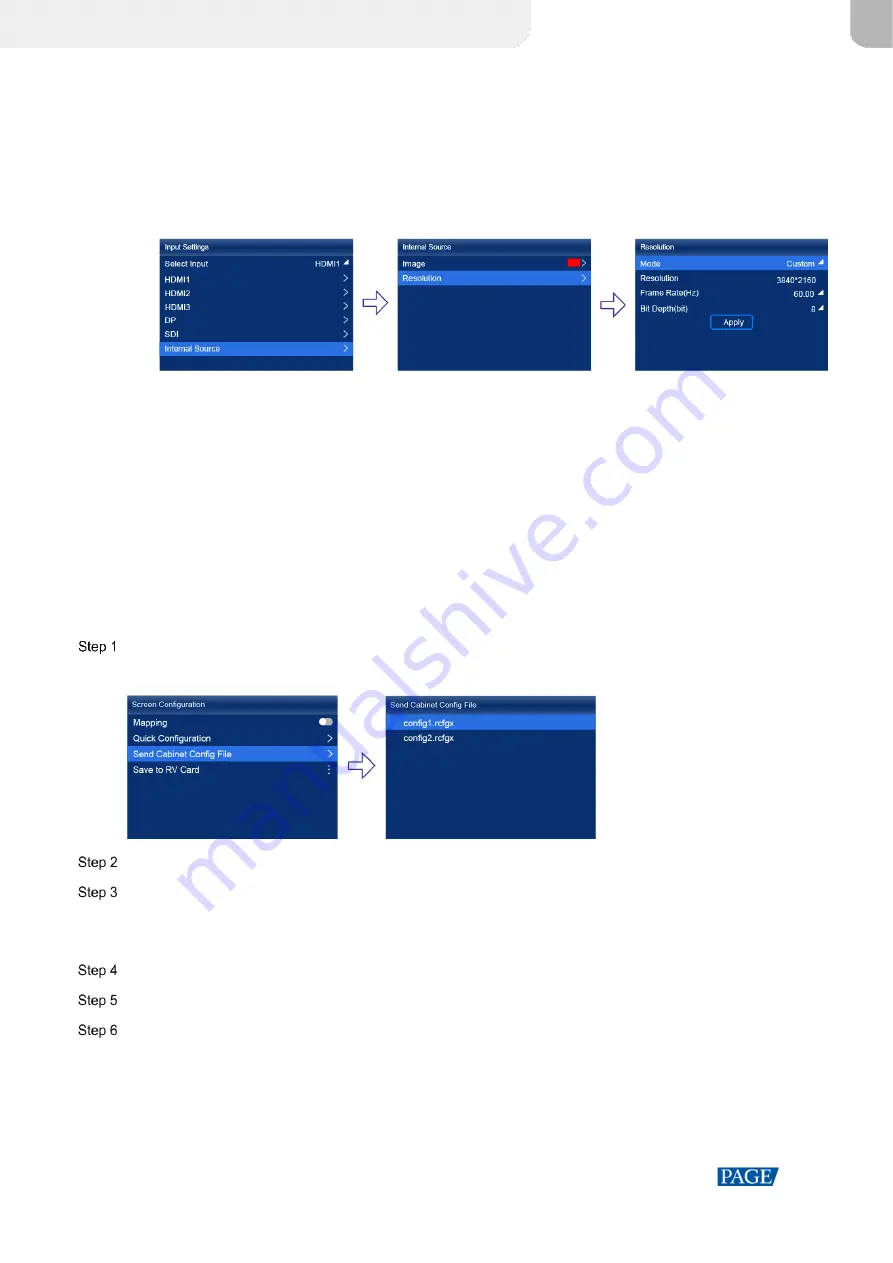
Internal sources
a.
Choose
Internal Source
>
Image
, and then select a static picture or a motion picture.
b.
When the relevant parameters of the image are displayed, set the parameters according to your actual
needs; otherwise, please skip this step.
c.
Press the
BACK
button to go back to the upper-level menu and select
Resolution
.
d.
Set
Mode
to
Custom
or
Standard
, and then set the resolution and frame rate.
e.
After the settings are done, click
Apply
.
5.1.2
Load Cabinet Config File
When the cabinet cannot display images normally, send the cabinet configuration file (.rcfgx) to the cabinet and save
it to display the image normally. Before the operation, please import cabinet configuration file with VMP or store the
cabinet configuration file in the root directory of the USB drive and insert the USB drive into the USB connector on the
device front panel.
On the main menu screen, choose
Screen Configuration
>
Send Cabinet Config File
.
Figure 5-2 Send cabinet config file
Select the target configuration file.
Select
Yes
in the displayed dialog box.
After the configuration file is successfully sent, a message appears on the menu screen and then then you will
automatically return to configuration file screen.
Press the
BACK
button to go back to the upper-level menu.
Select
Save to RV Card
.
Select
Yes
in the displayed dialog box.
After the configuration file is successfully saved, a message appears on the menu screen.
5.1.3
Configure the Screen Quickly
Set the screen configuration parameters to quickly complete the cabinet connection, so that the LED screen can
display the input source image normally.
XI'AN
NOVASTAR
TECH
CO.,
LITD.


