


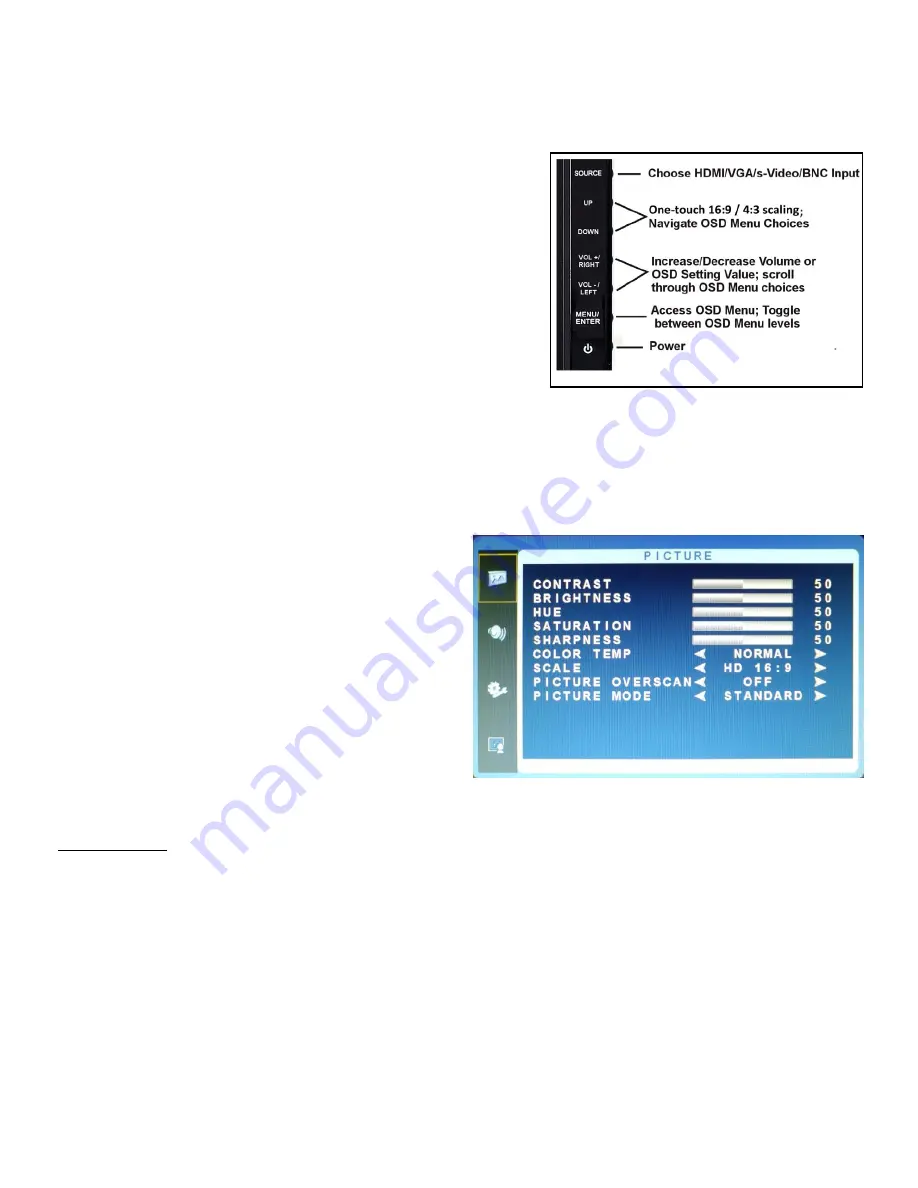
CONTROL KEYS/BUTTONS
Buttons are located on the right side of the bezel.
To change the input selection, press SOURCE to display the pop-up
menu, use up/down to highlight the desired source, then press
ENTER to complete the selection.
To verify the current input selection, press SOURCE to display the
pop-up, then press SOURCE again to dismiss the pop-up.
For One Touch Instant Scaling between 16:9 and 4:3 aspect ratio,
press Up or Down buttons when no menus are displayed.
To close any OSD window, press SOURCE twice.
1. Image Parameters
The PICTURE menu is for adjusting the image appearance. The Picture menu is for BNC. PICTURE menu op-
tions differ for VGA. Depending on HDMI signal format, either PICTURE menu form may be displayed.
A. PICTURE Menu (BNC, & some HDMI)
Press the MENU button to bring the menu on screen, and
then the up/down
buttons to move up along the main menu
selections to choose the PICTURE menu. Press the MENU
button to move between the left side main menu selector into
the window of menu choices and parameters.
Use the up & down buttons to move the yellow highlighted
sub-menu selection within the sub-menu. Pressing the right +
& left - buttons will adjust the value of the highlighted item.
Press the MENU button to exit the sub-menu and return to
the main menu selector.
To exit the menu system, press the SOURCE button twice. Settings will remain as they appear on screen.
Adjustments
Contrast:
Adjusts the range of difference between light and dark areas of the picture.
Brightness:
Adjusts the overall picture intensity.
Hue:
Increase or decrease the red/green/blue tint of the image.
Saturation:
Increase or decrease the intensity of (mix of white with) colors in the image.
Sharpness:
Change the balance between image detail (Resolution) and degree of transition between areas of differing
brightness (Acutance).
Color Temp:
Adjust color reproduction: choose between
normal, warm
(more red) &
cool
(more blue) to achieve the
best visual result.
Scale:
Choose between SD 4:3 and HD 16:9 aspect ratio. If analog images appear „stretched‟ use 4:3 scaling.
Picture Overscan:
Choose between legacy CRT-type cropping of picture edges (
On
) or display of entire image without
cropping (
Off
). Note: HDMI recognizes multiple signal types; for some types of HDMI signals Overscan is disabled.
Picture Mode:
Choose from Standard/Movie/Vivid/User for most pleasing image based on ambient light. User mode
Controls & Menu Operation
Summary of Contents for NTH-LED18
Page 11: ......


