background image

Additional phone features

133

Note: 

If you do not use the Resume Normal Mode command after 

testing, the IP Phone automatically returns to Normal Mode in 10 
minutes.

Troubleshooting MG 1000B

The MG 1000B can display error messages on-screen. Table 10 lists 
error messages and describes actions to correct the causes.
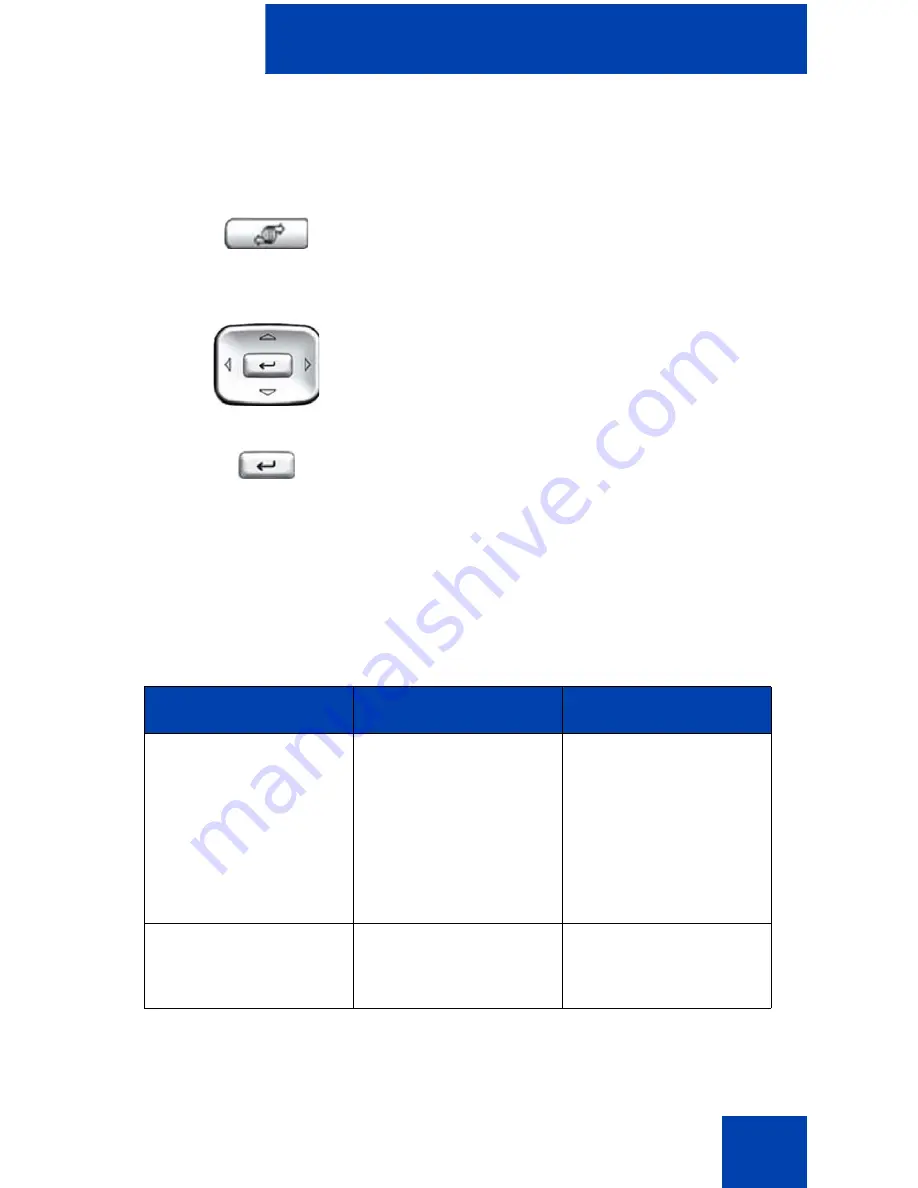
 

1.

Press the 

Services

 key.

2.

Press the 

Up/Down 

navigation key to 

scroll and highlight 

Resume Normal 

Mode

.

3.

Press the 

Enter

 key (the IP Phone 

registers back to the main office). 

Table 10: Troubleshooting MG 1000B (Part 1 of 2)

Display Message

Probable Cause

Actions

Local Mode

Test Local Mode.

Network problem.

Press the 

Services


key, and then select 
Resume Normal 
Mode.

Contact system 
administrator if 
problem persists.

Local Mode

Invalid ID (1)

Gatekeeper unable to 
find end point from 
Branch User ID.

Notify system 
administrator.

(Services)

Summary of Contents for NN43112-103

Page 1: ...Nortel Communication Server 1000 IP Phone 1120E User Guide Title page ...

Page 2: ......

Page 3: ...g text using the soft keys 25 Entering text using the USB keyboard 26 Connecting the components 27 Before you begin 28 Connecting the components of the phone 28 Configuring Telephone Options 34 Using the Telephone Options menu 35 Adjusting the volume 36 Adjusting the display screen contrast 37 Selecting a language 38 Selecting date and time format 39 Accessing display diagnostics 40 Choosing local...

Page 4: ...ing 2 Network Diagnostic Tools 59 Using 3 Ethernet Statistics 59 Using 4 IP Network Statistics 59 Using 5 USB Devices 60 Using the 3 Network Configuration menu 60 Using the 4 Lock Menu 60 Making a call 61 Using Off hook dialing 61 Using On hook dialing 62 Using handsfree dialing 63 Using the Directory applications 65 Making a call using Corporate Directory 65 Making a call using the Personal Direc...

Page 5: ...all 80 Using Attendant Recall 81 Using Call Park 82 Recording a Calling Party Number 84 Displaying incoming call information 84 Tracing a malicious call 85 Incoming calls 86 Using Automatic Answerback 86 Using Call Pickup 86 Using Call Waiting 88 While away from your desk 90 Using Call Forward 90 Using Internal Call Forward 91 Using Remote Call Forward 92 Securing your IP Phone 94 Talking with mor...

Page 6: ...a call or charging a forced call 105 Using Enhanced Override 108 Using Forced Camp on 109 Overriding a busy signal 110 Using Privacy Release 111 Using Radio Page 112 Using Voice Call 114 Additional phone features 115 Using the Personal Directory 115 Using the Callers List 118 Using the Redial List 120 Using Virtual Office 122 Logging in to Virtual Office 123 Using Virtual Office on your Remote IP ...

Page 7: ...35 Configuring Automatic Wake Up 135 Activating Message Registration 137 Using Maid Identification 139 Displaying Room Status 140 Accessing External Server Applications 142 Flexible Feature Codes FFC 143 Terms you should know 145 Regulatory and safety information 151 Other 153 DenAn regulatory notice for Japan 154 Index 155 ...

Page 8: ...Contents 8 ...

Page 9: ... May 2007 Standard 01 01 This document is up issued to support CS 1000 Release 5 0 This document reflects the new document number June 2006 Standard 2 00 This document is up issued to support Nortel Communication Server 1000 Release 4 5 software Added support for new security features January 2006 Standard 1 00 This document is issued to support Nortel Communication Server 1000 Release 4 5 softwar...

Page 10: ...Revision history 10 ...

Page 11: ...tly above the keys Figure 1 shows the key labels Figure 1 Self labeled feature keys and context sensitive soft keys Basic features Your IP Phone 1120E supports the following features four self labeled line programmable feature keys with labels and indicators four context sensitive soft keys For information about context sensitive soft keys see New in This Release Communication Server Release 5 0 N...

Page 12: ... Inbox Shift Outbox Services Copy six call processing fixed keys Mute Handsfree Goodbye Expand Headset Hold gigabit Ethernet ports built in gigabit Ethernet switch for shared PC access headset jack with an On Off key USB port to support a keyboard or mouse Note Powered downstream 1 1 compliant USB hubs are supported including USB 2 0 hubs if they offer USB 1 1 backwards compliancy automatic networ...

Page 13: ...on Module for IP Phone 1100 Series User Guide NN43130 101 Figure 2 shows the IP Phone 1120E Figure 2 IP Phone 1120E Telephone controls This section describes the controls on the IP Phone 1120E In some geographic regions the IP Phone 1120E is offered with key caps that have English text labels In this document text in parentheses indicates the labels that appear on the key caps for example Services...

Page 14: ... feature keys with labels on the LCD These keys also function as line DN keys A steady LCD light beside a line DN key indicates that the line is active A flashing LCD light indicates the line is on hold or the feature is being programmed A steady LCD light beside a feature key indicates that the feature is active A flashing LCD light indicates that the feature is being programmed Use the Volume co...

Page 15: ... Use the Navigation keys to scroll through menus and lists appearing on the LCD display screen The outer part of this key cluster rocks for up down left and right movements Use Up and Down to scroll up and down in lists and the Left and Right keys to position the cursor In some dialog boxes that appear on your phone you can also use the Left and Right keys to select editable fields press the Right...

Page 16: ...handsfree to the headset The Headset LED indicator located on the Handsfree key lights to indicate that the headset is in use Use the Goodbye key to terminate an active call When a message is waiting the red Visual Alerter Message Waiting indicator flashes Also when the ringer sounds this indicator flashes When your IP Phone 1120E firmware is being updated the blue Feature Status Lamp flashes To f...

Page 17: ...ctive menu or dialog Pressing the Quit Stop key does not affect the status of active calls The Shift Outbox key is a fixed key that is reserved for future feature development Press the Message Inbox key to access your voice mailbox Note This function is not available on all phones consult your administrator Press the Directory key to access directory services Copy Quit Shift Outbox Msg Inbox Direc...

Page 18: ... Log Options Ring type Call Timer On hook default path Change Feature Key Label Name Display Format Live Dialpad Password Admin Station Control Password The Password Admin menu is not available on all IP Phone 1120E sets Display Network Diagnostics Utilities Only your system administrator or service provider can use Display Network Diagnostics Utilities to perform Internet diagnostics Virtual Offi...

Page 19: ...mation For example during an incoming call only the Directory Number DN appears if the caller name is greater than 10 characters Press the flashing arrow to display the caller name continued Test Local Mode and Resume Local Mode if Media Gateway 1000B is configured Press the Services key to exit from any menu or menu item Press the Services key twice to access the Local Tools menu and use the navi...

Page 20: ...igned to your IP Phone and supported by system software Contact your system administrator to configure these features and codes on your IP Phone Security features The following security features are available on your IP Phone 1120E Using Encrypted Calling Managing your Station Control Password SCPW Using Encrypted Calling Your IP Phone 1120E supports secure communication using SRTP media encryptio...

Page 21: ...Phone password protected IP Phone features for example Personal Directory Redial List and Callers List Your system administrator defines your initial SCPW Contact your system administrator for detailed information To change your password SCPW Services 1 Press the Services key 2 Press the Up Down navigation keys to scroll and highlight Password Admin 3 Press the Enter key 4 Use the dialpad to enter...

Page 22: ...ew password 8 Press the Enter key to accept the new password If you are locked out of your IP Phone 1120E or if you forget your SCPW contact your system administrator 1 Press the Directory key 2 Press the Up Down navigation keys to scroll and highlight Change Protection Mode 3 Use the dialpad to enter your password if Password Protection is enabled 4 Press the Enter soft key Enter ...

Page 23: ... navigation keys to highlight one of the following Enable Password Protection Disable Password Protection 6 Choose one of the following soft keys Yes to accept the selection No to return to the Directory menu 7 Press the Done soft key or Yes No Done ...

Page 24: ...u can use for text entry Entering text using the dialpad You can use the dialpad to enter text when you use features such as Personal Directory Redial List and Callers List For example if you want to use the letter A press the number 2 key once If you want the letter C press the number 2 key three times Table 2 Application text entry For Use Call Server related applications for example changing fe...

Page 25: ...for the operation you want to perform 4 If the character you want is not visible press the More soft key to access the next layer of soft keys 5 To add non alphanumeric symbols press the Symbol soft key and perform the following a Press the Up navigation key to access the symbols b Press the Left Right navigation keys to move to a specific symbol c Press the Choose soft key to select a symbol 6 Pr...

Page 26: ...s f1 f2 f3 f4 f5 f6 f7 and f8 to control the phone Table 4 shows the function keys and their associated action during phone calls Case Switch the next character to either uppercase or lowercase Delete Backspace one character Done Select Enter Meaning depends on application Table 4 USB keyboard function keys during phone calls Function key Action f1 Go to Handsfree mode f2 Go to Headset mode f3 Pla...

Page 27: ...20E Figure 4 IP Phone 1120E connections WARNING Ensure that the protective rubber cap on the Accessory Expansion Module port is in place when the port is not in use Connecting anything other than the proper Expansion Module for IP Phone 1100 Series connector to this port can cause damage to the phone ...

Page 28: ...our system administrator to ensure that you plug your phone into a 10 100 1000BaseT Ethernet jack CAUTION Your IP Phone 1120E is designed for use in an indoor environment only WARNING Your IP Phone 1120E is shipped with the base locked in position To avoid damaging your phone press the wall mount lever located just under the Handsfree key as indicated in Figure 5 on page 29 to release the base and...

Page 29: ...Phone 1120E from the stand Use the following steps to connect the components of your phone 1 Remove the stand cover Pull upward on the center catch as indicated in Figure 6 on page 30 and remove the stand cover The cable routing tracks are now accessible ...

Page 30: ...ble and then thread the adapter cord through the channels in the stand Note 1 The IP Phone 1120E supports both AC power and Power over LAN options including IEEE 802 3af Power Classification 3 To use Power over Ethernet where power is delivered over the CAT 5e cable the LAN must support Power over Ethernet and an AC WARNING Use your IP Phone 1120E with the approved Nortel AC Adapter model N0089601...

Page 31: ...the back of the phone and thread the headset cord along with the handset cord through the channels in the stand so that the headset cord exits the channel marked with the symbol 5 Install the Ethernet cable Connect one end of the supplied Ethernet cable to the back of your phone using the RJ 45 connector marked with the symbol and thread the network cable through the channel marked with the symbol...

Page 32: ...5 on page 29 Using the stand cover the part you removed in step 1 mark the wall mount holes by pressing the bottom of the stand cover firmly against the wall in the location where you wish to install the phone Four small pins on the bottom of the stand cover make marks on the wall Use the marks as a guideline for installing the wall mount screws not provided Install the screws so that they protrud...

Page 33: ...sure that all cables are neatly routed and press the stand cover into place until you hear a click 10 Put the phone in the wall mount position optional If you wall mounted your phone put it in the wall mount position by holding the Tilt Lever and pressing the phone towards the base until the phone is parallel with the base Release the Tilt Lever and continue to push the phone towards the base unti...

Page 34: ...or Branch Office menus are listed when an IP Phone 1120E Class of Service is configured for Virtual Office and Branch Office For more information see page 122 Note The Password Admin Virtual Office Login and Test Local Mode menus are not available on all IP Phone 1120Es Consult your system administrator Figure 8 Telephone Options menu Note When an option has a sublist an ellipsis appears after the...

Page 35: ...ocal dialpad tone on page 40 Viewing telephone information on page 41 Diagnostics on page 42 Configuring call log options on page 43 Choosing a ring type on page 47 Enabling or disabling Call Timer on page 48 Enabling OnHook Default Path on page 49 Changing feature key labels on page 49 Configuring the name display format on page 51 Configuring Live Dialpad on page 52 To use the Telephone Options ...

Page 36: ...n for example Language 5 Press the Enter key The display provides information required to adjust your selection 6 Choose one of the following Press the Select soft key to save changes and return to the Telephone Options menu Press the Cancel soft key to keep existing configurations 1 Press the Up Down navigation keys to scroll and highlight one of the following Ringer Handset listen Handsfree list...

Page 37: ...ast configuration for the Expansion Module for IP Phone 1100 Series Note 2 You can also adjust the contrast using the Local Tools menu Nortel recommends that you use the control in the Telephone Options menu 2 Press the Enter key or 3 To increase or decrease the volume do one of the following Press the Down and Up soft keys Press the Up Down navigation keys 4 Choose one of the following Press the ...

Page 38: ...n your phone only To set the language used elsewhere on your phone press Services twice select Preferences and select Language or 1 To increase or decrease the display contrast level choose one of the following Press the Lower and Higher soft keys Press the Up Down navigation keys 2 Choose one of the following Press the Select soft key to save the contrast level and return to the Telephone Options...

Page 39: ...eys to scroll and highlight the desired language for example German Deutsche Note Some languages may not be installed on your IP Phone Contact your system adminstrator for more information about available languages 2 Choose one of the following Press the Select soft key to save the language and return to the Telephone Options menu Press the Cancel soft key to keep existing configurations 1 Press t...

Page 40: ...Tone Multi Frequency DTMF sounds a single tone or no sound when you press a key on the dialpad To choose a local dialpad tone press the Services key select Telephone Options and select Local DialPad Tone 2 Choose one of the following Press the Select soft key to save the format and return to the Telephone Options menu Press the Cancel soft key to keep existing configurations 1 Press the Up Down na...

Page 41: ...he Services key select Telephone Options and select Set Info 1 Press the Up Down navigation keys to highlight one of the following dialpad tones None to disable all tones Short Click to enable a single tone for all keys DTMF to turn on a separate DTMF tone for each key 2 Choose one of the following Press the Select soft key to save the tone selection and return to the Telephone Options menu Press ...

Page 42: ... QOS Stats To view diagnostic information press the Services key select Telephone Options and select Diagnostics To view IP Phone information 1 Press the Up Down navigation keys to scroll through the list to view the IP Phone information 2 Press the Cancel soft key to return to the Telephone Options menu 1 Press the Up Down navigation keys to scroll through the list of diagnostic information 2 Pre...

Page 43: ...o log all incoming calls or only unanswered calls The default configuration is Log all calls To log unanswered calls only press the Services key select Telephone Options and select Call Log Option To log only unanswered calls 1 Press the Up Down navigation keys to scroll and highlight the Log Mode option 2 Press the Enter key 3 Press the Up Down navigation keys to scroll and highlight Log unanswer...

Page 44: ...configure New Call Indication 1 Press the Up Down navigation keys to scroll and highlight the Log Mode option 2 Press the Enter key 3 Press the Up Down navigation keys to scroll and highlight New Call Indication 4 Press the Enter key 5 Press the Up Down navigation keys to scroll and highlight one of the following New call indication off New call indication on 6 Choose one of the following Press th...

Page 45: ...des When an incoming call arrives with an area code that matches one of the three stored area codes the incoming call number is reordered to display the phone number followed by the area code as opposed to the area code followed by the phone number 1 Press the Up Down navigation keys to scroll and highlight Preferred Name Match 2 Press the Enter key 3 Press the Up Down navigation keys to scroll an...

Page 46: ...hree 1 Press the Up Down navigation keys to scroll and highlight Area Code Setup 2 Press the Enter key 3 Press the Up Down navigation keys to scroll and highlight one of the following Area Code 1 Area Code 2 Area Code 3 4 Press the Enter key 5 Use the dialpad to enter the number at the prompt 6 Choose one of the following Press the Select soft key to save the configuration Press the Cancel soft ke...

Page 47: ...Press the Up Down navigation keys to scroll and highlight Area Code Setup 2 Press the Enter key 3 Press the Up Down navigation keys to scroll and highlight one of the following Area Code 1 Area Code 2 Area Code 3 4 Press the Enter key 5 Use the dialpad to edit the number 6 Choose one of the following Press the Select soft key to save the configuration Press the Cancel soft key to keep existing con...

Page 48: ...d highlight one of the ring types 2 Press the Play soft key to sample the ring tone 3 Choose one of the following Press the Select soft key to save the ring type and return to the Telephone Options menu Press the Stop soft key and use the Up Down navigation keys to select a different ring type Press the Cancel soft key to keep existing configurations 1 Choose one of the following To turn on the ca...

Page 49: ...key or restores the default labels to the keys To rename feature key labels press the Services key select Telephone Options and select Change feature key labels 2 Choose one of the following Press the Select soft key to save the configuration and return to the Telephone Options menu Press the Cancel soft key to keep existing configurations 1 Press the Up Down navigation keys to highlight one of th...

Page 50: ...e Enter key 4 Press the feature key that you are changing Note If you enter a prime DN key an error message appears 5 Enter the new information for the feature key label To enter special characters press the Up navigation key For information about entering text refer to Entering text using the dialpad on page 24 6 Choose one of the following Press the Select soft key to save the changes and return...

Page 51: ...figure name display format 8 Use the Up Down navigation keys to scroll and highlight one of the following a Restore all key labels Press the Yes soft key to change all feature keys to default values b Restore one key label Press the Select soft key Press the feature soft key Press the Yes soft key to change the selected feature key label to the default value Note When labels are changed to default...

Page 52: ...ices key select Telephone Options and select Live Dialpad To configure Live Dialpad 2 Press the Enter key 3 Press the Up Down navigation keys to scroll and highlight one of the following first name last name last name first name 4 Choose one of the following Press the Select soft key to save the configuration Press the Cancel soft key to keep existing configurations 1 Press the Up Down navigation ...

Page 53: ...he Up Down navigation keys to scroll and highlight one of the following On Off default 4 Choose one of the following Press the Select soft key to save the configuration Press the Cancel soft key to keep existing configurations or Select Cancel ...

Page 54: ...ubmenus Using the 1 Preferences submenu on page 56 Using the 2 Local Diagnostics submenu on page 59 Using the 3 Network Configuration menu on page 60 Using the 4 Lock Menu on page 60 If a menu entry has a number in front of it you can select that entry by pressing the associated key on the dialpad For example when you are in the Local Tools menu you can access 2 Local Diagnostics by pressing the 2...

Page 55: ... boxes Key Function Down arrow keys Scroll the window down Up arrow keys Scroll the window up Right arrow key Go to the next Edit item Left arrow key Go to the previous Edit item Enter key Toggle Edit mode on or off Toggle the check box status Table 7 Navigation key functions in Edit mode Part 1 of 2 Key Function Down arrow keys Open the combo box list Move the highlight down the list Up arrow key...

Page 56: ... the display Use the Sleep tool to control how long the display remains lit if the phone is inactive Note Contrast can also be adjusted in the Telephone Options menu Nortel recommends that you use the control in the Telephone Options menu whenever possible To configure the Contrast or Sleep tools press the Services key twice to open the Local tools menu press the 1 key on the dialpad to select 1 P...

Page 57: ... hours 2 Press the Enter key 3 Press the Up Down arrow keys to increase or decrease the selected value Note 1 Available values for Sleep are as follows 5m 5 minutes 15m 15 minutes 30m 30 minutes 1h 1 hour default 2h 2 hours Never screen does not go black Note 2 Extending the sleep time or never sleeping reduces the life span of the display screen 4 Press the Exit soft key to exit to the main displ...

Page 58: ... local menus press the Services key twice to open the Local tools menu press the 1 key on the dialpad to select 1 Preferences and press the 2 key on the dialpad to select 2 Language To select the language used in local menus 1 Press the Up Down navigation keys to scroll and highlight the desired language for example German Deutsche 2 Choose one of the following Press the Select soft key to save th...

Page 59: ...ering the Local Tools menu For example you can check the Ethernet Statistics then press Return and enter the Network Diagnostics Tools to ping an IP address Using 1 IP Set DHCP Information The Network Configuration tool is used to view reports about IP set and DHCP operation This tool is for administrator use only Using 2 Network Diagnostic Tools The Network Diagnostic Tools menu contains tools th...

Page 60: ... 2 Local Diagnostics and press the 5 key on the dialpad to select 5 USB Devices To check USB device information Using the 3 Network Configuration menu The Network Configuration tool displays information that was configured when the IP Phone was installed This tool is for system administrator use only Using the 4 Lock Menu Your system administrator can use the lock menu tool to protect the Local To...

Page 61: ...Using On hook dialing on page 62 Using handsfree dialing on page 63 Using the Directory applications on page 65 Using Predial on page 69 Using AutoDial on page 70 Using Ring Again on page 72 Using Last Number Redial on page 73 Using Speed Call on page 74 Using System Speed Call on page 75 Using HotLine on page 75 Using intercom calling on page 76 Using Off hook dialing 1 Lift the handset 2 Dial th...

Page 62: ...o the cradle Press the Goodbye key 1 Leave the handset in the cradle 2 Press the line DN key 3 When the dial tone sounds dial the number 4 When the called party answers lift the handset 5 To terminate the call choose one of the following Replace the handset into the cradle Press the Goodbye key Goodbye 2498 or Goodbye ...

Page 63: ...e on an active call you can switch between Handset and Handsfree mode To use handsfree dialing To discontinue a handsfree call To mute a handsfree call 1 Press the Handsfree key 2 If a headset is connected press the Headset key 3 Dial the number Press the Goodbye key 1 Press the Mute key The LED indicator flashes Handsfree Headset Goodbye Mute ...

Page 64: ...switch from handsfree to headset 2 Press the Mute key again to return to a two way handsfree conversation Lift the handset 1 Press the Handsfree key 2 Replace the handset 1 Connect the headset to the headset jack or the handset jack 2 Press the Headset key 1 Press the Headset key Mute Handsfree Headset Headset ...

Page 65: ...all phones Contact your system administrator to find out if this feature is available for your use The Corporate Directory feature provides an alphabetical list of entries using last names You can search by name view additional information on each entry and dial Corporate Directory numbers To use the Corporate Directory press the Directory key and select Corporate Directory To search for a specifi...

Page 66: ...refer to Using the Personal Directory on page 115 3 Choose one of the following Press the Dial soft key to dial the resulting number Press the Cancel soft key to exit without dialing Note If there is no match to the search query start a new search or change the information in the initial search 1 Press the Up Down navigation keys to scroll and highlight a name in the Corporate Directory 2 Choose o...

Page 67: ...e the Callers List refer to Using the Callers List on page 118 To make a call using the Callers List 1 Press the Up Down navigation keys to scroll and highlight a name in the Personal Directory 2 Choose one of the following Press the Dial soft key to dial the resulting number Press the Cancel soft key to exit without dialing 1 Press the Up Down navigation keys to scroll and highlight a name in the...

Page 68: ...ing the date and time of a call In both the Redial List and Caller List you can check the date and time of a call To view date and time of a call 1 Press the Up Down navigation keys to scroll and highlight a name in the Redial List 2 Choose one of the following Press the Dial soft key to dial the resulting number Press the Cancel soft key to exit without dialing 1 Press the Up Down navigation keys...

Page 69: ...o the selected entry In the Caller List press the Down navigation key twice to display the date and time of the last call from the selected entry Note In the Caller List the first press of the Down navigation key displays the number of times a caller has called 1 Without selecting the line key enter the number to be dialed 2 Press a line key to dial the number 3 Lift the handset when the called pa...

Page 70: ... the Clear soft key Reenter the numbers to be dialed To change one number at a time press the Delete soft key to backspace Re enter the number 3 Press a line key to dial the number 1 Without lifting the handset press the appropriate AutoDial key Note The display screen displays the word Autodial next to the appropriate key 2 Using the dialpad dial the phone number including access code to be store...

Page 71: ...r is displayed 4 Assign a label to the key Note After you assign the label the number disappears and only the label appears on the screen next to the key 1 Press the Display key 2 Press an AutoDial key in the upper display area to display the number associated with that key 1 Lift the handset 2 Press an AutoDial key in the upper display area to dial the number associated with that key AutoDial Dis...

Page 72: ...ctivate Ring Again To call a Ring Again party when you receive notification 1 Dial a number and receive a busy tone or no answer 2 Choose one of the following Press the Ring Again soft key Enter the Ring Again Activate FFC 1 After receiving the notification ring lift the handset or if you are using the headset or in Handsfree mode go to step 2 2 Press the Ring Again soft key to automatically dial ...

Page 73: ...er To use Last Number Redial Choose one of the following Press the Ring Again soft key a second time Enter the Ring Again Deactivate FFC Choose one of the following or 1 To redial using the handset Lift the handset Press the line DN key 2 To redial without lifting the handset press the line DN key twice the last number dialed is automatically redialed or RngAgn 2498 ...

Page 74: ...eed Call 1 Press the Speed Call Controller soft key The triangular icon flashes indicating programming mode 2 At the prompt Enter a one two or three digit code 0 999 If required dial the access code Enter the phone number internal external or long distance number 3 Press the Speed Call Controller soft key again to save the code and number The flashing icon turns off 1 Lift the handset 2 Press the ...

Page 75: ...HotLine feature to automatically dial a specific number To use HotLine 3 Dial the Speed Call code to automatically dial the number 1 Lift the handset 2 Choose one of the following Press the System Speed Call soft key Press the System Speed Call Controller SScCtl key 3 Dial the Speed Call code to automatically dial the number Press the HotLine soft key to automatically dial the number or SScUsr SSc...

Page 76: ...er an intercom call while on a line other than your intercom group line 1 Lift the handset 2 Press the Intercom key 3 Dial the one or two digit code for the desired intercom group member or 1 Choose one of the following keys Press the Hold key to put the current call on hold Press the Goodbye key to end the call 2 Press the Intercom key and begin to speak Intrcm Hold Goodbye Intrcm ...

Page 77: ...and the Message Indicator lamp to flash To answer a call Choose one of the following four options or Lift the handset or Press the Handsfree button located on the left side of the handset or Press the line DN key beside the LCD indicator as it flashes Press the Headset key if a headset is connected to your IP Phone Handsfree Headset ...

Page 78: ...ng call information on page 84 Tracing a malicious call on page 85 Placing a call on hold Use the Hold feature when you are talking on one line and another call arrives on a second line Retain the original call by putting it on hold and then answer the second call To place a call on hold To retrieve a call on hold Press the Hold key The LCD indicator flashes beside the line on hold Note If Automat...

Page 79: ...party is put on hold and a dial tone sounds The LCD indicator light flashes steadily 2 Dial the DN to which you are transferring the call or use the Personal Directory Redial List or Callers List to select a number to dial 3 When that number rings or a person answers press the Transfer soft key to connect the calling party If the person called is not available press the line DN key next to the LCD...

Page 80: ...answered To use Timed Reminder Recall 1 Press the Transfer soft key The call is put on hold 2 Dial the number to which you are transferring the call or 3 Choose one of the following to start the recall timer Press the Transfer soft key Replace the handset before the extension answers Note If the transfer is complete the recall timer stops Trans Trans ...

Page 81: ...ndant while on a call 1 Lift the handset to reconnect to the original caller 2 Choose one of the following Press the Transfer soft key and repeat the transfer If the transfer is picked up while you are on the line press the Goodbye key to complete the transfer 1 Press the Attendant Recall key and stay on the line until the attendant answers 2 Press the Goodbye key The caller remains connected to t...

Page 82: ...can be configured to automatically park most calls To park a call on the System Park DN or your own DN To park a call on a DN other than the System Park DN or your own DN During an active call press the Park soft key twice Note By default the call is parked on your DN unless a System Park DN is enabled to automatically park calls on the system 1 Press the Park soft key 2 Dial the DN where you want...

Page 83: ...m the System Park DN or your own DN dial the DN where you want to park the call Otherwise proceed to step 4 4 Choose one of the following Press the Transfer soft key Press the Conference soft key 1 Lift the handset 2 Press the Park soft key 3 Dial the DN where you parked the call Note If a parked call is not retrieved within a specified period of time it rings back to your IP Phone or to the atten...

Page 84: ...ay a second incoming caller s number and name if available during an active call without interfering with the call in progress To view the information on an incoming call while on a call in progress 1 Press the Call Party soft key The caller is placed on hold 2 Dial a charge account number or the caller s number Note For information on using the Charge key see Charging a call or charging a forced ...

Page 85: ...n a call To use Call Trace without a Call Trace key 2 Press the flashing line DN key The call waiting information displays Note When used with other feature keys the Display key displays information associated with those feature keys Press the Call Trace key 1 Choose one of the following Press the Transfer soft key Press the Conference soft key 2 Dial the SPRE code followed by 83 or dial the Call ...

Page 86: ...IP Phone automatically answers in Handsfree mode after one ring however calls are not forwarded to the voice message service To activate Automatic Answerback To deactivate Automatic Answerback Using Call Pickup Use the Call Pickup feature to pick up calls from any IP Phone in your pickup group or another pickup group To answer a call in your own call pickup group Press the Automatic Answerback key...

Page 87: ...se one of the following Press the Pickup key Enter the Pickup Ringing Number FFC 1 Lift the handset 2 Press the Group Pickup key or enter the Pickup Group FFC 3 Dial the pickup group number of the ringing IP Phone 1 Lift the handset or 2 Choose one of the following Press the Pickup key Enter the Pickup Directory Number FFC Pickup GrpPkp Pickup ...

Page 88: ...is not in your call pickup group If the pickup DN or group number is invalid an overflow burst tone sounds and the screen displays Goodbye and try again press the Goodbye key 1 When the incoming call tone sounds press the Hold key to put the current call on hold Note If Automatic Hold is enabled it is not necessary to press the Hold key 2 Press the Call Waiting key 1 Choose one of the following Pr...

Page 89: ... do not have a Call Waiting key 2 Press the line DN key associated with the first call 1 Press the Goodbye key to end the current call 2 Press the line DN key beside the flashing status icon to answer the incoming call Goodbye ...

Page 90: ...ur IP Phone on page 94 Using Call Forward Use the Call Forward feature to direct incoming calls to ring on another line DN If the IP Phone is ringing the call cannot be forwarded To forward your calls or change the forward number 1 Choose one of the following Press the Forward soft key Lift the handset and enter the Call Forward All Calls Activate FFC 2 Dial the DN where you want to forward your c...

Page 91: ...till ring at your IP Phone Current incoming calls cannot be forwarded To forward internal calls Choose one of the following Press the Forward soft key Lift the handset and enter the Call Forward All Calls Deactivate FFC Press the Forward soft key twice or 1 Choose one of the following Press the Internal Call Forward key Lift the handset and enter the Internal Call Forward Activate FFC 2 Dial the D...

Page 92: ...one To activate Remote Call Forward 3 Press the Internal Call Forward key or Choose one of the following Press the Internal Call Forward key Lift the handset and enter the Internal Call Forward Deactivate FFC Press the Internal Call Forward key twice 1 Lift the handset 2 If you are calling from an IP Phone outside the system dial your direct system access number and wait for the dial tone IntForwa...

Page 93: ...e following Dial your DN To forward calls to the previous call forward phone number press the key Do not perform steps 6 and 7 6 Dial the number to which you are forwarding calls If calls are forwarded to an invalid number a fast busy signal sounds 7 Press the key 1 Lift the handset 2 If you are calling from an IP Phone outside the system dial the direct system access number and wait for the dial ...

Page 94: ...ing your Station Control Password SCPW To change your Station Control Password please refer to Security features on page 20 To lock your IP Phone 3 Dial the Remote Call Forward Deactivate FFC 4 Dial your Station Control Password 5 After you hear the dial tone dial your DN 6 Press the key 1 Lift the handset 2 Dial the Electronic Lock Activate FFC 3 Dial your Station Control Password ...

Page 95: ...press the Goodbye key If you are dialing the FFC remotely dial your DN 1 Lift the handset 2 Dial the Electronic Lock Deactivate FFC 3 Dial your Station Control Password or 4 Choose one of the following If you are dialing locally press the Goodbye key If you are dialing the FFC remotely dial your DN Goodbye Goodbye ...

Page 96: ...ng Group Call on page 99 Using the Call Join feature Use the Call Join feature to connect a call to a current active call This connection creates a conference between the two callers and yourself To connect a call on hold on a different line to your current call 1 Press the Conference soft key 2 Press the line key that has the number of the caller you want to connect to your current call 3 Press t...

Page 97: ...available 1 While on a call press the Conference soft key to place the party on hold You hear a dial tone 2 Dial the number of the person you want to add to the conference call You can talk privately to the person you are adding at this time Note If you press the Directory key you can also use the Corporate Directory Personal Directory Redial List and Callers List to find and dial the number of th...

Page 98: ... on a conference call press the Conferee Selectable Display key to turn on the LCD indicator Each key press changes the screen to show a different active conferee Note This action has no effect on the display of other IP Phones involved in the conference 2 Press the Goodbye key If configured the Conference Count Display returns an updated total count of conferees The LCD indicator turns off 1 Whil...

Page 99: ...s 2 Press the line DN key on which the conference call is established 3 Choose one of the following For a single conferee press the Goodbye key If configured the Conference Count Display returns an updated total count of conferees The LCD indicator turns off For multiple conferees repeat steps 1 and 2 until all conferees are disconnected Then press the Goodbye key 1 Lift the handset Goodbye ...

Page 100: ...ence call or another group call they are not connected to your group call After everyone in the group has answered only the person who made the group call can put the call on hold 1 Lift the handset Note the following about notification tones If you are on a call and receive three 10 second tones this is the notification of a group call on your current extension If you are on a call on another lin...

Page 101: ...up call Press the Goodbye key Note When the person who made the group call disconnects the call terminates for all members of the group However the members of the group call can disconnect from the call and not affect other members on the call Goodbye ...

Page 102: ... feature to make your IP Phone appear busy to all callers To activate Make Set Busy To deactivate Make Set Busy or Choose one of the following Press the Make Set Busy key Lift the handset and enter the Make Set Busy Activate FFC or Choose one of the following Press the Make Set Busy key a second time to deactivate the feature Lift the handset and enter the Make Set Busy Deactivate FFC MakeSetBsy M...

Page 103: ...rced Camp on on page 109 Overriding a busy signal on page 110 Using Privacy Release on page 111 Using Radio Page on page 112 Using Voice Call on page 114 Using AutoDial Transfer Use the AutoDial Transfer feature to transmit digits through your AutoDial key to the Central Office after a Trunk Switchhook Flash You must be on a Central Office Exchange CO trunk call from or to a CO that offers Centrex...

Page 104: ...make an announcement Use the Call Page Connect feature to make an announcement over a paging system Note A Page key on an attendant console overrides and disconnects the IP Phones The IP Phones must reaccess the page trunk To connect to Call Page 3 Press the Goodbye key to end the call Press the Buzz key The IP Phone linked to your IP Phone buzzes as long as you press the key 1 Lift the handset 2 ...

Page 105: ...e Switchhook Flash Charging a call or charging a forced call Use the Call Charge feature to charge a call to a specific account The Forced Charge feature charges long distance calls from an IP Phone restricted to local calls 4 Press the Goodbye key 1 While on a call press the Centrex Line Switchhook Flash key A special dial tone sounds 2 Dial the codes for your custom Centrex feature 3 Press the G...

Page 106: ...Press the Charge soft key Dial the Call Detail Recording FFC 3 Dial the charge account number 4 When the dial tone sounds dial the number 1 Choose one of the following Press the Transfer soft key Press the Conference soft key 2 Choose one of the following Press the Charge soft key Dial the Call Detail Recording FFC 3 Dial the charge account number Charge or Trans Conf or Conf ...

Page 107: ...ose one of the following Press the Charge soft key Dial the Call Detail Recording FFC 3 Dial the charge account number 4 After the dial tone dial the number to which you are transferring the call 5 Press the Transfer soft key when you hear the IP Phone ring Note You can talk privately to the person at the transfer number before you press the Transfer soft key 2493 Trans or Trans Trans ...

Page 108: ... on Use Enhanced Override to make a call or a consultation call such as placing a call on hold and calling another party 1 Press the Conference soft key The call is placed on hold 2 Choose one of the following Press the Charge soft key Dial the Call Detail Recording FFC 3 Dial the charge account number 4 Dial the number of the person you want to add to the conference 5 Press the Conference soft ke...

Page 109: ...ess the Override key Enter the Override FFC to initiate a Forced Camp on If either person on the call disconnects at this time you receive an overflow fast busy or engaged signal 2 Choose one of the following Press the Override key again Enter the Override FFC again The other two people on the call receive an override tone and a conference call is established between the three of you If anyone dis...

Page 110: ... Enter the Override FFC to initiate a Forced Camp on Note The person you called receives a tone and you receive a ring signal or a busy signal depending on the options chosen You are now camped on to the number you dialed 2 Return the handset to the cradle 3 When the person you called finishes the call your IP Phone automatically dials the number and both IP Phones ring When your IP Phone rings li...

Page 111: ...ne number 2 Choose one of the following Press the Override key Enter the Override FFC The people in the targeted call receive a tone for approximately 1 second After Override joins you to their call a short tone repeats every 16 seconds 3 To terminate the call press the Goodbye key Press the Privacy Release soft key during a call People can join the call by pressing the shared number DN key on the...

Page 112: ...Lift the handset 2 Dial the Radio Paging Access FFC The paging tone sounds two beeps followed by a dial tone 3 Dial the number of the party you want to page After dialing the ringback tone sounds Note The paged person can use any IP Phone to enter a Radio Paging Answer FFC plus their own DN number 4 If your call goes unanswered for a preset time period and a 15 second high pitched tone sounds foll...

Page 113: ...o function in Meet me mode you can answer the page call from any IP Phone 1 Press the Radio Page soft key A special dial tone sounds 2 Dial the Radio Paging Access FFC The ringback tone sounds Note The paged person can use any IP Phone to enter a Radio Paging Answer FFC plus their own DN number 3 If your call goes unanswered for a preset time period and a 15 second high pitched tone sounds followe...

Page 114: ...espond to a voice call 3 Dial your own DN to connect to the paging caller If the caller has disconnected a steady high pitched number unavailable tone sounds 1 Lift the handset 2 Press the Voice Call key and make the announcement 3 Press the Goodbye key Your IP Phone rings once and the caller s voice transmits through your speaker Lift the handset VceCal Goodbye ...

Page 115: ...ctory Use the Personal Directory feature to create and store up to 100 directory entries A Personal Directory entry can contain last name up to 24 characters first name up to 24 characters phone numbers up to 31 characters To use the Personal Directory press the Directory key and select Personal Directory Note If password control has been enabled enter your SCPW at the prompt To add an entry 1 Pre...

Page 116: ... enter the phone number 5 Choose one of the following Press the Done soft key to save the new entry Press the Cancel soft key to discard the new entry and return to the Add screen 1 Press the Up Down navigation keys to scroll and highlight the desired entry 2 Press the Edit soft key and perform your edits Next or Done Cancel Edit ...

Page 117: ...without saving your changes 1 Press the Up Down navigation keys to scroll and highlight the entry 2 Press the Delete soft key 3 Choose one of the following Press the Confirm soft key to delete the entry Press the Cancel soft key to return to the Personal Directory without deleting the entry 1 Press the Up Down navigation keys to scroll and highlight the desired entry or Done Cancel Delete or Confi...

Page 118: ...alled Entries in the Callers List are sorted by the time the call arrived Note Calling Party Name Display CPND is affected depending on the Preferred Name Match option If Preferred Name Match is on the CPND appears according to your configurations If the Preferred Name Match option is off the CPND appears according to the system configurations To access the Callers List press the Directory key and...

Page 119: ...on keys to scroll and highlight the desired entry 2 Press the Dial soft key 1 Press the Up Down navigation keys to scroll and highlight the desired entry 2 Press the Delete soft key 3 Choose one of the following Press the Confirm soft key Press the Cancel soft key 1 Press the Delete soft key Dial Delete or Confirm Cancel Delete ...

Page 120: ... List are sorted by the time the call arrived Note Calling Party Name Display CPND is affected depending on the Preferred Name Match option If Preferred Name Match is on the CPND appears according to your configurations If the Preferred Name Match option is off the CPND appears according to the system configurations To access Redial List press the Directory key and select Redial List Note If passw...

Page 121: ... scroll and highlight the desired entry 2 Press the Delete soft key 3 Choose one of the following soft keys Yes to delete the entry No to return to the previous screen 1 Press the Delete soft key 2 Choose one of the following soft keys Yes to delete the entire Callers List No to return to the previous screen Dial Delete or Yes No Delete or Yes No ...

Page 122: ...d Station Control Password SCPW You must activate Virtual Office on your Office phone before you can connect to it from a Remote phone See Logging in to Virtual Office on page 123 Note Consult your system administrator to verify if the Virtual Office feature is available for your use You can use an IP Phone as a Remote phone to connect to your IP Phone 1120E even if it is a different IP Phone mode...

Page 123: ...phone 2050 is blocked in certain situations Consult your system administrator Logging in to Virtual Office To activate Virtual Office on your Office IP Phone from your Remote IP Phone IP Phone 2004 Yes IP SoftPhone 2050 Yes with restrictions IP Phone 2007 Yes 1 Press the Services key 2 Press the Up Down navigation keys to scroll and highlight Virtual Office Login 3 Press the Enter key 4 At the pro...

Page 124: ...a Remote phone to an IP Phone 1120E Office phone All the features appear as they do on your Office IP Phone 1120E 5 Press the Enter key 6 At the prompt enter the home Station Control Password SCPW Note 1 If the user ID is not found locally the message Locating Remote Server is displayed Note 2 After three failed login attempts wait 1 hour before attempting to log in again or contact your system ad...

Page 125: ...ne 1120E Figure 10 shows an IP Phone 1140E logged in as a Remote phone to an IP Phone 1120E Office phone Fewer display lines are available on the IP Phone 1120E so the display provides less information User 45645 42888 45645 AutoDial 47678 Trans Conf Forward More ...

Page 126: ...ged in as a Remote phone to an IP Phone 1120E Office phone In this case the information display is arranged in a different fashion but all the information is visible at one time Figure 11 Logged in to an IP Phone 1120E using an IP Softphone 2050 Nortel User 49521 42888 47678 09 16 2 32pm 42597 44759 41798 49521 Trans Conf Forward More ...

Page 127: ...d Out When activated for Virtual Office by a Remote IP Phone your Office IP Phone is logged out and no longer operational If this is the case when you return to your office you can disconnect the remote login and regain control of your Office phone If you do not disconnect the remote login your Virtual Office session expires after a fixed period of time determined by your system administrator Logg...

Page 128: ...ne of the following or To completely disconnect your Office IP Phone from the Remote IP Phone a Press the Home key b Enter your User ID and password this logs the Office IP Phone back on to your office network Press the Virtual soft key to log in to another IP Phone and your IP Phone becomes a Remote IP Phone 1 Press the Services key 2 Press the Up Down navigation keys to scroll and highlight Virt...

Page 129: ... Phone to become idle and try again ACD is logged in Log out ACD IP Phone before Virtual Office from another IP Phone Make Set Busy is inactive on ACD IP Phone Configure Make Set Busy active on ACD IP Phone Invalid ID 1 Incorrect User ID entered Enter correct User ID User ID is not in Gatekeeper database Notify system administrator Invalid ID 2 Incorrect User ID entered Enter correct User ID Inval...

Page 130: ...Phone has no Station Control Password Notify system administrator Permission Denied 4 Incorrect User ID entered Enter correct User ID Attempt to log in to a remote IP Phone 2004 or IP Softphone 2050 from an IP Phone 1120E some restrictions apply Go to an IP Phone 2004 or IP Softphone 2050 and try again or consult your local system administrator Permission Denied 5 Incorrect User ID entered Enter c...

Page 131: ...and receives IP Phone services from the Main Office At any time during Normal Mode you can check Local Mode functionality make and receive calls by enabling Local Mode and returning to Normal Mode After testing you can return to Normal Mode see Using Resume Normal Mode on page 132 or by waiting for 10 minutes Permission Denied 6 Incorrect User ID entered Enter correct User ID Incorrect Station Con...

Page 132: ... Mode the IP Phone displays the message LOCAL MODE Using Test Local Mode Use Test Local Mode to check Local Mode functionality make and receive IP Phone calls Test Local Mode is useful when provisioning has changed for an IP Phone on an MG 1000B Controller Using Resume Normal Mode Use the Resume Normal Mode command to return to Normal Mode after testing survival functionality 1 Press the Services ...

Page 133: ...ss the Services key 2 Press the Up Down navigation key to scroll and highlight Resume Normal Mode 3 Press the Enter key the IP Phone registers back to the main office Table 10 Troubleshooting MG 1000B Part 1 of 2 Display Message Probable Cause Actions Local Mode Test Local Mode Network problem Press the Services key and then select Resume Normal Mode Contact system administrator if problem persist...

Page 134: ...tional phone features 134 Local Mode Invalid ID 2 Branch User ID not found in any equipped TN Notify system administrator Table 10 Troubleshooting MG 1000B Part 2 of 2 Display Message Probable Cause Actions ...

Page 135: ...ke Up feature to receive a timed reminder call From your IP Phone you can program the system to automatically place a call to you at a predetermined time When you answer the call recorded music plays for up to 30 seconds followed by a prerecorded announcement or the attendant To enter the time for an Automatic Wake Up call 1 Lift the handset 2 Dial the Automatic Wake Up Request FFC 3 Dial the Auto...

Page 136: ...he handset 2 Dial the Automatic Wake Up Quit FFC 3 Press the Goodbye key 1 Lift the handset 2 Dial the Automatic Wake Up Verify FFC 3 Dial the Automatic Wake Up time in a 24 hour time format hhmm If your query matches the preset time a confirmation tone sounds Note In a 24 hour time format 7 30 a m is entered as 0730 9 45 p m is 2145 Goodbye Goodbye ...

Page 137: ...eters that log your hotel IP Phone calls To read meters To change a meter 4 Press the Goodbye key 1 Press the Message Registration key 2 Dial the room Directory Number DN 3 Press the Message Registration key 1 Press the Message Registration key 2 Dial the Directory Number DN 3 Dial the correct meter count Goodbye MRK MRK MRK ...

Page 138: ...ity features 138 To reset a meter to zero 4 Press the key 5 Press the Message Registration key 1 Press the Message Registration key 2 Dial the room DN 3 Press the key 4 Press the Message Registration key MRK MRK MRK ...

Page 139: ...ing status 1 Press the Room Status key 2 Dial the DN for the room 3 Dial one of the following cleaning status codes 1 Cleaning requested 2 Cleaning in progress 3 Room cleaned 4 Room passed inspection 5 Room failed inspection 6 Cleaning skipped The interrupted dial tone sounds 4 Press the key 5 Dial the Maid ID If you dial the wrong Maid ID press the key and redial the ID 6 Press the Room Status ke...

Page 140: ...tatus key 2 Dial the DN for the room The DN is displayed followed by a two digit code The first digit indicates the occupancy status 0 Room vacant 1 Room occupied The second digit indicates the cleaning status of the room 1 Cleaning requested 2 Cleaning in progress 3 Room cleaned 4 Room passed inspection 5 Room failed inspection 6 Cleaning skipped 3 Press the Room Status key 1 Press the Room Statu...

Page 141: ...digit indicates the cleaning status of the room 1 Cleaning requested 2 Cleaning in progress 3 Room cleaned 4 Room passed inspection 5 Room failed inspection 6 Cleaning skipped 3 Dial the status code for the room A three digit code appears The first digit indicates the occupancy status the second is the previous cleaning status and the third is the new status 4 Press the Room Status key RMK ...

Page 142: ...1120E To find out what features and services are available contact your system administrator Depending on what is available on your system your phone can provide information for example local news and weather stock market information or traffic reports For more information about the External Server Applications consult the Nortel IP Phone External Server Applications User Guide ...

Page 143: ...t Busy Deactivate Automatic Wake Up Verify Malicious Call Trace Call Detail Recording Charge Account Override Call Forward All Calls Activate Pickup Ringing Number Call Forward All Calls Deactivate Pickup Directory Number Call Park Pickup Group Electronic Lock Activate Radio Paging Access Electronic Lock Deactivate Radio Paging Answer Group Call Remote Call Forward Activate Internal Call Forward A...

Page 144: ...le Feature Codes FFC 144 RingAgain Deactivate Virtual Office Terminal Log Off Station Control Password Change Virtual Office Terminal Log On Table 11 Flexible Feature Codes Part 2 of 2 FFC Feature FFC Feature ...

Page 145: ...ur pairs of copper wire Category 6 Cat6 Cable and associated connecting hardware capable of transmitting at speeds up to 200 MHz Designed specifically to support 1000BaseT Gig Ethernet GigE it is also compatible with 10BaseT 100BaseT4 and 100BaseTX installations The cable normally has four pairs of copper wire Communication Server 1000 Your office communication system Context sensitive soft keys A...

Page 146: ... or off Fixed key The hard labeled keys on your telephone Flexible Feature Codes FFC Specialized codes entered using the dialpad that enable features for example Ring Again Goodbye key A fixed key used to end an active call Indicator An LCD or an LED that indicates the status of a feature by the flash wink steady on or off Information display Any display of call activity lists prompts and status o...

Page 147: ...f hook Any line selected to make a call or receive an incoming call The term off hook is applied when a the end user lifts up the handset b the end user presses a line key c the call is automatically answered at the telephone or d a line is automatically selected for an outgoing call Paging tone A special tone two beeps followed by dial tone that sounds when you use the Radio Paging feature Ringba...

Page 148: ...t others from making calls from your telephone and to prevent access to protected features for example Remote Call Forward Status Messages A message displayed to inform the user of important information A right arrow appears if more than one Status Message is present Examples of Status Messages include Message Waiting All Lines Forwarded to 6453 Do Not Disturb On Ring Again active and Ringer is OF...

Page 149: ...ser interface Screen displays that interact with the end user as a result of an action or event Visual Alerter Message Waiting indicator An LCD or an LED that flashes to indicate that a message is waiting or when the ringer is on ...

Page 150: ...Terms you should know 150 ...

Page 151: ...ing measures Reorient or relocate the receiving antenna Increase the separation between the equipment and receiver Connect the equipment into an outlet on a circuit different from that to which the receiver is connected Consult the dealer or an experienced radio TV technician for help Note The user should not make changes or modifications not expressly approved by Nortel Networks Any such changes ...

Page 152: ...Class B Emissions Interference Causing Equipment Standard Digital Apparatus Australia New Zealand AS NZS 3548 CISPR 22 Class B Emissions Information technology equipment Radio disturbance European Community EN 55022 Class B Emissions Information technology equipment Radio disturbance EN 55024 Information technology equipment Immunity characteristics Limits and methods of measurement EN 61000 3 2 L...

Page 153: ...s and other relevant provisions of Directive 1999 5 EC A copy of the Declaration may be obtained from www nortel com or Nortel Networks GmbH address Ingolstaedter Strasse 14 18 80807 Munich Germany Australia AS ACIF S004 Voice Frequency Performance Requirements for Customer Equipment European Community EN 60950 1 ITE equipment Safety Part 1 General requirements Australia New Zealand AS NZS 60950 1...

Page 154: ...Regulatory and safety information 154 DenAn regulatory notice for Japan ...

Page 155: ...ok Flash 105 Change feature key labels 49 Changing feature key labels 49 Charge a call or charge a forced call 105 Choosing 47 Choosing ring type 49 Conferee Selectable Display and Disconnect 98 Conference call 97 Configure Callers List log 43 Configure New Call indication 44 Configuring Area Code Setup 45 Configuring call log options 54 Configuring Name Display format 47 Connect the components 27...

Page 156: ...s FFCs 143 G Goodbye key 16 146 Group Call 99 H Handsfree Speaker key 15 Handsfree dialing 63 Headset key 16 Hold key 16 Hospitality features 135 Hot Line 75 I Indicator status 146 Information display 146 Information line 147 Intercom call 76 Internal Call Forward 91 Interrupted dial tone 147 L Language display 38 Last Number Redial 73 Line DN key 14 Local Area Network LAN 11 Local Diagnostics 59 ...

Page 157: ...ing type 49 Ringback ring tone 147 Room Status 140 S Secure your telephone 94 Security features 20 Selecting a language 38 Selecting date time format 39 Self labeled line programmable feature keys 14 Services key 18 147 Shared Directory Numbers 148 Shift Outbox key 17 Special dial tone 148 Special Prefix code SPRE 148 Speed Call 74 SRTP media encryption 20 Station Control Password SCPW 21 148 chan...

Page 158: ...User Interface 149 V Viewing telephone information 54 Virtual Office 122 Virtual Office login 123 Virtual Office logout 128 Virtual Office on your Remote tele phone 124 Voice Call 114 Volume adjustment 36 Volume control 14 Volume control bar 14 ...

Page 159: ......

Page 160: ...esented without express or implied warranty Users must take full responsibility for their applications of any products specified in this document The information in this document is proprietary to Nortel Networks Nortel Nortel Logo the Globemark SL 1 Meridian 1 and Succession are trademarks of Nortel Networks Publication Number NN43112 103 Document Release Standard 01 02 Date March 2009 Produced i...

Reviews: