N(1)
2
3
Indoor Unit Installation
2.
/HDGWKHSRZHUZLUHWKURXJKWKH
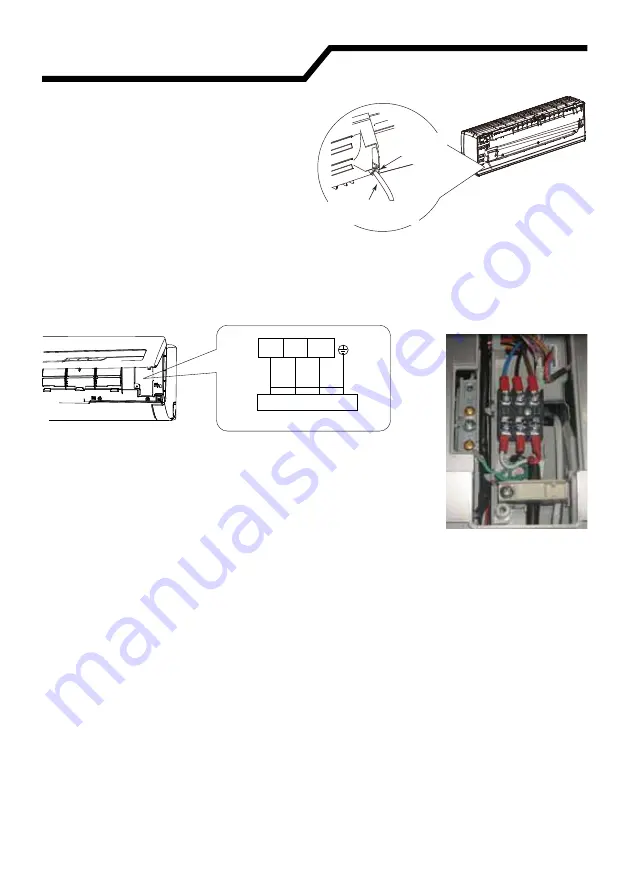
cable-cross hole at the back of indoor
unit and then pull it out from the front
side.
3. Remove the wire clip; connect the
power connection wire to the wir-
LQJWHUPLQDODFFRUGLQJWRWKHFRORU
7LJKWHQWKHVFUHZDQGVHFXUHWKH
power cable with the wire clip.
$IWHU¿QLVKLQJWKHZLULQJFODPSWKHJURXQGLQJZLUH\HOORZJUHHQZLUHLQWRWKH
JURRYHDVVKRZQLQWKHSKRWREHORZWRDYRLGSLQFKLQJWKHZLUHZKHQFORVLQJ
the electrical box cover.
Cable-cross
Hole
Power
Connection Cord
4.
5HSODFHZLULQJFRYHUDQGWLJKWHQWKHVFUHZ
5. Close the panel.
Note:
All wires of indoor unit and outdoor unit should be connected by a professional.
2QO\VLQJOHXQEURNHQHOHFWULFDOZLUHVVKRXOGEHXVHG6SOLFHGZLUHVDUHQRWDO
-
lowed.
)RUDLUFRQGLWLRQHUPRGHOVZLWKHOHFWULFDOSOXJWKHRXWOHWPXVWEHUHDFKDEOHDIWHU
¿QLVKLQJLQVWDOODWLRQ
)RUDLUFRQGLWLRQHUPRGHOVZLWKRXWSOXJDFLUFXLWEUHDNHUPXVWEHLQVWDOOHGLQ
WKHOLQH7KHFLUFXLWEUHDNHUVKRXOGEHDOOSROHSDUWLQJDQGWKHFRQWDFWSDUWLQJ
GLVWDQFHVKRXOGEHPRUHWKDQPPLQ
Outdoor Unit Connection
White
(blue)
Black Red
(brown)
Green
(yellow-
JUHHQ
3DJH
Summary of Contents for GHH092.6KSK4DH
Page 50: ...3DJH ...
Page 51: ...3DJH ...


