background image

Our Web site at www.iFIT.com allows you to access
basic programs, audio programs, and video programs
directly from the internet. Additional options are soon
to be available. See www.iFIT.com for details.

To use programs from our Web site, the treadmill must
be connected to your home computer. See HOW TO
CONNECT YOUR COMPUTER on page 20. In 
addition, you must have an internet connection and 
an internet service provider. A list of specific system
requirements will be found on our Web site.

Follow the steps below to use a program from our 
Web site. 

Insert the key fully into the console.

See HOW TO TURN ON THE POWER on page
11. 

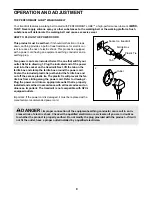
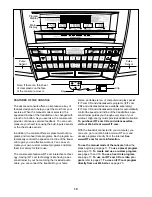
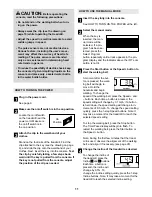
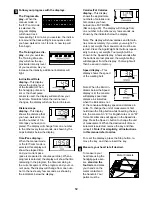
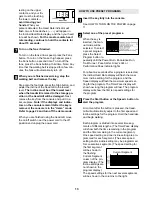
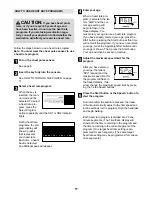
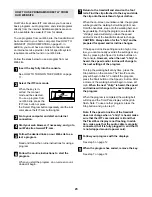
Select the iFIT.com mode.

When the key is in-
serted, the manual
mode will be selected.
To use a program from
our Web site, press the
iFIT.com button or press
the Select Program button repeatedly until the indi-
cator above the iFIT.com button lights.

Go to your computer and start an internet
connection.

Start your web browser, if necessary, and go to
our Web site at www.iFIT.com.

Follow the desired links on our Web site to se-
lect a program.

Read and follow the on-line instructions for using a
program.

Follow the on-line instructions to start the
program.

When you start the program, an on-screen count-
down will begin. 

Return to the treadmill and stand on the foot
rails. Find the clip attached to the key and slide
the clip onto the waistband of your clothes.

When the on-screen countdown ends, the program
will begin and the walking belt will begin to move.
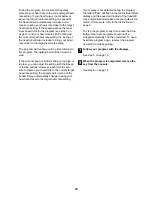
Hold the handrails, step onto the walking belt, and
begin walking. During the program, an electronic
“chirping” sound will alert you when the speed
and/or incline of the treadmill is about to change.
CAUTION: Always listen for the “chirp” and be
prepared for speed and/or incline changes. 

If the speed or incline settings are too high or too
low, you can manually override the settings at any
time by pressing the Speed or Incline buttons on
the console. However, when the next “chirp” is
heard, the speed and/or incline will change to
the next settings of the program.

To stop the walking belt at any time, press the
Stop button on the console. The Time/Pace dis-
play will begin to flash. To restart the program,
press the Start button or the Speed + button. After
a moment, the walking belt will begin to move at 1
mph. When the next “chirp” is heard, the speed
and incline will change to the next settings of
the program
.

When the program is completed, the walking belt
will stop and the Time/Pace display will begin to
flash. Note: To use another program, press the
Stop button and go to step 5.

Note: If the speed or incline of the treadmill
does not change when a “chirp” is heard, make
sure that the iFIT.com indicator is lit and that
the Time/Pace display is not flashing. In addi-
tion, make sure that the audio cable is properly
connected, that it is fully plugged in, and that it
is not wrapped around a power cord.

Follow your progress with the displays.

See step 5 on page 12. 

When the program has ended, remove the key.

See step 7 on page 14.

9

8

7

6

5

4

3

2

1

23

HOW TO USE PROGRAMS DIRECTLY FROM
OUR WEB SITE

Summary of Contents for 4200r Treadmill

Page 1: ...he serial number in the space above for reference QUESTIONS As a manufacturer we are com mitted to providing complete customer satisfaction If you have questions or if there are missing or damaged parts please call Or write ICON Health Fitness Ltd Customer Service Department Unit 4 Revie Road Industrial Estate Revie Road Beeston Leeds LS118JG UK email csuk iconeurope com 08457 089 009 www iconeuro...

Page 2: ...ENSOR 8 OPERATION AND ADJUSTMENT 9 HOW TO FOLD AND MOVE THE TREADMILL 25 TROUBLESHOOTING 27 CONDITIONING GUIDELINES 30 PART LIST 34 ORDERING REPLACEMENT PARTS Back Cover Note An EXPLODED DRAWING is attached in the centre of this manual 2 NordicTrack is a registered trademark of ICON Health Fitness Inc ...

Page 3: ...r is turned off Do not operate the treadmill if the power cord or plug is damaged or if the treadmill is not working properly See BEFORE YOU BEGIN on page 5 if the tread mill is not working properly 14 Never start the treadmill whilst you are stand ing on the walking belt Always hold the handrails whilst using the treadmill 15 The treadmill is capable of high speeds Adjust the speed in small incre...

Page 4: ...representative Servicing other than the procedures in this manual should be performed by an authorised service representative only 27 This treadmill is intended for in home use only Do not use this treadmill in any commer cial rental or institutional setting WARNING Before beginning this or any exercise program consult your physician This is especially important for persons over the age of 35 or p...

Page 5: ... Service Department at 08457 089 009 To help us assist you please note the product model number and serial num ber before calling The model number of the treadmill is NETL92130 The serial number can be found on a decal attached to the treadmill see the front cover of this manual for the location Before reading further please familiarise yourself with the parts that are labelled in the drawing belo...

Page 6: ...are on the Latch Pin Note If there are two Latch Pin Collars place one on each side of the Spring Insert the Latch Pin into the Latch Knob Sleeve 111 and the Left Upright 99 Tighten the Latch Knob 113 onto the Latch Pin 107 99 112 111 113 110 109 107 2 1 Slide the treadmill out of the box Insert the three Cage Nuts 96 into the three indicated holes in the treadmill To insert each Cage Nut 96 first...

Page 7: ...he inset drawing Next lift the right Handrail 83 slightly and align the Bolts with the holes in the Handrail Thread the Bolts into the Handrail Do not tighten the Bolts yet Attach the left Handrail not shown in the same way Then tighten all four Handrail Bolts 104 5 104 106 Thick Side 99 106 4 Have a second person hold the Handrails 83 near the Uprights 99 Connect the Upright Wire Harness 119 to t...

Page 8: ...ainer that may trap moisture Do not expose the chest pulse sensor to direct sunlight for extended periods of time do not expose it to temperatures above 50 Celsius 122 Fahrenheit or below 10 Celsius 14 Fahrenheit Do not excessively bend or stretch the sensor unit when using or storing the chest pulse sensor Clean the sensor unit using a damp cloth never use alcohol abrasives or chemicals The chest...

Page 9: ...t lift the tab on the ferrite box and clamp the ferrite box around the power cord Fasten the included plastic tie just behind the ferrite box and cut off the excess plastic tie The plastic tie will prevent the fer rite box from sliding along the power cord Refer to drawing 2 Plug the power cord into an appropriate outlet that is properly installed and earthed in accordance with all local codes and...

Page 10: ... your home stereo portable stereo or computer and play special iFIT com CD and videocassette programs iFIT com CDs and videocassettes are available separately iFIT com CD and videocassette programs automatically control the speed and incline of the treadmill as a per sonal trainer guides you through every step of your workout High energy music provides added motivation To purchase iFIT com CDs and...

Page 11: ...ts of 0 5 mph To change the speed setting quickly press the 1 step Speed buttons Note It may take a moment for the treadmill to reach the selected speed setting To stop the walking belt press the Stop button The Time Pace display will begin to flash To restart the walking belt press the Start button or the Speed button Note During the first few minutes that the tread mill is used observe the align...

Page 12: ...tors below the display Calories Fat Calories display This display shows the approximate numbers of calories and fat calories you have burned see FAT BURN ING on page 30 The display will change from one number to the other every few seconds as shown by the indicator below the display Note The display will show calories and fat calo ries more accurately if you enter your weight To enter your weight ...

Page 13: ...e console See HOW TO TURN ON THE POWER on page 11 Select one of the preset programs When the key is inserted the man ual mode will be selected To select a preset program press the Select Program button re peatedly until the Power Burn Endurance Run Trail Runner Pace Setter Hiker s Hill or Performance Peak indicator lights For about six seconds after a program is selected the Incline Heart Rate dis...

Page 14: ...he Speed or Incline buttons Every few times a Speed button is pressed an additional indicator will light or darken in the Current Segment column If any of the columns to the right of the Current Segment col umn have the same number of lit indicators as the Current Segment column an additional indicator may light or darken in those columns as well Note When the next segment begins the treadmill wil...

Page 15: ...button is pressed an ad ditional indicator will light or darken in the Current Segment column When the first segment of the program is com pleted the current speed setting and the current incline setting will be saved in memory The three columns of indicators will then move one column to the left and the speed setting for the second segment will be shown in the flashing Current Segment column Prog...

Page 16: ...mn to the left The speed setting for the second segment will then be shown in the flashing Current Segment column and the treadmill will automatically adjust to the speed and incline settings for the second segment The program will continue until the speed setting for the last segment is shown in the Current Segment column and no time remains The walk ing belt will then slow to a stop If desired y...

Page 17: ...e is shown Then press the Start button Your age will then be saved in memory Adjust the maximum speed limit for the program After you have entered your age the letters SPd speed and the maximum speed limit for the program will flash in the Speed display If de sired change the maximum speed limit by press ing the 1 step Speed buttons Press the Start button or the Speed button to start the program A...

Page 18: ...tting is too high or too low you can adjust the setting with the Speed or Incline buttons However each time the con sole compares your heart rate to the current target heart rate setting the speed and or incline of the treadmill may automatically change to bring your heart rate closer to the target heart rate setting If your pulse is not detected during the program the letters PLS will flash in th...

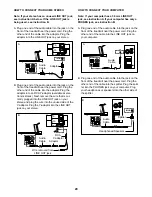
Page 19: ...HONES jack on your CD player Plug your headphones into the other side of the splitter HOW TO CONNECT YOUR PORTABLE STEREO Note If your stereo has an RCA type AUDIO OUT jack see instruction A below If your stereo has a 3 5 mm LINE OUT jack see instruction B If your stereo has only a PHONES jack see instruction C A Plug one end of the audio cable into the jack on the front of the treadmill near the ...

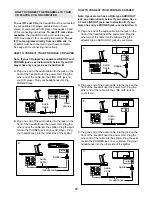
Page 20: ...unused side of the Y adaptor Plug the Y adaptor into the LINE OUT jack on your stereo HOW TO CONNECT YOUR COMPUTER Note If your computer has a 3 5 mm LINE OUT jack see instruction A If your computer has only a PHONES jack see instruction B A Plug one end of the audio cable into the jack on the front of the treadmill near the power cord Plug the other end of the cable into the LINE OUT jack on your...

Page 21: ... or video program Insert the key fully into the console See HOW TO TURN ON THE POWER on page 11 Select the iFIT com mode When the key is in serted the manual mode will be selected To use an iFIT com CD or video program press the iFIT com button or press the Select Program button repeatedly until the indicator above the iFIT com button lights Insert the iFIT com CD or videocassette If you are using...

Page 22: ...and go to step 1 on page 21 Note If the speed or incline of the treadmill does not change when a chirp is heard Make sure that the iFIT com indicator is lit and that the Time Pace display is not flashing If the Time Pace display is flashing press the Start button or the Speed button on the console Adjust the volume of your CD player or VCR If the volume is too high or too low the con sole may not ...

Page 23: ... begin and the walking belt will begin to move Hold the handrails step onto the walking belt and begin walking During the program an electronic chirping sound will alert you when the speed and or incline of the treadmill is about to change CAUTION Always listen for the chirp and be prepared for speed and or incline changes If the speed or incline settings are too high or too low you can manually o...

Page 24: ...e Time Pace display will show the total number of hours that the treadmill has been used An E for English miles or an M for metric kilometres will appear in the Speed display Press the Speed button to change the unit of measure ment IMPORTANT The Calories Fat Calories dis play should be blank If a d appears in the display the console is in the demo mode This mode is in tended to be used only when ...

Page 25: ...n on the latch knob Release the latch knob Make sure that the platform is resting against the pin as shown To protect the floor or carpet from damage place a mat under the treadmill Keep the treadmill out of direct sunlight Do not leave the treadmill in the stor age position in temperatures above 30 C 85 F HOW TO MOVE THE TREADMILL Before moving the treadmill convert the treadmill to the stor age ...

Page 26: ... it Pivot the treadmill down until the frame is past the pin on the latch knob Slowly release the latch knob 2 Hold the treadmill firmly with both hands and lower the treadmill to the floor Do not drop the treadmill frame to the floor CAUTION To decrease the possibility of in jury bend your legs and keep your back straight Latch Knob Platform Pin ...

Page 27: ...eck the circuit breaker located on the treadmill frame near the power cord see c above If the circuit breaker has tripped wait for five minutes and then press the switch back in b Make sure that the power cord is plugged in If the power cord is plugged in unplug it wait for five minutes and then plug it back in c Remove the key from the console Reinsert the key fully into the console d Make sure t...

Page 28: ...has shifted to the left use the allen wrench to turn the left rear roller bolt clockwise 1 2 of a turn if the walking belt has shifted to the right turn the bolt counterclockwise 1 2 of a turn Be careful not to overtighten the walking belt Plug in the power cord insert the key and walk on the treadmill for a few minutes Repeat until the walking belt is centred b If the walking belt slips when walk...

Page 29: ...N a If the heart rate monitor does not function properly see CHEST PULSE SENSOR TROUBLE SHOOTING on page 8 b If the heart rate monitor still does not function properly the battery should be changed To replace the battery locate the battery cover on the back of the sensor unit Insert a coin into the slot in the cover and turn the cover counterclockwise to the open position Remove the cover Remove t...

Page 30: ... be aerobic Aerobic exercise is activity that requires large amounts of oxygen for prolonged periods of time This increases the demand on the heart to pump blood to the muscles and on the lungs to oxygenate the blood For aerobic exercise adjust the speed and incline of the treadmill until your heart rate is near the highest number in your training zone WORKOUT GUIDELINES Each workout should includ...

Page 31: ...illes Stretch With one leg in front of the other reach forward and place your hands against a wall Keep your back leg straight and your back foot flat on the floor Bend your front leg lean forward and move your hips toward the wall Hold for 15 counts then relax Repeat 3 times for each leg To cause further stretching of the achilles ten dons bend your back leg as well Stretches Calves achilles ten ...

Page 32: ...32 NOTES ...

Page 33: ...33 NOTES ...

Page 34: ...Idler Pulley 42 8 Lift Motor Nut Idler Nut 43 4 Tension Washer 44 2 Incline Motor Bolt Top 45 1 Idler Arm Bearing 46 1 Idler Arm 47 1 Idler Spring 48 9 Hood Mount Screw 49 5 Hood Mount 50 1 Incline Motor 51 1 Incline Motor Bolt Bottom 52 1 Incline Motor Bracket 53 1 Front Roller Adj Bolt 54 1 Front Roller Nut 55 2 Motor Bolt 56 1 Pulse Wire 57 1 Lift Leg 58 1 Left Fan Housing 59 2 Large Cage Nut 6...

Page 35: ...FIT com Audio Cable 123 1 Jack 124 1 Releaseable Tie 125 1 Catch 126 1 Idler Arm Bushing 127 2 Leveling Foot 128 1 Power Board 129 1 Filter 130 2 Motor Bushing 131 2 Roller Adj Washer 132 1 Chest Pulse Strap 133 1 Chest Pulse Sensor 134 1 Isolator Plate 135 1 Ferrite Box 136 4 Base Pad Screw 137 3 Hood Screw Rear 138 2 Frame Pivot Nut 139 1 Transformer 140 1 Ground Screw 141 1 Ground Nut Washer 14...

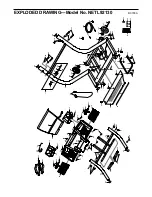
Page 36: ...1 42 127 127 59 59 118 118 106 104 106 104 144 140 141 119 103 102 100 101 42 82 81 83 84 85 85 86 84 7 7 80 73 105 58 105 117 87 88 88 87 88 87 88 87 87 7 137 87 87 87 87 87 87 87 116 87 87 115 89 87 79 87 133 132 17 56 99 113 111 110 107 108 109 112 114 87 EXPLODED DRAWING Model No NETL92130 R0703A ...

Page 37: ... 28 78 28 45 54 86 64 67 135 43 142 130 86 65 52 50 42 51 86 19 48 69 68 73 72 74 86 86 48 70 87 87 71 76 77 137 137 129 86 139 86 86 143 134 128 60 60 20 31 30 54 27 1 15 18 18 61 125 87 19 22 23 25 14 2 11 6 10 9 6 3 8 8 24 2 42 42 8 8 13 12 13 12 13 12 13 12 21 5 4 128 131 5 4 42 128 131 EXPLODED DRAWING Model No NETL92130 R0703A ...

Page 38: ...on Leeds LS118JG UK Tel Outside the UK 0 044 113 387 7133 Fax 0 044 113 387 7125 To help us assist you please be prepared to give the following information The MODEL NUMBER OF THE PRODUCT NETL92130 The NAME OF THE PRODUCT NordicTrack 4200 R treadmill The SERIAL NUMBER OF THE PRODUCT see the front cover of this manual The KEY NUMBER AND DESCRIPTION OF THE PART S see the PART LIST on pages 34 and 35...

Reviews: