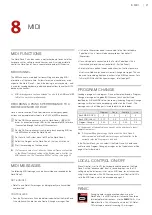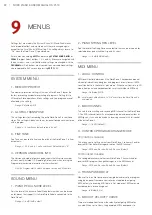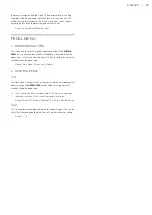
3. GETTING STARTED | 9
4
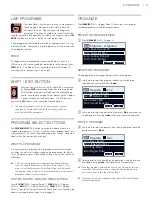
Press the Live Mode button again to exit Live Mode and return to
the Program banks.
If Live Mode is active and you wish to store the settings permanently
as a program in one of the Program banks, you can do so using
the standard Store methods (see the previous section). Conversely,
programs can also be stored
into
any of the Live Mode memory
locations by pressing
LIVE MODE
and selecting one of the Live program
locations, at the “Store Program To” stage.
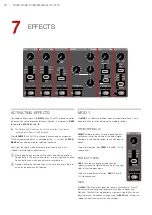
ACTIvATING EFFECTS
1
Make sure a piano based program is selected.
2
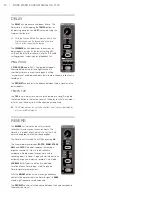
Activate the reverb by pressing the Reverb
ON
button.
3
Adjust the
DRY/WET
balance with the knob above the reverb
selector.
4
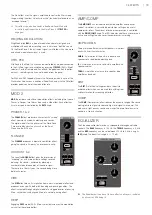
Activate the delay effect by pressing the
DELAY
ON/OFF
button.
5
The LEDs above the button indicate which sound engine and Layer
is routed to the effect;
PIANO A
and/or
B
or
SYNTH A
and/or
B
. Or
in the case of the Delay and EQ effects,
all
sources. Press
SHIFT
and the Delay
SOURCE
button so that the
PIANO A
LED is lit, if it is
not already.
Double-clicking the On Off / Source button is a shortcut for quickly
changing the source for any effects unit, between any of the
currently active Layers.
6
Try the
TEMPO
,
FEEDBACK
and
DRY/WET
controls, to alter the
character and intensity of the Delay effect.
LAYERING WITH SAMPLE SYNTH
1
Activate
LAYER A
in the Sample Synth section.
2
Turn the
SAMPLE SELECT
dial and select a string sound from the
Sample bank. Use the
CATEGORY
dial to select the
Ensemble
Strings
category if not already selected. The location and name of
the sample are shown at the bottom of the display while browsing.
3
Use the
LEVEL
control to set an appropriate sound level for the
strings.
When a sample is selected,
preset
settings for the Sample Synth
envelope (Attack, Decay/Sustain/Release) and Dynamics settings are
also loaded. These parameters can subsequently be adjusted manually
as desired. Descriptions of these controls are found in the Sample Synth
reference chapter, starting on page 13.
ADDING A SECOND PIANO SOUND
Continuing on with the same example, let us now add a second Piano
sound to it:
1
Hold down the
LAYER A
button of the Piano section and press once
on
LAYER B
. Note that both Layer LEDs now are lit, but that the
Layer B LED is blinking, indicating that it is
focused
for editing.
2
With Layer B focused, select a different Piano sound using the
PIANO SELECT
controls.
3
Adjust the Level of each Piano sound by focusing each Layer
respectively using the Layer A and B buttons, and turning the
LEVEL
dial.
Feel free to try the Octave Shift controls (Shift+Layer A/B) to trans-
pose each Layer by octaves, as desired.
Adding a second Sample Synth sound is done the same way, except
that the
Sample Synth
LAYER
buttons are used instead.
To turn one of two active Layers off, hold down the button for the Layer
that should
remain active
and press once on the other
LAYER
button.
If you would like to see what sound is selected for each layer at all
times, press the
PROG VIEW
button in the Program section.
CREATING A SPLIT
Each Piano or Sample Synth Layer can be freely assigned to either
side of the keyboard split point. This allows for various combinations of
layered and split sounds. Below is how to set up a split using a Piano
sound on the left side of the split point and a Sample Synth sound on
the right:
1
Make sure that both a Piano and a Sample Synth Layer is active.
2
In the Piano section press the
KB SPLIT
button until only the
LO
LED is lit.
3
In the Sample Synth section press the
KB SPLIT
button until only
the
UP
LED is lit.
4
To adjust the
position
of the Split point, press the KB Split
KEY
button in the Program section repeatedly to select one of
the available positions. The selected position is indicated by a
corresponding LED above the keyboard
.
The keyboard is now divided into two zones, the split point being
indicated by a green LED above the keyboard.
Use the
OCTAVE UP/DOWN
controls in the Piano and Sample Synth
section for accessing different ranges of the respective sounds.
SETTING UP A CROSS-FADE (x-FADE)
With
X-FADE
enabled the sounds on either side of the split point
gradually transition between one another:
5
Press
X-FADE
(Shift+KB Split). x-Fade
1
is now selected, which is
a shorter cross-fade of 6 notes below and 6 notes above the split
point.
6
Press
X-FADE
(Shift+KB Split) again to select x-Fade
2
. This is a
longer cross-fade encompassing 12 notes below and 12 notes
above the split point.
Playing across the Split point will now “cross-fade” between the lower
and the upper sound. Note that the split LED above the keyboard is lit
with a
red
light, indicating that a large x-Fade (
2
) is being used. With a
small x-Fade (
1
) the LED will be yellow, and with x-Fade turned off the
LED will be green.


