Norco KVM-15C08 User Manual Download Page 8


INSTALLATION 

Standalone


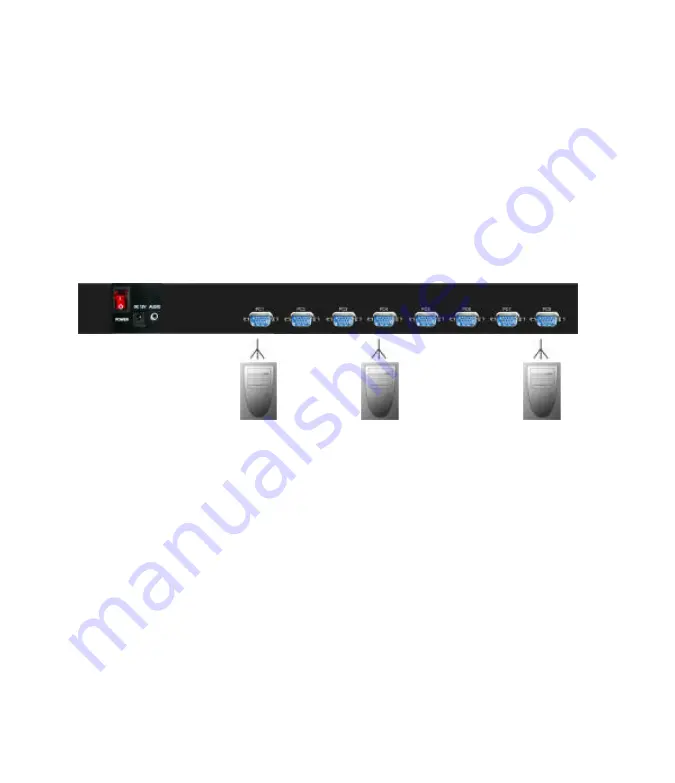
1.Make sure that the power switch at the rear panel of the KVM is OFF.Plug an end of the AC    

power cord into the KVM and the other end to an AC  power supply . 

2. Make sure to power off the PC and then install the 3-in-1 cable to each of the PC one by one . 

Note : If  the ON-LINE LED (Green) of any port of a PC is on , then we recommend you to power off such PC 

(Turn off the power switch of the power supply of the PC or unplug the power cable dof the PC) or wait till Step 5 

to install that particular PC. 

3. Turn don the power switch at the rear panel of the KVM . 

4. Power on the PC . 

Note :It is not necessary to power down the whole system for install a new PC or KVM thereafter . All you need 

is to make sure that the new PC or KVM is OFF during the installation .If the KVM powers down due to external 

factors (such as power failure of the power of the KVM is turned off) , we recommendyou to reinstall the whole 

system . 

Connection in Series 

1.Make sure that the power switch at the rear panel of the Master KVM is OFF . Plug one end of the AC power 

cord to the KVM and the other end to the AC power supply . 

2. Make sure the power switches at the rear panels of all slave KVMs are OFF. Plug one end of the AC power cord 

to the KVM and the other end to the  AC power supply . 

3. Install the Master KVM to the 3-in-1 cable (same as the cable for connecting the KVM to the PC) in the middle of 

the Slave KVMs. 

4.Make sure the power of the PC is OFF and then install the 3-in1 cable to each PC one by one . 

Note : Install the PCs on the master or the PCs on the Slave first . If the ON-LINE LED (Green) of any port of a 

PC is on ,then we recommend you to power off such PC (Turn off the power switch of the power supply of 

the PC or unplug the power cable of the PC) or wait till Step 8 to install that particular PC. 

4. 

Turn on the power switch at the rear panel of the master KVM . 

5. 

Turn on the power switch at the rear panel of the slave KVM. 

6. 

Power on the PC 


Summary of Contents for KVM-15C08

Page 1: ...LCD CONSOLE KVM 15C08 KVM 15C16 User Manual...

Page 2: ...crease the numeric value parameter in certain menu Enter key Use this key to enter next menu or highlight a confirmed function If the screen is not in a full screen graphic mode such as in a DOS or is...

Page 3: ...You can install a cascade to facilitate expansions or transportation without requiring a cascade cable or changing the KVM configurations On Screen Display OSD Menu The embedded OSD control module le...

Page 4: ...Buttons and LED lamps for easy switch and identification l Complies with the height of the IU chassis specification And installable with a hanging stand Into a 19 chassis system l Requires no additio...

Page 5: ...Touch pad module Console Connector Keyboard Standard 104 key Port Selection Keys on Front Panel 8 16 Port 8 16 LEDs Power 1 1 OSD Built in Video Resolution 1024x768 75Hz Dimensions 600x447x48 mm Weig...

Page 6: ...onfirmed and the keyboard and mouse will be reconnected and the EDID in the screen will be read again 2 Port LEDs These Port LEDs are built in the Port Selection Switches Online A green light indicate...

Page 7: ...KVM 1508 Rear VIEW KVM 1516 Rear VIEW 1 CPU Port Install the cable connected to a PC here 2 Audio in optional 3 AC Power Jack DC 12V Input 4 Power Switch Power On Off the LCD KVM 1 1 4 3 3 2 2...

Page 8: ...urned off we recommendyou to reinstall the whole system Connection in Series 1 Make sure that the power switch at the rear panel of the Master KVM is OFF Plug one end of the AC power cord to the KVM a...

Page 9: ...then power on the PC 2 Slave KVM Make sure the power switch at the rear panel of the KVM is OFF Use the AC power cord 3 in 1 cable to connect the console port of the slave KVM to the CPU port of the...

Page 10: ...irect switch For example if you want to switch a PC to the Slave KVM port 04 underThe Master KVM port 03 then you can start the OSD and then directly enter 0304 If you are using a standalone machine t...

Page 11: ...digits If a User has not given a name for the PC the name field will be blank 03 04 Mail Ser 4 LIST MASTER PWR C KVM NAME SVS l l l l l l 01 02 03 04 05 06 07 08 04 08 16 Admin Mail Group Peter Web Gr...

Page 12: ...tting use to open and to close The SVS I blank and not clickable if the KVM is connected In parallel If this option is set to open then you can make the switch By operating the Hot Key Switch or Mouse...

Page 13: ...el Information and mode selection Full Number Name Channel Display Time It shows the time for displaying Channel information 5 Sec 10Sec Always None Auto Scan Time For Auto Scan it shows the Residing...

Page 14: ...s the model name and F W version information Which is helpful for users to understand the updated version F4 OSD Position You can enter the OSD position to make adjustments We recommend you to unify t...

Reviews: