Nokia Communicator 9290 User Manual Download Page 146

128

Contacts

A field is displayed if it is recognized; if not, it is ignored.

Audio data, in a supported format, is set as the personal ringing tone of the contact 
(if you choose to add the card to your Contacts directory).

To add the received card to your Contacts directory, press 

Add to Contacts

The card is converted to contact card format. To decline the card, press 

Delete

.

Settings

Press the Menu key and select 

Tools

 > 

Settings

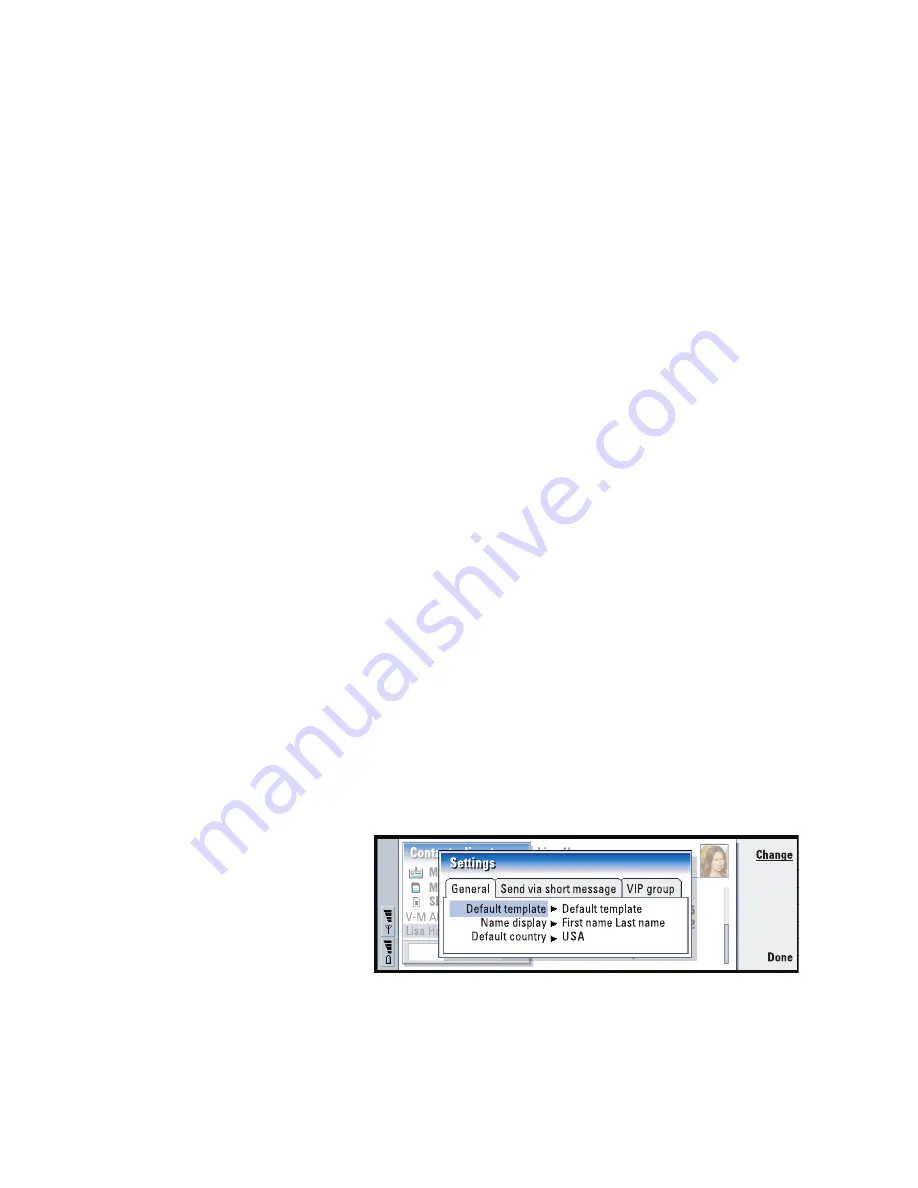
, then select a page, as follows:

General page

Figure 47

Default template

 - Allows you to define which template is used when creating a 

new contact card. When you press 

Change

, you can choose a template from a 

list of templates used with the current database.

Name display

 - Allows you to define the display order of names in the Contacts 

directory main view. The values are 

First name Last name

/

Last name, First name

The names will be displayed in the same order in the Telephone application and 
the cover phone.

Summary of Contents for Communicator 9290

Page 1: ...User Guide ...

Page 2: ...Nokia 9290 Communicator User Guide 9290_UG_EN_ISSUE 1 book Page 1 Wednesday March 6 2002 4 41 PM ...

Page 3: ...r Wireless service provider Wireless provider s number Wireless service provider Provider s customer care Wireless service provider Model number Label on back of phone under battery Phone type Back of title page International Mobile Equipment Identification IMEI Label on back of phone under battery See Facts about your communicator on page 41 ...

Page 4: ...Your Internet Service Provider as above WAP Information you need Where to obtain it Where it goes Record it here WAP Internet access point name modem phone number user name password Your WAP Service provider See Set up WAP connections on page 169 Internet access connection settings dialog WAP Internet access point name modem phone number user name password Data call type information whether high s...

Page 5: ...nternet access point The protocol of your remote mailbox Your mailbox service provider The Servers page Mailbox type POP3 or IMAP4 IP Internet Protocol address or host name of the server that sends your mail Your mailbox service provider Outgoing mail server IP address or host name of the server that receives your mail Your mailbox service provider Incoming mail server SMS Information you need Whe...

Page 6: ...national CorrectSpell English spelling correction system 1995 by Lernout Hauspie Speech Products N V All rights reserved Reproduction or disassembly of embodied algorithms or database prohibited English spelling software developed by Lernout Hauspie Speech Products N V UK English Concise International Electronic Thesaurus Copyright 1995 by Lernout Hauspie Speech Products N V All rights reserved Re...

Page 7: ...ON TO THE ACCURACY AND RELIABILITY OR CONTENTS OF THIS DOCUMENT NOKIA RESERVES THE RIGHT TO REVISE THIS DOCUMENT OR WITHDRAW IT AT ANY TIME WITHOUT PRIOR NOTICE EXPORT CONTROLS This product contains commodities technology or software exported from the United States in accordance with the Export Administration regulations Diversion contrary to U S or Canadian law is prohibited FCC INDUSTRY CANADA N...

Page 8: ......

Page 9: ...4 Memory card 7 Charging the battery 8 Communicator interface 12 Setup configuration 14 PC connectivity 16 Desk 18 Telephone 18 Messaging 20 Internet 23 Contacts 25 Calendar 26 Office 27 Extras 31 Phone 33 Install Remove software 35 Getting help 39 Facts about your communicator 41 ...

Page 10: ...5 View help 56 Using the menus 56 Messages Menu 1 58 Call log Menu 2 60 Settings Menu 3 63 Forwarding Menu 4 68 Infrared Menu 5 69 SIM services Menu 6 69 3 General information 71 Communicator display 71 Communicator keyboard 76 Connectors 79 General features 80 Install software from the CD ROM 89 Activate the infrared connection 90 ...

Page 11: ...a call 96 Make a new call during a call 96 Make conference calls 98 Transfer calls 99 Answer a waiting call 99 Send touch tones during a call 100 Telephone Settings 100 Flight profile 113 6 Contacts 115 Contacts directory 115 Make a contact card 116 Open a contact card 117 Move or copy contacts from a SIM card 117 Search for a contact card 118 Change fields in a contact card 118 Attach a ringing t...

Page 12: ... business card 126 Receive a business card 127 Settings 128 Create a new contacts database 130 7 Calendar 131 Calendar entries 131 Views 138 Icons 144 Task lists 144 Search for Calendar entries 145 Settings 147 8 Internet 149 Setting up your Internet access point 150 Connect to the World Wide Web 158 Open a Web page 160 WWW settings 165 WAP 168 Java 173 ...

Page 13: ...ce 205 Document 205 Sheet 210 Presentation viewer 218 File manager 220 11 Extras 227 Clock 227 Calculator 229 Control panel 230 Recorder 240 Imaging 241 RealOne Player 244 Cell broadcast 245 Fax modem 247 12 Accessories guide 253 Power management 253 Vehicle accessories 257 Wearables 261 ...

Page 14: ...mation SAR for U S 285 Certification Information SAR for Canada 287 Care and maintenance 288 Accessory safety 289 Battery safety 290 Nokia One Year Limited Warranty for U S 291 Nokia One Year Limited Warranty for Canada 298 15 Glossary 301 Appendix A Message from the CTIA to all users of mobile phones 311 Appendix B Message from the FDA to all users of mobile phones 315 ...

Page 15: ...ear medical equipment SWITCH OFF IN AIRCRAFT Wireless phones can cause interference SWITCH OFF WHEN REFUELING Do not use the phone at a refueling point Do not use near fuel or chemicals SWITCH OFF NEAR BLASTING Do not use the phone where blasting is in progress Observe restrictions and follow any regulations or rules USE SENSIBLY Use only in the normal position to ear Do not touch the antenna unne...

Page 16: ... TO OTHER DEVICES When connecting to any other device read its user s guide for detailed safety instructions Do not connect incompatible products INFRARED PRECAUTIONS Do not point the IR beam at anyone s eye or allow it to interfere with other IR devices DISCLAMER It is possible that you may not be able to activate your phone on all wireless systems Please see your service provider for details USI...

Page 17: ... of your phone under the battery If you re calling about an accessory please have it available for reference Nokia Customer Care Center 7725 Woodland Center Boulevard Suite 150 Tampa FL 33614 Tel 1 800 4MY 9290 Fax 1 813 249 9619 For the TTY TDD users only 1 800 24 NOKIA 1 800 246 6542 Customer Interaction Centre Canada Nokia Products Ltd 601 Westney Rd South Ajax Ontario L1S 4N7 Tel 1 888 22 NOKI...

Page 18: ......

Page 19: ...okia 9290 Communicator 16 MB Memory card The Nokia 9290 Communicator User Guide the Getting Started card fold out poster and the Add on applications guide High Power Battery BLL 3 ACP 12U Charger RS232 DLR 2L Adapter Cable CD ROM with PC connectivity software Headset The Nokia9290Communicatorconsistsof twoparts thephoneandthe communicator interface The phone is on the device cover and the communic...

Page 20: ...ly The communicator looks and operates like other Nokia wireless phones except the earpiece and microphone are at the rear of the device The phone is switched on and off by pressing the button on the cover IMPORTANT Do not switch on the phone when wireless phone use is prohibited or when it may cause interference or danger Support options To get the most from your Communicator Nokia s support opti...

Page 21: ...e step by step user manual to help you learn how to use all the features on your 9290 Communicator Using the phone To be able to send and receive calls and messages on your Nokia 9290 Communicator you must have the following the phone must be turned on a valid SIM card must be inserted and you must be located in the service area of the wireless network Emergency calls to the emergency number 911 o...

Page 22: ...1900 phones you can move the phone number from one phone to another by moving the SIM card to the phone you wish to use WARNING Support for features may vary with different service providers To start up your phone 1 Close the device cover and ensure that the phone is turned off If it is on press 2 If the battery is connected to the communicator remove the battery Press the catch at the top of the ...

Page 23: ...e gold contacts of the SIM card are facing down and that the bevelled corner of the card is on the right See Figure 3 Figure 3 When the card is properly inserted into the SIM card slot the bevelled corner remains visible as shown in Figure 4 Figure 4 bevelled corner is visible ...

Page 24: ...e and Regional settings applications 7 Scroll to the name of your home city with the Arrows key and press OK A view showing the current time and date opens You can search for a city by typing the name of the city in the search field at the bottom of the view 8 Change the time and date if necessary and press OK 9 Next you can modify your personal information in a business card Press OK If a valid S...

Page 25: ...er and press the help key Note The memory card is hot swap capable between the Communicator and some digital cameras MP3 players and PC card readers However file formats may vary between the Communicator and other devices Check the user manual of your camera MP 3 player or PC card reader to determine compatibility with the Communicator Do not remove the memory card while reading or saving a file I...

Page 26: ...tch Charging the battery Note See important safety information on battery usage on page 9 Tip To check the current battery level see the battery indicator on the communicator or phone display 1 Connect the charger cable to the bottom of the communicator as shown in Figure 6 Figure 6 ...

Page 27: ...icator switches itself off Note When you connect a communicator with a fully discharged battery to a charger it will take 30 60 seconds before the CHARGING message appears on the display and the battery indicator bar starts scrolling After that it may take 10 30 seconds before you can switch the phone on WARNING Keep all SIM cards and memory cards out of the reach of small children Battery informa...

Page 28: ...rge and discharge cycles Use only batteries approved by the communicator manufacturer and recharge the battery only with the chargers approved by the manufacturer With approved chargers and accessories the battery can be charged continuously The battery need not be fully discharged before recharging When a charger is not in use disconnect it from the power source Do not leave the battery connected...

Page 29: ... to the real time clock of the communicator In case the backup battery is drained it will be automatically charged the next time a charged battery is reconnected to the communicator Always close the device cover before removing the battery Closing the cover will save all data Note The battery does not fit into place if the SIM card is not correctly installed Do not force the battery into place Che...

Page 30: ...u close the cover the communicator interface saves all data and turns off its display Note When you press Close switch to another application or close the device cover the Nokia 9290 Communicator saves all data automatically Use the applications The buttons at the top of the keyboard start the corresponding applications The application buttons are Desk Telephone Messaging Internet Contacts Calenda...

Page 31: ...n it means that you must press the command button next to the command name Open The main elements of the display are shown in Figure 8 Commands always relate to the four command buttons on the right side of the display In the guides commands are in bold and items shown on the display and on the menu bar are in italics The scroll bar indicates that there are more items than currently shown on the d...

Page 32: ... configure the relevant settings Note To help you configure these settings see the Settings checklist at the front of this guide In the checklist you can see the information you need where to get it from and where to enter it in your communicator More importantly add the information to the checklist for future reference and useittocommunicatewithyourserviceprovidersabouttheinformation you need to ...

Page 33: ...press the Menu key 4 Enter the details and press Advanced settings A dialog with four pages opens Enter the details on each page On the Other page press Address options A dialog opens Figure 10 Define the IP and DNS addresses Press Done to return to the view with three icons Tip For details see the Internet chapter of this guide 5 Select WAPaccess and press Open A dialog opens ...

Page 34: ...rnet and Messaging chapters of this User Guide PC connectivity You can connect your communicator to a compatible PC or laptop using the PC Suite for Nokia 9290 Communicator program found in the communicator sales package CD ROM The CD ROM also contains PC Suite Guide in the UsingNokia 9290Communicator section PC Suite for Nokia 9290 Communicator is a PC application that works with Windows 95 98 20...

Page 35: ...Certificate Management in the user guide Connect your communicator to your PC 1 If you use a cable connect the larger end of the RS 232 cable to the serial COM port of the PC and the smaller end to the connector at the bottom of the communicator 2 If you use infrared or a serial port other than COM1 double click the PC Suite connection icon on the WIndows taskbar and choose the right connection po...

Page 36: ... Write the note 3 Press Close to save the document The note will now appear in the main view of Desk Telephone Telephone is used for making and receiving voice calls and adjusting the telephone settings TostartTelephone openthecommunicatorcoverandpresstheTelapplication button on the keyboard Many of the actions you do in the Telephone application you can also do using the front cover of the commun...

Page 37: ...all a note appears on the display Depending on the profile settings you may also hear a ringing tone To answer the call press Answer If you do not wish to answer it press Decline Flight profile The Flight profile prevents you from accidentally turning on the phone in an aircraft To select the Flight profile 1 In the Telephone main view press Menu key scroll across the menu bar to the Profiles icon...

Page 38: ...rence in an aircraft If the aircraft personnel allow use of the communicator interface you MUST activate the Flight profile The Flight profile will allow use of the communicator interface only and will prevent use of the phone Be aware that all communications applications require use of the phone Messaging Messaging contains the following applications Fax Mail and SMS Short Messaging Service Start...

Page 39: ...end and select one of the sending options available in the submenu Press any of the following commands in the main view of Messaging Write fax Write mail or Write short message Press the Menu key in the main view of Messaging and select Write New message Then select the appropriate message type Select recipients Note A fax or a short message can have only one recipient There are two ways to select...

Page 40: ...received by your communicator but by your remote mailbox To read your mail you must first connect to the remote mailbox and then select the messages you wish to retrieve to your communicator Connection to a remote mailbox is established via a data call Connect to a remote mailbox 1 Select the remote mailbox in the left frame of the Messaging center main view 2 Press Retrieve mail 3 When the connec...

Page 41: ...tions carefully Note You must have your phone turned on within network coverage and free of any other voice or data call to connect to the Internet To establish an Internet connection 1 Press the Internet application button on the communicator keyboard 2 Select the application you want for example WWW and press Open When the application needs to make a connection a dialog opens showing the Connect...

Page 42: ... select links press the A key To move backwards use the Q key Alternatively use the Pointer tool For more information on the Pointer tool see Browse with the pointer on page 163 4 To go to another page or site select a hyperlink or hotspot and press Go to WAP The WAP services application is a hypertext system used to access Internet services containing news weather reports flight times dictionarie...

Page 43: ...essing the Contacts application button on the keyboard Use Contacts for creating editing and managing all contact information such as phone numbers and addresses The entries in the Contacts directory are called contact cards You can synchronize your contacts with a compatible PC For more information on synchronizing contacts see the PC Suite Guide on the sales package CD ROM The main contacts data...

Page 44: ...lendar and tasks with Microsoft Windows and Lotus programs when you connect your communicator to a compatible PC For more information on synchronization see the PC Suite Guide on the sales package CD ROM Create a new calendar entry One way to create a new calendar entry is 1 Press the Menu key and select File Newentry Select the entry you wish to create Appointment Event Anniversary or Task 2 Ente...

Page 45: ...w one task list at a time You can use task lists to list and organize tasks You can set deadlines dates and priorities for your tasks You can also have several task lists for example one for business tasks and another for personal tasks Other views The communicator contains other views such as the Year schedule and the Anniversaries view Office Office contains the following applications Document S...

Page 46: ...save a workbook press the Menu key in the worksheet view and select File Save To create a new worksheet in a workbook press the Menu key and select Insert Newworksheet To enter data select a cell with the Arrows key and start typing the data in the selected cell To confirm what you have entered in a cell press Enter OK or go to another cell with the Arrows key To dismiss the action press Esc or Ca...

Page 47: ...ext or Enter To view the previous slide press Previous To scroll the current slide use the Arrows key File manager You can use File manager to manage the contents and properties of various folders In the folder frame the tree can contain folders from two roots the communicator and memory card Under the communicator root there is C Documents folder that contains four default folders Documents Downl...

Page 48: ...u key in the main view of File manager and select File New folder A dialog opens 2 Name the new folder Search for files and folders 1 Choose the folder or memory storage where you want the search to take place 2 Press the Menu key Tools Find A dialog opens 3 Type in the field the string you wish to search for 4 Press Options to define the search in more detail Press Change to change the value of a...

Page 49: ...d countries or regions in the world The Clock also includes an alarm clock Set an alarm Tip You can set calendar alarms in the Calendar application 1 Press Alarm clock in the main Clock view An alarm clock view opens The currently active alarms are listed next to the clock 2 To create a new alarm press New alarm To edit an alarm press Edit alarm A dialog opens 3 Define the requirements of your ala...

Page 50: ...In the Control panel you can view or modify the following Security Datacall restrictions Profiles Display Accessories Certificatemanager Dateandtime Install Removesoftware Internetaccess Aboutproduct Memory Regionalsettings and Defaultfolder Modifying these features affects the operation of your communicator across all the applications To open a program for editing select it with the Arrows key an...

Page 51: ...the phone If you are prompted for the PIN code enter your PIN code which is provided with the SIM card and press the key directly under the OK text on the display IMPORTANT Do not switch on the phone when the use of wireless phones is prohibited or when it may cause interference or danger Earpiece Front Back Microphone Phone ...

Page 52: ...nger the signal and bars above this symbol Indicates the remaining charge in the battery The more bars are visible the more charge remains in the battery For information on other display indicators see Phone chapter of this guide Making and answering calls To make a call enter the area code and the phone number then press To answer a call press To end a call press Selection keys Switches between p...

Page 53: ...en the Install Remove application the Installedsoftware page lists all of the software packages that have been installed with their name version number type and size Press Certificate Info to display the certificate details of an installed software package that has a digital signature and a certificate Install software The types of applications which you can install are those that are specifically...

Page 54: ...ame is MediaPlayer sis To start the installation press Install new on the Installed software page Browse for the software package you want to install and press OK The installation process begins WARNING Only install software from sources that offer adequate protection against viruses and other harmful software To helpyou the software installation system on the Nokia 9290 Communicator uses digital ...

Page 55: ...ackage from your communicator select the software package you want to remove from the Installedsoftware page and press Remove 2 A dialog appears asking for your confirmation Press OK to remove the software Note Some software packages update existing software and cannot be removed IMPORTANT If you remove software you can only re install it by having the original software package file or by restorin...

Page 56: ...ollowing Deleteinstallationfileafteruse If set to Yes the software package installation file that ends in sis will be deleted from the device after installation If you download software packages using the WWW browser this may be helpful in reducing the amount of required storage space Note If you want to store the software package file for possible re installation later on either set this to No or...

Page 57: ...he following guides either in print or as PDF files The PC Suite Guide and the Software on CD ROM Guide are both on the CD ROM under the section Using the Nokia 9290 Communicator To help you begin to use your communicator turn to the Getting Started chapter in the user guide It explains the start up procedure and gives basic information on how to use the various applications The General informatio...

Page 58: ...y available in a printed version The Getting Started card and the Getting Started CD ROM help you to connect your Nokia 9290 Communicator with different kinds of wireless services In the Getting Started chapter of the user guide the names of the commands on the display are in bold and the settings and options are in italics Accessibility solutions Nokia is committed to making mobile phones easy to...

Page 59: ...rs for activating or deactivating services The Nokia 9290 Communicator nevertheless is capable of handling commands given in that form For these commands please consult with your service providers Services that need to be subscribed to are typically the short message service Internet and fax Because the number of special services depends on what services are available in your home network it is un...

Page 60: ...es you need most often are the lock code to lock up your communicator and the PIN code which is provided with the SIM card IMPORTANT The default lock code is 12345 For security reasons it is imperative that you change the lock code Keep the code secret and in a safe place separate from the communicator For more information on changing access codes see section Security on page 230 You can change ac...

Page 61: ...itles and so on are not shown GSM data transmission The Nokia 9290 Communicator employs the data transmission capabilities of the GSM 1900 MHz system to send faxes short messages and e mail and to establish connections with remote computers Wireless data connections can be made from most locations where your phone operates However it is recommended that you move the communicator to a location wher...

Page 62: ...arge may result in distorted display and unstable software operation Wireless connections may become unreliable data may become corrupted and the transmission halted In this case you need to end the existing call if any close the cover and switch off the phone if on and remove the battery Then replace the battery and establish a new wireless connection Dead spots and dropouts Dead spots are areas ...

Page 63: ...g wireless data communication while in a moving vehicle is not recommended Fax transmission is more easily impaired than data or short message transmission Do not place the communicator on a metal surface Check that the signal strength on the communicator display is sufficient Moving the communicator within a room especially towards a window may result in a stronger signal If signals are not stron...

Page 64: ...46 Getting started ...

Page 65: ...fine many settings For more complicated tasks like sending long touch tone sequences or modifying phone settings use the Telephone application See the Telephone chapter starting on page 93 Selection keys When operating the phone press keys one at a time The phone keypad is not functional when the cover of the communicator is open Phone Earpiece Front Back Microphone ...

Page 66: ...all cancels a dialed call or clears the display 0 9 The number and alphabet keys Tip Ifyouhavesubscribed to two phone lines you can switch between them by pressing and holding Used for creating functions The function of these two selection keys depends on the text shown on the bottom of the display See Figure 15 Note Hold the phone as you would any other mobile phone with the antenna pointed up an...

Page 67: ...e situation and previous selections Tip A press of the key will return the display to stand by mode Often you must confirm the selection by pressing OK If available you can use Back command to return to the previous menu level without making any changes Display indicators The display indicators inform you about the current operation of the phone The indicators described on the next page are shown ...

Page 68: ...rt messages You have received one or several new faxes Infrared transmission is active Call forwarding is active Make a call To make and receive calls the phone must be switched on the communicator must have a valid SIM card fitted and you must be located in a service area of the wireless system Tip When a call is active you can use the and keys to lower or raise the volume level of the earpiece 1...

Page 69: ...memory by the name with which the phone number was stored For more information see Call a number in the telephone directory on page 94 Tip To choose which memory to use press Names scroll to Optionsandpress Selecttwice Scrolltochoose Device SIM card or a con tacts database you have created and press Select 1 Press Names 2 Scroll to Search and press Select 3 Key in the name of the person whom you w...

Page 70: ...ey in the number of the 1 touch dial location where you have stored the phone number Press The phone will display the phone number briefly and then dial it Tip Pressing and holding dials your voice mailbox number 1 touch dialing is not possible during a call Call service numbers Your service provider may have stored service numbers on your SIM card For more information see Call a number in the tel...

Page 71: ...nctions 1 To answer the call press If you do not want to answer the call press The caller will hear the alerting tone change to a busy tone To mute the ringing tone of an incoming call press Mute Tip If the Forwardifbusy is activated to forward the calls for example to your voice mailbox declining an incoming call will also forwardthecall See Forward voice calls on page 105 2 To end the call press...

Page 72: ... off the microphone of the car kit Swap Allows you to alternate between two calls an active and a held call Transfer Enables you to connect two voice calls together and disconnect yourself from both calls See Transfer calls on page 99 Conference If one call is active and another call is on hold this option merges them into a conference call Private During a conference call Private allows you to co...

Page 73: ... the emergency number preprogramed into your communicator for example 911 or other official emergency numbers Change profiles Example If you use the Meeting profile in a meeting the phone only rings once You can use the Profiles key to adjust phone tones for the various operating environments of the communicator One profile is always in use For more detailed information on the various profiles how...

Page 74: ...ess the menu functions even during a call The phone offers a set of menu functions that allow you to tailor the phone for your particular use The menus and submenus can be accessed by scrolling the menu or using the appropriate shortcuts Scrolling the menus 1 Press Menu 2 Press either or to scroll the list of menus until you reach the desired menu 3 Press Select to access the menu If the menu cont...

Page 75: ...service in your area Third level menus are not shown Menu Function Submenus MENU 1 MESSAGES 1 Writemessage 2 Inbox 3 Drafts 4 Sent 5 Cellbroadcast 6 Service commandeditor 7 Voicemessages MENU 2 CALL LOG 1 Missedcalls 2 Receivedcalls 3 Dialednumbers 4 Clearrecentcalllists 5 Callduration 6 Callcosts MENU 3 SETTINGS 1 Callsettings 2 Phonesettings 3 Securitysettings 4 Restorefactorysettings MENU 4 FOR...

Page 76: ...d faxes or mail you must use the respective applications of the communicator interface Tip You can call the phone number while viewing the message by pressing twice 1 Press Read twice to view the message or press Exit to view it later If you view a message later press Menu 1 2 scroll to the desired message and press Read to view the message 2 While viewing the message press Options to scroll throu...

Page 77: ...have sent Cell broadcast 1 5 This system service allows you to receive SMS messages on topics that you have predefined on the communicator interface See Cell broadcast on page 245 For available topics and relevant topic numbers contact your service provider On Sets the information message reception on Off Turns the information message reception off Service command editor 1 6 Tip These requests are...

Page 78: ...d to subscribe to it first Voice mailbox number 1 7 2 In this submenu you can store and edit your voice mailbox number A voice mailbox can be a system service or your personal answering machine For more information and for the voice mailbox number contact your service provider Call log Menu 2 Missed calls 2 1 Tip Receivedcalls and Missedcalls functions are system services which work only in system...

Page 79: ...oing or incoming call in hours minutes or seconds for example 0 02 15 All calls duration 2 5 2 Shows the total duration of all calls made and received with any SIM card that you have used with the communicator Received calls duration 2 5 3 Shows the total duration of calls received with any SIM card that you have used with the communicator Dialed calls duration 2 5 4 Shows the total duration of ca...

Page 80: ...2 6 2 Last call cost units 2 6 1 shows the cost or units of the last or current call All calls cost units 2 6 2 shows the total cost or units of all calls made with the current SIM card Whichever menu you choose press Options to access the following three submenus Clear cost counters 2 6 3 1 Resets all cost counters You cannot undo the reset operation Show cost Show in units 2 6 3 2 You may select...

Page 81: ...hown on the display when in stand by mode When all units have been used no calls can be made To turn the limit off select Off Note In some systems calls to the emergency number programed into your communicator for example 911 or other official emergency numbers may be made even if there are no charging units left Note The actual time invoiced for calls and services by your service provider may var...

Page 82: ... waiting is a system service Contact your operator for subscription For more information see Answer a waiting call on page 99 Choose Activate to enable call waiting Cancel to disable call waiting or Checkstatus to show whether call waiting is active and for which call types Send caller ID when calling 3 1 5 This system service allows you to set your phone number either to be displayed or to be hid...

Page 83: ... Network technology MCN technology increases the capacity of wireless networks in urban areas The setting will remain in effect even if the SIM card is changed or the phone is switched off Welcome note 3 2 3 You can write a message of up to 44 characters which appears on the display when you switch on the phone System selection 3 2 4 The system to which you are connected can be selected either aut...

Page 84: ...or system lock etc calls may be possible to certain emergency numbers in some systems for example 911 or other official emergency numbers PIN code request 3 3 1 The options are On and Off See Security on page 230 Call restrictions 3 3 2 This system service allows you to restrict incoming calls to and outgoing calls from your phone You need a restriction password to be able to use this function Con...

Page 85: ...e the PIN code the PIN2 code and the restriction password See Security on page 230 The access codes may only include the digits 0 to 9 Lock system 3 3 6 Tip You can also press Menu and to enter your lock code In this submenu you can lock the communicator Press Select and enter your lock code The communicator locks immediately When your communicator is locked you can make emergency calls to predefi...

Page 86: ... when you have activated the Forwardallvoicecalls This system service allows you to direct your incoming voice calls to another phone number when you do not want to be disturbed or when the phone is switched off or outside the system coverage area For details see Forward voice calls on page 105 The options are Forwardallvoicecalls Forwardifbusy Forwardifnotanswered Forward ifoutofreach Forwardifno...

Page 87: ...n access in the Menu 6 Menu 6 is shown only if it is supported by your SIM card The name and contents of the menu depend entirely on the services available For availability rates and information on using the SIM services contact your SIM card vendor for example your system service provider service provider or other third party vendor You can set the phone to show you the confirmation messages sent...

Page 88: ...70 Phone ...

Page 89: ...gure 16 The communicator interface is turned on by opening the cover The application that was active the last time the communicator was used is shown on the display When you close the cover the communicator interface turns off its display and saves all data Tip When a command is dimmed it cannot be used The commands always correspond to the command buttons as shown in Figure 17 Scroll bar Commands...

Page 90: ...there is a search field at the bottom of the display you can search for items by using the keyboard to enter text into the search field Figure 17 If there is more than one frame in the view the selected one is always highlighted You can move from one frame to another by pressing the Tabulator key See Figure 18 This item is selected Details of item The left hand frame is highlighted Press the Tab k...

Page 91: ...play the application you are in at the moment as shown below The icons that appear on the Inbox Outbox indicator rows change according to the application and current situation The battery level and signal strength indicators are the same as shown on the phone display when the phone is on This is a page This is a dialog Use the Arrows key to move within a page Another page To go to it press the Men...

Page 92: ...nnection An infrared connection has been established The infrared connection is obstructed The communicator is connected to a PC The communicator is connected to a PC via cable The communicator is being used as a fax modem The communicator is in a profile in this case in the Meeting profile See Telephone Settings on page 100 Time You can adjust time in the Clock application See page 227 Applicatio...

Page 93: ... to an external power source The battery is fully charged All the four bars are displayed Signal strength The communicator is connected to a wireless system When all the four bars are shown the wireless signal reception is good If the signal is weak make sure the antenna is up You can also try to improve the reception by moving the communicator slightly or by using it in the handsfree mode The pho...

Page 94: ...e buttons are Desk Telephone Messaging Internet Contacts Calendar Office and Extras To use the applications When the cover is opened the application that was active the last time the communicator was used is shown on the display To switch to another application or application group press the corresponding application button You can even do this during a call You need not exit an application before...

Page 95: ...an application group as the preferred application or a link on Desk as the preferred link and access it directly from the keyboard You can open a preferred application by clicking Ctrl the application button Example If you make the Document application preferred inside the Office application group you can press Ctrl Office within any application to open Document To make an application preferred op...

Page 96: ...enerates shortcut commands See Shortcuts on page 82 In writing and editing text the Shift key and the Arrows key can be used to select text see Shortcuts on page 82 Control Ctrl Pressed together with other keys on the keyboard the control key generates shortcut commands which can be used in viewing and writing text See Shortcuts on page 82 Character Chr Press the character key to open a character ...

Page 97: ...ontain the generic option Settings Arrows key Tip In the WWW browser application use the Arrows key to move a pointer around the display See page 163 The Arrows key can be used to move the cursor or selected frame Enter When the cursor is shown pressing Enter moves the cursor to the beginning of the next text line or adds a new line Enter can also be used to open folders applications and documents...

Page 98: ...se affect all the selected items Multi selection works in most lists To select items one by one scroll to the item and press and hold down Ctrl While pressing down Ctrl scroll to each item you want to select and press space bar To select a larger set of consecutive items paint the items by pressing and holding Shift using the and arrows on the Arrows key Multi selection is cleared when you press t...

Page 99: ...elect the special character or characters then press Insert Insert special characters from the keyboard There are two ways to insert special characters directly from the keyboard To insert a character printed on the keys in green press and hold the Chr key and simultaneously press a key with a special character printed in green To generate special characters by using certain unmarked keys for exam...

Page 100: ... Ctrl v Ctrl z Selects all Copies selected text Cuts selected text Pastes selected text Undoes the last action Ctrl b Ctrl i Ctrl u Applies bold Applies italics Applies underlining Ctrl t Ctrl d Full screen mode if available Deletes files messages shortcuts and other items Ctrl p Print or Properties Ctrl n Ctrl o Ctrl e Creates a new file Open Close Ctrl s Ctrl Shift s Save Save as Chr left right ...

Page 101: ... following commands become available in the dialog OK Confirms the name of the document and saves the document Browse Opens a dialog in which you can browse for a location where you save your file Chr Ctrl up down arrow on Arrows key Moves to start or end of document Shift Ctrl left right arrow on Arrows key Selects the previous or next word Shift right left up down arrow on Arrows key Selects one...

Page 102: ...t Asafax You can send the document as a fax Asamail You can send the document as a mail message Asashortmessage You can send the document as a short message Viainfrared You can send the document via infrared Note When you open a document the document is opened in the appropriate editor or viewer The commands vary according to the editor viewer Search for text You can search for text strings in the...

Page 103: ...4 Press Replace or Replace all Check spelling Note You can spell check only English text and words You can check words and text for spelling in the applications where Spellcheck is available on the Menu list To be able to use this function you first need to install the Spell checker from the CD ROM found in the sales package of your communicator For details see Install software from the CD ROM on ...

Page 104: ...y the page setup press the Menu key and select File Printing Pagesetup To preview the document before printing it press the Menu key and select File Printing Printpreview To print a document or a file 1 Press the Menu key and select File Printing Print A note appears showing the print range connection type and printer used 2 Press Print A dialog opens To change the printing options press Options 3...

Page 105: ...red sensors or the communicator is moved printing is interrupted For details on infrared connection see page 90 Log Log contains information about the communication history of your communicator The log shows all or certain types of communication events in chronological order With log files you can monitor your communications use the information to create or complete contact cards or reply directly...

Page 106: ...ct to your Contacts directory Check the command buttons for available options View only certain communication types 1 Press Filter by type to choose a communication type you want to view Press Filter by direction to choose whether you want to view communications originated by you or by the remote party 2 Select from the options 3 Press OK Erase the contents of the log Log events remain in the log ...

Page 107: ...n the sales package Or Prepare the communicator and the computer for an infrared connection For more information see Activate the infrared connection on page 90 4 If the CD ROM user interface does not open automatically double click the file Nokia9290 exe in the CD ROM file structure 5 Select a program you want to install from the CD ROM user interface and click Install Tip See the Add on Applicat...

Page 108: ...t Tools Receiveviainfrared 1 Make sure that the infrared port of the communicator faces the infrared port of the other device 2 To activate the infrared connection press Chr the key with the infrared symbol this key is on the right hand side of the keyboard next to the Enter key 3 To end the infrared connection press Chr again ...

Page 109: ...WWW link to the official Nokia web site You cannot select more than one link at a time You can delete Desk links only in the Desk application Tip You can change the order in which a link appears Select the link press the Menu key and select File Move Using the Arrows key move the link across the display and press Place here Figure 24 Add a link Tip To view and change the icon label or parameters o...

Page 110: ...he main view of Desk Change the background image You can also customize the background image of the Desk main view 1 Press the Menu key and select Tools Settings A dialog opens 2 Define the following Backgroundimage The options are Yes No Imagefile Press Change to browse for an image Press Preview to view the image 3 Press Done Note The image file you choose as a background image should be scaled ...

Page 111: ...wireless system Some of the operations explained here can also be made using the cover of the communicator Note Opening or closing the cover does not affect active phone calls If you have made a voice call using the Telephone application and you close the cover you can continue the call with the cover phone Make a call manually Tip To disable the handsfree mode press the Menu key select Settings C...

Page 112: ... you can also press the shortcut keys Chr Tel 2 Press Call If the contact has more than one phone number a list opens listing all the contact s phone numbers Choose a number from the list and press Call Tip You can zoom in and out to either make the text more readable or fit more entries on display Press the Menu key and select View Zoomin or Zoomout Figure 26 Call a number in a recent calls list ...

Page 113: ...e volume Figure 27 Tip The caller s name appears in the note if the telephone number is sent with the call and if the caller s number is listed in your Contacts directory 1 When you receive a call and the communicator cover is open a note about the incoming call appears To answer the call press Answer or close the device cover and answer the call via the cover phone 2 If you do not want to take th...

Page 114: ...ave more than one voice mailbox a dialog prompts you to choose a mailbox from a list You can also create additional voice mailboxes as follows 1 Contact your service provider for a number to use with an additional voice mailbox 2 Press the Menu key and select Settings Voicemailboxes 3 When the Voicemailboxes dialog appears press Add Type a name and number Record a call You can record the conversat...

Page 115: ...2 Press New call and make the new call The previous call will be put on hold 3 To switch between calls use the Arrows key The active call is framed with a dark line The command buttons change according to the status of the selected call For example a call on hold can be changed to an active call by highlighting it with the Arrows key and then pressing Activate Figure 28 4 To end a call select the ...

Page 116: ...sons into a conference call press Conference call The display shows a single conference call Press Conference commands to list the two participants of the conference call 5 To include another person press New call The conference call is put on hold When the person answers the call press Conference call This new person is included in the conference call 6 To include further persons repeat step 5 Ti...

Page 117: ...lls Contact your service provider to check if this service is available When you have one call on hold and another call active or an outgoing call alerting press the Menu key and select Call Transfer to connect the calls together Note You may be charged for some of the cost of the transferred call contact your service provider for details Note You can only transfer voice calls Fax data or conferen...

Page 118: ...mmand button selection is needed before starting to type the digits Each keystroke generates a touch tone which is transmitted while the call is active Alternatively 1 Press Send tone The touch tones sequences you have stored in the contact card of the person you are talking with are shown For information on how to store touch tones sequences see page 122 2 Select a touch tones sequence You can ed...

Page 119: ...ofile from the menu list Figure 30 To select and modify a profile press the Menu key and select Settings Profiles The profiles provided with your communicator are Normal The default profile of the communicator Silent You can set this profile on when you want all the alert tones to remain silent except Clock and Calendar alarms see Note on page 102 Meeting You can specify how the communicator opera...

Page 120: ...mains on in all profiles including Silent Create a new profile 1 To create a new profile press the Menu key select Settings Profiles and press New The current values of General profile are copied to the new profile 2 To modify the settings of any of the profiles highlight a profile name and press Edit A dialog with four pages opens as shown in Figure 31 For each of the pages define the following F...

Page 121: ...ion about attaching a ringing tone to a contact card see Attach a ringing tone on page 120 Alerts page Clockalarm Calendaralarm ReceivedSMS and Receivedfax Choose a specific sound for each of these situations to alert you Highlight an option then press Change to choose from sound files provided with the communicator or browse for other sound files To adjust the volume of an alarm press Volume Noti...

Page 122: ...You can assign 1 touch dials to eight phone numbers An example is shown in Figure 32 1 Press the Menu key and select Settings 1 touchdials 2 To assign a number to a 1 touch dial location or to change an existing number press either Add number or Change number You see a list of contacts from the contacts database in your communicator s internal memory 3 Highlight a contact card and press Select Whe...

Page 123: ...lect Settings Systemservices 2 For example to check the setting of Forwardifbusy select Callforwarding highlight it with the Arrows key then press Check status While the communicator is making a request to the system a query note is shown on the display 3 After a successful request the new status now appears in the settings list Figure 33 Forward voice calls Voice call forwarding allows you to dir...

Page 124: ... In a single action this option turns on forwarding of Forwardifbusy Forwardifoutofreach Forwardifnotanswered 3 Press Change and select one of the following options To Type the number to which you want to forward the calls Default voice mailbox Calls are forwarded to your voice mailbox If you have more than one mailbox you must choose one from a list shown to you See page 108 for more information ...

Page 125: ...rnate line system service voice call restriction applies only to the Selectedline Note If voice call restriction is in use calls to emergency numbers such as 911 can still be made To cancel all call forwards or restrictions press Cancel all Other system services 1 Press the Menu key and select Settings Systemservices Otherservices 2 Other system service settings contains the following options Syst...

Page 126: ...on on voice mailboxes see page 96 1 Press the Menu key and select Settings Voicemailboxes 2 To change the settings of a voice mailbox highlight it and press Edit A dialog with two pages opens See Figure 34 Figure 34 Properties page Define the following options Name Type a descriptive name for the mailbox Number Type a number for the mailbox obtained from the system service Note The type of voice m...

Page 127: ...cover Press Change to toggle On Off Automaticredial When this setting is set On and you call a number that is busy or does not answer the communicator attempts to call the number until the call is connected Press Change to toggle On Off Advanced settings 1 Press the Menu key and select Settings Advanced 2 Define the following options Call costs page Tip To see the phone serial number press the Men...

Page 128: ...cimal number for the price of each charging unit You must also complete the Currency field above Maximumcostlimit You have two options Nolimit or a value that you can define in the field You can define the limit in either units or in currency If you are in a call when the cost limit is reached the call ends You cannot make any more calls You see a note on the display before and after the call limi...

Page 129: ...rvices from your service provider may vary depending upon system features rounding off for billing taxes and so on Fixed dialing page Fixeddialing is a system service which allows you to restrict your calling to a limited set of numbers stored in the SIM card The service is offered by some service providers When the fixed dialing service is active the SIM phone book list shows only numbers in the ...

Page 130: ... dialing is set to on calls may be possible to certain emergency numbers in some systems such as 911 or other official emergency numbers Line selection page If you need two lines phone numbers for your communicator you must subscribe to the alternate line system service and check that this feature is activated in your communicator If this service is unavailable or you do not use it the Line select...

Page 131: ...election Allows you to block the changing of the selected line The values are On Off Changing the value requires you to enter your PIN2 code Note Block line selection option is only provided by some service providers Flight profile The flight profile prevents you from accidentally turning on the phone in an aircraft To select the flight profile 1 In the Telephone main view press the Menu key scrol...

Page 132: ...profile has been selected emergency calls must be made from the phone close the communicator cover 1 Press The phone display will read Flightprofileisactive 2 While the note is visible for approximately five seconds you can dial an emergency number preprogramed into your communicator for example 911 3 Press IMPORTANT Never use the phone when in an aircraft If the aircraft personnel allow use of th...

Page 133: ...abase is in the communicator s memory You can also store contacts in the SIM card and in databases on an attached memory card You can synchronize your contacts with Microsoft Outlook Lotus Notes and Lotus Organizer programs when you connect your communicator to a compatible PC For information on synchronizing your contacts with a PC see the PC Suite Guide on the sales package CD ROM Contacts direc...

Page 134: ...pen An individual contact card contains the information of one person A group contact card contains more than one contact person You can see the name of a group contact card in bold font in the list Contacts are listed by name You can change the sort order of the list See General page on page 128 You can create more than one contacts database in a memory card For more information see page 130 Note...

Page 135: ...card press Done Note The 1 touch dial icon next to a contact card telephone number means that you have defined a 1 touch dial for that telephone number with the Telephone application Figure 40 Open a contact card Tip To copy or move a range of contacts select the contacts press the Menu key and select File More options Copyto or Moveto 1 In the Contacts main view with the left hand frame highlight...

Page 136: ...ntered are displayed 2 Using the Arrows key select a contact and press Open Notes on using the search field A search checks the most important fields in a contact card The matching of search criteria is limited to the beginning of words For example to search using the characters Ann finds Annabel but not Joanne Example john carr florida edu or http florida edu john carr The search also checks the ...

Page 137: ...o rename the field the Rename field command button is dimmed Information on fields Company Firstname Lastname Suffix Title MiddleName Jobtitle Birthday You can have only one of each of these fields Telephone number fields Storing a plus character before the country or region code allows you to use the same phone number abroad Enter mobile phone numbers in this field to send short messages Country ...

Page 138: ... communicator Note To use personal ringing tones this feature must be active in the profile that you are using For more information see Create a new profile on page 102 Insert a picture Tip Todefineyourdefault folder go to Control panel and open the Default folder application 1 Open the contact card 2 Press on the Arrows key to select the picture frame on the right hand side of the card Press Inse...

Page 139: ... Tools Cardtemplates A list of templates opens 2 Either press New to create a new template or move to an existing template in the list and press Open A contact card template opens 3 Edit the template You can change the name of the template and add or remove fields After you have created a contact card the card and its template are linked as follows In a template if you add or change fields or thei...

Page 140: ... 3 Scroll down the list to Touchtones and press Select The touch tone field is inserted in the contact card 4 Enter a touch tone sequence in the touch tone field If you need a phone number touch tone combination number for a contact store the phone number followed by the touch tone sequence in the Tel field You can use the following non numeric characters Character Function The asterisk and hash s...

Page 141: ...p press Add member A list of contact cards and groups opens 4 Select a contact and press Add Note that you can add another contact group to a group 5 To attach a picture for the group press on the Arrows key to move to the picture frame Alternatively press the Menu key and select Group Insert picture A dialog displaying the contents of the default folder opens Select a file and press OK or press B...

Page 142: ...3 1 To view or change the groups to which a contact or a group belongs open the contact card press the Menu key and select Card or Group Belongstogroups A list opens showing memberships for the contact or group 2 To add the card to a new group press Add to group A list of contact groups in the current database opens 3 Select a group and press Add Your contact card or group contact card is added to...

Page 143: ...g opens as shown in Figure 44 If fixed dialing is active the SIM contents show only your fixed dialing numbers For more information on fixed dialing see page 111 2 The memory location shows the first free location number To change the location press Change 3 Type a name for the contact 4 Type a number for the contact Note The length of the name and the phone number you can enter is defined by the ...

Page 144: ...ation about fixed dialing numbers Send a contact card as a business card Tip You can send only one business card in each message you send however you can send it to many recipients When you send or receive a contact card between the communicator and other devices the term business cards is used A business card is a contact card in a format suitable for transmission usually vCard format You can add...

Page 145: ... messages press Recipient Tip If you change the setting to include images in the message do not forget to change it back after you have sent the message to reduce call charges 4 If you are sending via the short message service the images are left out by default to reduce call charges If you want to include the image in the message you must change the setting See Send as a short message page on pag...

Page 146: ...ress Delete Settings Press the Menu key and select Tools Settings then select a page as follows General page Figure 47 Defaulttemplate Allows you to define which template is used when creating a new contact card When you press Change you can choose a template from a list of templates used with the current database Namedisplay Allows you to define the display order of names in the Contacts director...

Page 147: ...s support the vCard format Sendingformat Allows you to define the format used when sending a business cardviatheshortmessage service Thevaluesare Compact vCard Compactis more widely supported but the number of fields sent is more restricted Use vCard format if you know the receiving device understands vCard format Using vCard format you can send all fields except Note and touchtones Sendcontactcar...

Page 148: ... 3 To add a new card to the new database select and open the database in the Contacts directory then press New card To copy or move contacts to the new database select existing contacts from the Contacts directory press the Menu key and select File Moreoptions Copyto or Moveto Tip To see a summary of the usage of the database press the Menu key and select File Properties Figure 48 Note If you have...

Page 149: ... lunches Appointment entries are the basic entries in your calendar Event entries are related to the whole day not to a specific time of day Event entries do not appear in the Weekly time schedule Anniversary entries are repeated annually on the same date Use Anniversary entries for annual reminders of important dates such as birthdays or celebrations Tip You can use the standardclipboardcommand s...

Page 150: ...Menu key and select File Newentry Select the entry you want to create The options are Appointment Event Anniversary or Task This is the way to create a new calendar entry when you do not want to use the default entry type for the particular view Define information in a calendar entry Tip To change the default values of an entry details dialog press the Menu key and select Entry Default settings Fi...

Page 151: ...ry starts depending on the entry type Example The start year may be a person s year of birth and the number of years since the start year may be a person s age Displayyear Displays the start year of the anniversary the number of years that have passed since the start year or no year information The options are Starting year Innumberofyears None Duration The duration of the entry If you change the ...

Page 152: ...g Monthlybyday On this page you can determine whether and when you want an entry to be repeated Repeattype The repeat type for the entry The options are Norepeat Daily Workingdays Weekly Monthlybyday Monthlybydate Yearlybyday Yearlybydate Note Define Repeattype first since the choice of options in the rest of the fields depends on what you have selected Repeatondays The days on which the entry is ...

Page 153: ...nces Thisandpastoccurrences Status page On this page you can define a background color and status for the entry as well as specify whether you want to synchronize the entry Tip Color is a handy way to categorize entries you see more easily how your time is reserved Color marking Allows you to define the color and letter for the entry symbol which appears after the text of the entry in all views Wh...

Page 154: ...m or redefine how the entry is repeated in the calendar See Define information in a calendar entry on page 132 Change an entry type Example You might have entered an event but you now want to change it to an appointment 1 Select the entry in the view 2 Press the Menu key and select Entry Changeentrytype 3 Choose a new entry type from the list Tip To change the default entry type of a particular vi...

Page 155: ...yed with a suggested range of entries to be deleted 2 Press OK to delete all the entries defined in the dialog box at step 1 or press Options to define further criteria including whether you want to move or to delete A dialog with two pages opens Define the following and press Done to return to the previous dialog Details page Action The consequences of removing the entries The options are Delete ...

Page 156: ...iews The purpose of each view is to help you organize your calendar so that you manage your time effectively on a daily weekly monthly and yearly basis You can customize the display of each view Commands in all views Tip In most of the views you can go to today s date by pressing the Space key on the keyboard The following command buttons are available in all of the views Edit Opens a selected cal...

Page 157: ... active If you are in the left frame go to the desired date and press the Enter key The focus moves to the right frame One row in the day table equals one week Abbreviations for the days of the week are in the highest row See Figure 52 Dates that have scheduled events are marked in bold and blue The currently selected date is highlighted Right frame Tip To see a list of icons that are displayed in...

Page 158: ... the title box from left to right presstheMenu keyand select View Viewsettings See Titlelocation in View settings on page 147 The week view shows the events for the selected week in seven day boxes The colored indicator area next to a day box shows the date and name of the day Today s indicator area is framed green See Figure 53 Day view Figure 54 The day view shows the events for the selected day...

Page 159: ...Enter Task lists Figure 55 Tip To see how to do task lists are created see page 144 You can create one or several business or personal task lists which may contain tasks with or without deadlines You can also set an alarm or a repeat for a task The page number in the upper right corner of the Task list view indicates the position of the task list among the other task lists For example in Figure 55...

Page 160: ...es and a red bar for business trips to get a quick overview of your activities during a week See View settings on page 147 If a time box contains entries the bar across the bottom of the weekly time schedule shows the details of the entry The numbers to the right of the entry description indicate the number of entries contained in that time box For example 1 2 in Figure 56 means that you are seein...

Page 161: ... the far left column Time boxes have the same functions as in the Weekly time schedule Anniversaries Figure 58 Tip Tochangethenumber of months shown in the anniversary view press the Menu key and select View Viewsettings See Monthsin view in View settings on page 147 The anniversary view shows the anniversaries for four months at a time You can add here all the birthdays and other anniversaries th...

Page 162: ...with high importance Task with low importance Untimed entry Task lists Create a new task list 1 Press the Menu key and select File Newtasklist A dialog with two pages opens 2 Define the task list on the two pages of the dialog See Details page and Visibility page below 3 When you are ready press Close The new task list is added in Task lists ...

Page 163: ... tasks on the list will be shown The options are Allviews Tasklistview Taskposition The position of the tasks in an event list if the tasks are all shown in Allviews Edit a task list 1 Open the task list 2 Press the Menu key and select View Tasklistsettings A dialog with two pages Details and Visibility opens as explained above Delete a task list 1 Open the task list 2 Press the Menu key and selec...

Page 164: ...ing point of the search Entry types page Choose the type of entries you want to find The options are Appointments Events Anniversaries Tasks Tip You can stop a search by pressing Stop 3 To start searching press Find A chronological list of the find results is shown See Figure 59 Figure 59 4 Select an entry and press Edit to open the entry details dialog for editing Go to to go to the date or view ...

Page 165: ... 3 Press Done to return to the currently active view View settings You can define the appearance of the view and default entry types for each view by following these steps 1 Go to the view you want to define 2 Press the Menu key and select View Viewsettings A dialog with two pages opens 3 Define the view settings on the two pages of the dialog See Details page and Entry types below 4 Press Done to...

Page 166: ...slot of the daily views and weekly time schedules The options are 2hours 1hour 30 minutes 15minutes Daystarts The time when a day starts in the Daily view Dayends The time when a day ends in the Daily view Showcolormarkings Specifies whether all entry symbols or only symbols with the letter specified in Defaultcolor are shown in the year view Defaultcolor The symbols and background colors of the d...

Page 167: ...ith small screen displays and limited amounts of memory WAP uses mainly text but does support pictures To connect to the Internet the wireless system you use must support data calls the data service must be activated for your SIM card you must have obtained an Internet access point from an Internet Service Provider ISP and you must have entered the proper Internet settings Note The Mail applicatio...

Page 168: ...sage via SMS This might reduce the number of settings you need to enter yourself or eliminate the need altogether Please contact your Internet Service Provider ISP for details Internet connections To set up and change the Internet settings go to the Control panel in the Extras application group and open Internet access For more information see page 230 Figure 60 The first two lines contain a summa...

Page 169: ...t connections may appear inactive but they may still be sending and receiving data in the background These connections may delay the start of the inactivity period specified here and therefore postpone the closing of the connection Ask before connecting The options are Yes No If you choose Yes a connection dialog appears every time you connect to the Internet asking you to either confirm change or...

Page 170: ...ve a descriptive name for the connection Tip All your connections should have different names Phone number The modem telephone number of the IAP Tip Often the minimum requirement for an Internet connection is Phonenumber Username and Password Passwordprompt If you must type in a new password every time you log on to a server or if you do not want to save your password choose Yes The options are Ye...

Page 171: ...so that some ISPs require the use of Web proxies Contact your ISP to determine proxy details When you have made an Internet connection for your company s intranet and you are unable to retrieve Web pages from the general WWW you may need to setup a proxy server to retrieve Web pages outside your company s intranet Tip If you set Useproxy server to No Portnumber Proxyserver and Noproxyfor are dimme...

Page 172: ...tivate it for your SIM card Remotemodemtype The options are Analog V 110ISDN V 120ISDN This setting can depend on both your GSM service provider and ISP because some GSM systems do not support certain types of ISDN connections For details contact your Internet service provider If ISDN connections are available they establish connections more quickly than analog methods Tip A very basic GSM data co...

Page 173: ...Yes No Note Charges may apply for certain types of received calls such as roaming and high speed data calls Contact your GSM service provider for more information Note If you are not using HSCSD the communicator expects the callback call to use the same data call settings that were used in the callback requesting call The system must support that type of call in both directions to and from the com...

Page 174: ...you have problems with establishing a connection try setting this to No Contact your Internet service provider for guidance See Figure 65 Figure 65 Script options If you need to define script options for your Internet connection press Script options on the Other page A script can automate the connection between the communicator and the server See Figure 66 Tip Your Internet service provider may be...

Page 175: ... script dialog you can press Import script to import a script On importing it replaces the current contents of the script file Define the following Useloginscript The options are Yes No Displayterminalwindow The options are Yes No If you choose Yes once a connection is established you see the execution of the script Use this window when resolving connection problems related to scripting with your ...

Page 176: ...ls here AutoretrieveDNSaddress If you select Yes the DNS Domain Name Server address is obtained automatically from the server The options are Yes No PrimaryDNSaddress The IP address of the primary DNS server SecondaryDNSaddress The IP address of the secondary DNS server Note If you need to enter the IPaddress PrimaryDNSaddress or SecondaryDNS address contact your Internet service provider to obtai...

Page 177: ...other harmful software For information on software installation and security certificates see Date and time on page 235 Figure 68 To open the WWW browser 1 Press the Internet application button on the communicator keyboard 2 Select the WWW application and press Open Unless you have already redefined the default homepage a Nokia 9290 link page opens This page is located in the memory of your commun...

Page 178: ...ect from the Internet is to close the cover and press the key 5 To disconnect from the Internet in any of the Internet applications press the Internet button on the keyboard then press Disconnect Disconnection is immediate Note Depending on the network configuration and load establishing an Internet connection may take a minute or more Open a Web page There are several ways to open a page in the W...

Page 179: ...ne number of the Internet access point you are using is displayed See Figure 69 You can also choose not to see the connection dialog when the connection is made see Internet connections on page 150 To change the Internet access point press Change connection Press OK to establish a connection Note If the page and its components are encrypted by a security protocol the security icon appears on the t...

Page 180: ...ks view Close Closes the WWW browser application Note Stored passwords to individual Web sites are removed when the communicator is restarted or the cookie list is emptied To clear the cookie list press the Menu key and select Tools Deletecookies Tip To go to your home page press the Menu key and select Navigation Goto homepage Browse with the keyboard The best way to browse a page and the WWW is ...

Page 181: ...e previous form element on a page Selects the next link on a page Selects the previous link on a page Selects the next heading on a page Selects the previous heading on a page Selects the next element on a page Selects the previous element on a page Selects the next frame if available Chr up down arrow on Arrows key Ctrl left right arrow on Arrows key Ctrl up down arrow on Arrows key Scrolls the p...

Page 182: ...ing options Depending on the number and size of images and other elements some web pages may be slow to load To control loading you have the following options Reload the page or stop loading altogether press the Menu key and select Navigation Reload Reload or Stop Turn off the auto loading of images The images are then replaced by placeholders Press the Menu key and select Tools Settings go to the...

Page 183: ...s in high contrast Some Web pages use colors which make reading difficult Viewing pages in high contrast makes them easier to read Press the Menu key and select View High contrast View pages offline To view local downloaded pages in your communicator without accessing the WWW press the Menu key and select File Browse Offline WWW settings To change the WWW settings press the Menu key and select Too...

Page 184: ...ou wish to be prompted each time a cookie is stored The options are Always Never Ask Tip To empty the cache immediately press the Menu key and select Tools Clear cache Note As cookies accumulate with time they may eventually take up a large amount of memory space You can free memory space by deleting the cookies stored in the memory Empty cache on exit If you select Yes the cache memory is emptied...

Page 185: ...as been installed press the Menu key and select Information Plug ins Plug ins can display documents that the WWW browser itself cannot show such as multimedia clips You can download plug ins from the WWW Bookmarks The Bookmarks view can be accessed by pressing Bookmarks in the main view of the WWW application See Figure 70 The Bookmarks view lists links to WWW pages in related folders You can orga...

Page 186: ...ookmark to your Bookmarks list 1 On an open Web page press the Menu key and select Tools Add bookmark 2 Edit the name and address of the bookmark if necessary 3 Press OK Export the Bookmarks list In the Bookmarks view press the Menu key and select Bookmarks ExportasHTML to export the current Bookmarks list as an HTML document Note When you export bookmarks as HTML the folder structure is lost WAP ...

Page 187: ...needtodefine WAPaccesspointsinyourcommunicator WAP access points are additional to the Internet settings You can receive WAP access points directly via a short message from your WAP service provider or define them manually This chapter contains instructions for manual setup Certain bookmarks can be accessed through a specific access point for example banking services may have to be accessed throug...

Page 188: ... Press the Menu key and select Tools WAPaccess A dialog opens 3 Press New to create a new connection and Edit to edit an existing connection A dialog opens See Figure 73 Figure 73 4 Press Close when you are ready Tip Theshortcuttodefine and edit WAP access points is Ctrl Shift X Name Name of the connection All your connections should have different names You can define each name freely Secureconne...

Page 189: ...e IP address that the required WAP gateway uses Changing WAP access points 1 To change WAP access points press the Menu key and select Tools WAPaccess A dialog opens 2 Press Change to change the connection A list opens 3 Choose the connection from the list and press OK Bookmarks The Bookmarks view is the main view of the WAP application You can organize edit and view these bookmarks in the same wa...

Page 190: ...The shortcut to go to the home page is Ctrl H Go to the WAP application home page Press the Menu key then select Goto Homepage Tip The shortcut to open a URL is Ctrl O Open a URL press the Menu key then select File Openpage A dialog opens Enter the address of the URL for example www nokia com Once the WAP page is opened use the and arrows on the Arrows key to scroll the view and to choose hyperlin...

Page 191: ...le on the communicator as your home page Java The Java in the Nokia 9290 Communicator is a Personal Java application environment designed especially for the communicator Java enables you to use Java applications downloaded from the Internet Java Software Development Kit SDK is available in Forum Nokia ...

Page 192: ...174 Internet ...

Page 193: ...our SIM card Tip To set Internet settings see page 150 To set Mail settings see page 188 You must have obtained an Internet Access Point IAP from an Internet service provider You must have entered the proper Internet and Mail settings The short message center number must be stored in the settings of the SMS application Contact your home service provider for details When you connect your communicat...

Page 194: ...olders in the Messaging main view are Inbox Received faxes and short messages Received mail appears in the Remote mailbox folder Outbox Messages which are waiting to be sent from the communicator Drafts Saved message drafts Sent Messages which have been sent from the communicator Any remote mailboxes that you set up appear at the bottom of the folder list Open folders and messages To open a folder...

Page 195: ...the folder 5 Press Create The new folder appears on the folder list To move faxes mail and short messages from one folder to another select the file press the Menu key and select Edit Move To search faxes mail and short messages for names dates time or any other pieces of text press the Menu key and select Tools Find For further details see Search for text on page 84 Sort messages and faxes You ca...

Page 196: ...y and possible attachments Here are some of the icons that you may see new mail in remote mailbox new ringing tone new fax new remote configuration data new short message SMS unread mail new voice mail message unread mail received from PC by synchronization new message from your system service provider priority high new business card priority low new calendar invitation message contains an attachm...

Page 197: ...quest The mail fax or short message will be sent only if you specifically press Send now in the Outbox view Waiting The fax or short message is queuing to be sent and will be sent as soon as possible for example when the phone is switched on signal strength becomes adequate or the previous phone call ends In the case of mail messages Waiting shows that the message will be sent the next time you co...

Page 198: ...it and press Cancel sending When a message or fax has been successfully sent it is automatically moved to the Sent folder Write and send faxes mail and short messages There are two ways you can start creating faxes mail and short messages in the Messaging application Tip If you are already writing a message or fax and want to start on a new message press the Menu key and select File New shortmessa...

Page 199: ...this is not possible with short messages Select recipients There are two ways to select recipients to your fax mail and short messages Note A fax can have only one recipient 1 Press Recipient in the corresponding message editor A dialog listing your contacts opens see Figure 79 Figure 79 Tip You can select more than one contact at a time see Select several items at once on page 80 2 Search for a c...

Page 200: ... and press Select Checked recipients are moved to separate lines in the header of the message Note that a fax can have only one recipient 4 To add another recipient to a mail or short message press Enter after a checked recipient or insert the semicolon as a separator To delete a checked recipient move the cursor to the end of the entry and press backspace Avoid low memory You should regularly del...

Page 201: ...he store in use press Change To move the message storage from communicator s memory to a memory card or vice versa press Move To delete all the messages in the selected message storage press Delete Tip See Mailattachments on page 197 to delete at tachments from received mail messages WARNING Deleting the message storage deletes permanently all messages and mailbox folders and restores all messagin...

Page 202: ...en the fax will be sent select Scheduled in the Sendfax option 4 If you wish to adjust the sending options of the fax press Sending options 5 For details see Fax settings on page 187 6 Press Send Note Voice calls are not possible when a fax is being sent or received Fax cover page Tip To define the default format of the header in your faxes you want a cover template to be attached to the faxes see...

Page 203: ...d fax press the Menu key and select File Forward Faxes are received automatically provided that this service is available and that the phone is turned on and within system coverage When a new fax is received you hear a tone unless the system is set to a silent profile and an information note is shown on the display Tip You can zoom and rotate in the fax viewer Each press of Rotate rotates the fax ...

Page 204: ...holedocument Currentpage Selected User defined Press OK A dialog opens 2 Specify the name and location of the new document To change the format of the new document press Change format 3 Press OK to save the exported fax file Fax polling You can retrieve faxes from a remote fax box by using Fax polling if available in the system It allows you to make a fax call to a fax machine and then receive inf...

Page 205: ...dition to the options above the option list may contain other cover templates saved in the Templates folder Sendfax Defines when the fax will be sent The options are Immediately Uponrequest Advanced page Resolution The resolution of the sent and received faxes The options are High Standard ECM Defines whether or not the Error Correction Mode is used when faxes are sent If set to On any pages conta...

Page 206: ... you must do the following You must configure an Internet access point IAP correctly See Setting up your Internet access point on page 150 You must define your Mail settings correctly See Mail settings on page 188 Note Follow the instructions given by your remote mailbox and Internet service providers Mail settings Any changes you make to mail settings affect the way your mail is sent and received...

Page 207: ...n you try to read mail in your remote mailbox Mymailaddress Type in the mail address given to you by your service provider The address must contain the character Replies to your messages are sent to this address Internetaccess The IAP connection used for the mailbox Choose an IAP from the list To create an IAP see Setting up your Internet access point on page 150 Defaultaccount Choose a mail accou...

Page 208: ...ection is established The options are Mailheaders stayonline Messages Messagesandattachments The Messages option is available only if the mailbox type is IMAP4 Max sizeofmail The maximum size of a message whichisretrieved The minimum is 1 KB and maximum 1000 KB Sync mailsinInbox Specifies the number of message headers to be retrieved from Inbox of the remote mailbox The options are All None or you...

Page 209: ...re Yes No Securelogin APOP Used with POP3 protocol to encrypt the sending of passwords to a remote mail server The options are Yes No Secureconnection TLS Used with POP3 IMAP4 and SMTP protocols to secure the connection to a remote mailbox The options are Yes No IMAP4folderpath Define the location of the IMAP mail folder here if not defined automatically This option is available only if the mailbo...

Page 210: ...ve from one insertion field to another by pressing the Tab key 4 If you wish to adjust the sending options of the mail message press Sending options A dialog with two pages opens see page 193 5 Press Send Tip You can zoom in the mail editor Note You cannot enter accented characters such as é or ä into mail addresses Recipients There are three hierarchy levels of recipients in a mail message Tip To...

Page 211: ...ullets Tip To format the font for a selected text area press the Menu key and select Format Font To set a preferred font for plain text and HTML mail press the Menu key and select Tools Preferences To align a mail message press the Menu key and select Format Alignment This opens the following options Left Center and Right Sending options Tip In the case of PC mail message see page 199 Priority and...

Page 212: ...he message will be sent The options are Immediately Upon request Duringnextconnection Retrieve mail Tip Delete mail regularly from your communicator to free up memory space For moreinformation see Avoid low memory on page 182 Mail addressed to you is not automatically received by your communicator but by your remote mailbox To read your mail you must first connect to the remote mailbox and then se...

Page 213: ...unsubscribe to remote mailbox folders If your remote mailbox is of IMAP4 standard you can edit and synchronize remote inbox folders in your communicator To do this you need to subscribe to the folders and make them visible in your communicator Tip To create new folders in your remote mailbox go online press the Menu key and select File Folder You can now choose whether to Createnewfolder or Rename...

Page 214: ...Messages marked as deleted when offline will also be deleted from the remote mailbox server when online To delete local mail messages without deleting remote mailbox files see Avoid low memory on page 182 Reply to mail 1 Select the mail message in Inbox and press Open The mail viewer opens Tip To forward mail press the Menu key and select File Forward 2 Press Reply The mail editor opens If you wis...

Page 215: ...ages you write in the other applications of your communicator as mail attachments WARNING Mail attachments may contain viruses or they can otherwise be harmful to your communicator or PC Do not open any attachment if you are not sure of the trustworthiness of the sender For more information see Date and time on page 235 Add mail attachments Tip To edit mail attach ments press the Menu key and sele...

Page 216: ...nly messages not folders When online you can delete rename or create new folders in your remote mailbox Note Any changes you make in the remote mailbox folders while offline take effect in your remote mailbox the next time you go online and synchronize For example if you delete a mail message from your communicator when offline the message will be deleted from the remote mailbox the next time you ...

Page 217: ...ines For more information see PC Suite Guide on the sales package CD ROM Mail synchronization copies the messages between your communicator and your PC E mail program to allow you use either machine for reading and replying to messages You can convert Internet mail to PC mail so that it is synchronized with a PC or convert PC mail to Internet mail so that it can be sent directly from the communica...

Page 218: ...ending options dialog before you can convert the message to PC mail See page 200 for more information PC and Internet mail appear together in the folders 1 Select the mail message or messages you wish to convert Tip PC mail is distin guished from Internet mail by a different icon 2 Press the Menu key and select Tools Converttointernetmail or ConverttoPC mail depending on the type of mail you wish ...

Page 219: ...ssage center continues to attempt to send the message until the validity period allowed by the system expires Note If you want to send text you have written or edited in another application as a short message all embedded objects or any rich formatting will be lost You cannot send attachments as short messages either Write and send a new short message Note You cannot change the font style or forma...

Page 220: ...ress Send Receive and read short messages Tip Your Inbox shows the date of received short messages and the time of the short messages received on the current day To view when it was sent open the message in the SMS viewer Short messages are received automatically provided that this service is available and that the phone is on and within system coverage When a new short message arrives a tone will...

Page 221: ...tton SMS settings Any changes you make to SMS settings affect the way in which your short messages are sent and received 1 Press the Menu key in the main view of Messaging and select Tools Accountsettings 2 Select Shortmessage and press Edit A dialog with two pages opens Define the following General page Press Service centers which opens a dialog where you can define new message centers as well as...

Page 222: ...e to reply using your message center If you choose Yes and the recipient replies to your message the return message is sent using the same service center number This requires that the recipient has subscribed to the Short Message Service is able to a reply to a message and uses a device which supports this feature Note also that the system must support this feature Includeoriginalinreply Specifies...

Page 223: ...d edit existing text documents You can insert and view images and other files in the documents You can also send and receive documents as fax SMS mail PC mail or via infrared You can open edit and save documents created with Microsoft Word for Windows versions 95 97 and 2000 Note that not all features and formatting of the original documents will be supported Documents made with other versions of ...

Page 224: ...erent predefined or user defined styles by either modifying particular pieces of text separately or by using a template on which the style of the text is based see page 208 Change fonts 1 Press Font in the document you are creating or editing A dialog opens see Figure 85 Figure 85 2 Press Change to change the value of a list item To see the effect of the changes you have made press Preview 3 Press...

Page 225: ... names of the default styles Press Format to view a list of style values you can change 4 Press Change to change the values of the following Font Alignment Indents Tabs Linespacing Borders Bullets and Outlinelevel 5 Press Done to confirm the changes Style option Font Point size Bold Italics Under lined Justifi cation Normal URW Sans 12 pt Off Off Off Left Header URW Sans 10 pt Off Off Off Left Foo...

Page 226: ...le Templates Saveastemplate To delete a template go to File manager See page 220 Insert an object Tip To resize an image after insertion press the Menu key and select Edit Object Objectdetails 1 Press Insert object in the document you are creating or editing A dialog opens See Figure 86 Figure 86 2 Select from the list the type of object you want to insert 3 Press Insert new to open the correspond...

Page 227: ...on breakingspaces and Showhardhyphens View the outline of a document Tip To open a specific page in the document press the Menu key and select Tools Goto 1 Press the Menu key and select View Outline A tree structure of the document opens 2 To show more details press Expand To show less details press Collapse To open a selected point in the document press Go to 3 Press Close to return to the docume...

Page 228: ...ed For information on other file format conversions see the PC Suite guide on the CD ROM Workbooks Tip To add a workbook to the Desk application press theMenukeyandselectFile AddtoDesk To create a new workbook press the Menu key and select File Newworkbook To open an existing workbook press the Menu key and select File Open To save a workbook press the Menu key in the worksheet view and select Fil...

Page 229: ...nformation Each category has a set of functions which you can see from the list next to Function name Select the function you want and press Close Figure 87 Example You might want to sum up figures in cells C2 to C4 in cell C5 select cell C5 press Point reference and select the cell range from C2 to C4 Press Enter or OK to confirm the action The SUM will now appear in C5 In a formula you can enter...

Page 230: ...Press the Menu key and select Edit Select Then enter the selection range or choose a range from the list Press and hold the Shift key and increase the selection frame with the Arrows key To select entire rows or columns press and hold the Shift key and select the desired row or column headings with the Arrows key To select the entire worksheet use the shortcut Ctrl A The selection is cleared when ...

Page 231: ...e sorting Search for data 1 Press the Menu key and select Edit Find A dialog opens 2 In the Find field enter the string you want to search for Tip Pressing Options opens up the following options Searchinvalues Searchinformula Matchcase Findentirecellsonly Direction and Searchby 3 Press Find to search for the string Press Options to search the worksheet according to certain criteria Press Replace t...

Page 232: ...is necessary To diminish row height press To adjust the width or height by exact figures press Define width Figure 89 Align cell contents 1 Select the cell or cells 2 Press the Menu key and select Format Alignment A dialog opens 3 Define the following options Horizontal Vertical and Wraptexttocell Change the appearance of cell borders 1 Select the cell or cells 2 Press the Menu key and select Form...

Page 233: ... value of a list item 4 To see the effect of the changes you have made press Preview 5 Press Done to save the changes you have made Change background color 1 Select the cell or cells 2 Press the Menu key and select Format Cellappearance Backgroundcolor A dialog opens 3 Choose the color Insert page breaks 1 Press the Menu key and select Insert Pagebreak A dialog opens 2 Define the following options...

Page 234: ...me it Delete cells columns rows page breaks and worksheets 1 Select a cell within the area you want to delete 2 Press the Menu key and select Edit Delete A dialog opens 3 Choose from the list what you want to delete Go to any sheet or chart within the same workbook Tip To view sheets in the Chartsheet view press Sheets Charts 1 Press the Menu key and select View Worksheets or Sheets Charts A list ...

Page 235: ...hoose an object from the following list for editing and press OK Chart Chart title X axis Y axis X axistitle Y axistitle Legend MajorX axisgridlines MinorX axisgridlines MajorY axisgridlines MinorY axisgridlines and Series The setting dialog for the selected object opens See Figure 90 for an example of X axis settings being edited 3 To edit the object press Change or press Enter A dialog opens To ...

Page 236: ... to dismiss them Presentation viewer You can use Presentation viewer to view presentations You can also send and receive these presentations as mail or via infrared You can view documents created with Microsoft PowerPoint for Windows versions 95 97 and 2000 Note that not all features and formatting of the original documents will be supported View a presentation Press Open in the Presentation main ...

Page 237: ...title texts press Titles only To return to the standard slide show press Slide view Search for and view a slide 1 Press the Menu key and select Tools Gotoslide A list of the slides in the presentation opens 2 Go to the slide you want by using the Arrows key 3 Press Go to open the slide View the presenter s notes To view the presenter s notes along with the slides press the Menu key and select View...

Page 238: ...n contain folders from two roots the communicator and a memory card Tip Avoid saving files to therootofthecommunicator use folders instead Under the communicator root there is C Documents folder that contains four default folders Documents Downloaded Documents Photogallery Documents Templates and Documents Tones To show or hide subfolders in the folder list frame press and on the Arrows key The an...

Page 239: ...ication date of the file The files are sorted in alphabetical order by default Note Hidden files are shown only if you press the Menu key and select View Showallfiles View the contents of a folder 1 Choose a folder in the left folder tree frame and press Open A view of all the subfolders and files of the parent folder opens See Figure 93 Figure 93 2 To view any possible subfolder select it and pre...

Page 240: ...at a time Moving files and folders Tip For multi selection see Select several items at once on page 80 1 Select folders or files that you want to move and press Move in the main view of File manager A list of folders opens as shown in Figure 94 Figure 94 2 Search for a target folder with the Arrows key To hide or show the subfolders of a folder press Collapse and Expand respectively You can also n...

Page 241: ... Menu key and select File Rename The cursor now appears at the beginning of the selected file or folder name 3 Rename the file or folder 4 To confirm the changes press OK To dismiss the changes press Cancel View the properties of files folders and drives Tip In the Properties dialog you can also change a file into hidden or read only state or a folder into read only state 1 Select the file folder ...

Page 242: ...Press Options to define the search in more detail See Figure 96 Tip You can search according to time period start and end time and the file type Figure 96 Press Change to change the value of a list item When ready press Close 5 Press Find to start the search To interrupt the search press Stop 6 When the search is over press Open to open the folder or file found To start a new search press New find...

Page 243: ...on page 7 1 Press the Menu key and select Memorycard Backuptomemorycard or Restore frommemorycard depending on what you want to do A dialog opens 2 If you are making a backup look for a backup folder on the memory card by pressing Change or type in the name of a new folder in the Backupfolder field If you are restoring data to your communicator select the folder in the communicator into which you ...

Page 244: ...sword protection press the Menu key and select Memory card Security Remove password Type your password and press Remove Note Use a password that is easy for you to remember but difficult for others to guess If you forget your password the only way to use your memory card again is to format the card Formatting deletes all data from the card To format a memory card press the Menu key select Memory c...

Page 245: ... on the sales package CD ROM see Software on CD ROM Guide in the Using Nokia 9290 Communicator section of the CD ROM Figure 97 Tip Toinstallapplications see section Install Remove software on page 236 Clock The Clock shows the time and date in your home city and country or region as well as in several other cities and countries or regions in the world The Clock also includes an alarm clock To set ...

Page 246: ...keypad of the phone cover PressSnoozetosilence the alarm for five minutes 5 Press Done to accept the set alarm Change your home city If your home city and time settings on your communicator are not set correctly you must first set your home city and then set the time since your home location defines the time zone used 1 Go to the World clock main view Tip The world map shows the currently selected...

Page 247: ...calculation is executed by pressing Enter or The calculation and its result can be seen on the output sheet on the left You cannot write in the output sheet but selection is possible Figure 99 To move between the input field output sheet and function map press the Tab key The input field is never empty in the desktop calculator it contains either the result of the previous calculation or a zero 0 ...

Page 248: ...your communicator across all the applications Figure 100 To open a program for editing select it with the Arrows key and press Select Security Here you can define the phone security level of your communicator IMPORTANT The default lock code is 12345 For security reasons it isimperative that you change the lock code Keep the code secret and in a safe place separate from the communicator The codes a...

Page 249: ...mmunicator will lock The options are None 2minutes 5minutes 10minutes The last option allows you to define the number of minutes yourself When the communicator is locked you can make emergency calls to predefined numbers using the cover phone You can also answer incoming calls and make emergency calls using the Telephone application All other actions are blocked The timer is reset by any input dat...

Page 250: ...5 to 10 digits long If you enter an incorrect lock code five times in succession the phone will be locked for five minutes after which you can try again If you try again within less than five minutes you have to wait five minutes more before a code can be accepted Tip Changing the restriction password requires that the phone is on and the Call restriction service is activated for your SIM card Res...

Page 251: ...ceiving calls when roaming International except to home country When activated prohibits making international calls to all countries except to the country that has been defined as the home country Note Calls described here as international may in some cases be made between regions of the same nation Certificate manager With Certificate manager you can manage digital certificates which you use when...

Page 252: ...ficates and their validity information Note Certificates have a restricted lifetime If a certificate is marked Expired evenif itshouldbeValid checkthatthe dateandtimeinyourcommunicator are correct Define the usage of the certificate 1 Select the certificate and press View details A dialog with certificate details opens 2 Press Trust settings A dialog opens 3 If you want this certificate to be able...

Page 253: ...ertificate belongs 3 Scroll the dialog until you see the Fingerprint field 4 The Fingerprint field uniquely identifies the certificate Contact the help desk or customer service of the owner of the certificate see step 2 above and ask for the MD5 fingerprint of the certificate Compare the fingerprint with the one shown in the dialog If they match the certificate is authentic Note Use this authentic...

Page 254: ...nformation see Install Remove software on page 35 Internet access Here you are able to edit create new and delete existing Internet access points For details on how this is done see the Internet section of the Settings checklist delivered in your sales package For details on IAPs see Setting up your Internet access point on page 150 Profiles Here you can edit profiles Profiles define the tones and...

Page 255: ...l rise to the level defined in Brightness as soon as any key is pressed again The options are 15sec 30sec 45sec 1min 2min Tip Selecting a low brightness level and a short time period for the last two options saves the battery and increases the operation time of the communicator Screensaver A time period after which the display will blank out if the device remains inactive The options are 2min 4min...

Page 256: ...ar kit settings Automaticanswer Allows you to define whether the automatic answering is on or off when your communicator is attached to the car kit Defaultprofile Allows you to choose the profile that will be automatically selected when you attach your communicator to the car kit Headset settings Coverdisplaylights Allows you to define whether the cover display lights are always on or not when the...

Page 257: ... of available memory on the card Press Device to return to view the communicator memory If the memory is getting low you should remove some documents Before removing you can print fax or mail them or transfer them to a PC or a memory card Regional settings On these four pages you can define the local time date numbering and currency expressions Note For more detailed information about Regional set...

Page 258: ...d file format Compression is done implicitly during the recording process Recorder contains all the controls like Play Stop Pause and Record that are typically found in recording equipment Press Resume to continue after recording or playback has been paused See Figure 102 Figure 102 You can change the volume level of the Recorder application by pressing the and keys on the Arrows key You can also ...

Page 259: ...ct View Zoom Zoomratio to zoom by exact figures You can open all commonly used image files directly for viewing Press Zoom in to enlarge the image Zoom out to reduce the image on the display and Rotate to rotate the image To view image properties press the Menu key and select File Properties You can use the Imaging application for viewing images and handling image albums You can delete rename copy...

Page 260: ...To open an image located outside the image albums select File Open from 1 Select the album in the Imaging main view and press Open A thumbnail view of the album contents opens 2 You can scroll the contents of the album with the Arrows key To open an image for viewing press Open 3 To view the next frame in the image if available press the Menu key and select View Nextframe To return to the previous...

Page 261: ...s are replaced with the same name Skip Skips the image and continues the operation Cancel Cancels the whole paste operation Tip To rename albums or images select File Rename define a name and press OK The file extension cannot be changed Create new images from originals You can choose parts of an opened image save them as separate images and reuse them 1 Open an image Press the Menu key and select...

Page 262: ...g opens 3 Select one of the following Receiveinalbum To receive the image and save it Receiveandmail To receive the image and send it as an e mail message Receiveandfax To receive the image and send it as a fax 4 Press OK RealOne Player RealOne Player lets you play audio and video files of the RealAudio and RealVideo formats on your Nokia 9290 Communicator You can download these files to your Comm...

Page 263: ...ll Broadcast Service CBS to view the messages and to subscribe to topics of interest In areas where CBS is provided you can receive short messages on various topics such as taxis weather service provider services and directory enquiries See Figure 105 Figure 105 To start or stop receiving CBS messages in the main view of Cell broadcast press Reception on or Reception off ...

Page 264: ... message on a particular topic when a new topic message is received press the Menu key and select Topic Mark ashottopic The hot topic is marked with an exclamation mark Create or rename topic lists To create a new list press the Menu key and select List Newblanklist or Newlist withselectedtopics Tip You can sort the topics by pressing the Menu key and selecting a sorting command in the View menu T...

Page 265: ...all messages select All Fax modem You can use the communicator as a fax modem with a compatible PC Your communicator can be connected to a PC via serial cable or by using an infrared connection Before your PC can recognize the communicator as a fax modem you need to install a new modem configuration for your PC Please refer to your operating system manual for more information During the installati...

Page 266: ...the option Don tdetectmymodem Iwillselectitfromalist 7 Click Have disk 8 Click Browse and locate the CD ROM drive with the Nokia 9290 CD ROM 9 On the CD ROM locate a folder SoftwareforPC Modemdrivers 10 In the Modem drivers folder select Mdmn9290 inf file and click Open or OK Tip To use High Speed connection your GSM operator must activate High Speed Data Services on your SIM card 11 In the Instal...

Page 267: ...e is the speed with which the data is transferred between your communicator and PC The best transfer rate for normal GSM calls is 19200 or higher For high speed calls you should select 115200 Select the same rate in your PC application as well 19 Your communicator is now ready to be used as a fax modem Press Activate to activate the Fax modem Fax modem settings To open Fax modem press the Extras a...

Page 268: ...fine the following Transferrate The speed with which the data is transferred between your communicator and PC The best transfer rate for normal GSM calls is 19200 For high speed calls you should select 115200 Select the same rate in your PC application as well Databits Defines how many bits are used to form a byte The default option 8 can typically be used Parity A parity error checking procedure ...

Page 269: ...ll If you do not have this information try to use the default options Connectiontype The options are Normal Highspeed Normal is the default Remotemodemtype The options are Analog ISDNV 110 ISDNV 120 Analog is the default Max connectionspeed The default in an analog connection is Automatic Note This configuration needs to be redefined if you use a different kind of modem If the connection settings ...

Page 270: ...252 Extras ...

Page 271: ...batteries chargers andaccessories approvedbythe communicator manufacturer for use with this particular communicator model The use of any other types will invalidate any approval or warranty applying to the communicator and may be dangerous Power management High power battery BLL 3 Figure 106 The High Power Battery BLL 3 is a slim powerful and durable 1300 mAh Li Ion battery See Figure 106 This bat...

Page 272: ...approximately 180 minutes depending on the amount of charge already in the battery See Figure 107 Advanced desktop stand DCH 10 Tip To charge batteries with this stand you need the Performance Travel Charger ACP 12U To connect to a PC you need the RS 232 Adapter Cable DLR 2L You can also connect to a PC via infrared Figure 108 The Advanced Desktop Stand DCH 10 provides a convenient way to charge t...

Page 273: ...tery with the desktop stand 1 Plug the Performance Travel Charger into the stand 2 Insert the spare battery in the second slot the golden contacts first First press the battery downwards then push it slightly backwards until it clicks into place 3 Plug the charger into a mains outlet Check that the light on the left of the stand is on The red light indicates that charging is in progress When the b...

Page 274: ...follows 1 Check that infrared is activated in the communicator and on the PC 2 Place the communicator in the stand connector end first 3 Place the infrared port on the stand in line with the infrared port on the PC The distance between the two ports should be a maximum of 30 cm 11 81 inches 4 On the PC start either the PC Suite for Nokia 9290 Communicator program or the Fax Modem application You c...

Page 275: ... 109 Tip Battery charging times are the same as those for the Travel Charger ACP 12U The Advanced HF Car Kit CARK 109 offers a convenient handsfree option in a car The car kit provides charging for your communicator The car kit must be installed by qualified personnel Figure 110 ...

Page 276: ...ors press the communicator down gently until it is securely held by the locking mechanism Make a call with the car kit 1 Key in the desired number with the keypad or use the search function to look for a name and number 2 Press For a private call lift the handset if installed Answer a call 1 Press or if the handset is installed lift the handset 2 If you set the Automatic answer feature on in the C...

Page 277: ...le If you do not wish to enable the ignition sense ask your dealer to leave it uninstalled When the ignition is turned off the message Phone will power off if not used is displayed The communicator will be switched off after 15 seconds unless you press any key or take the communicator from the holder during this time Car mute This feature mutes the car radio during a phone call if supported by the...

Page 278: ...obile Charger LCH 9 provides an easy and convenient way to charge the communicator battery in a vehicle It is suitable for most vehicles cigarette lighter sockets Plug the lead from the mobile charger into the bottom connector of the communicator See Figure 111 ...

Page 279: ...Headset HDC 8 offers private headset audio operation With the remote control button which is located in the microphone part of the headset you can answer and end a call The headset connects directly to the connector at the bottom of the communicator See Figure 112 ...

Page 280: ...ere are two different leather carrying cases designed especially for the Nokia 9290 Communicator shown in Figure 113 and Figure 114 The case shown in Figure 114 CSL 26 has a convenient shoulder strap Both are available from Nokia dealers Carry Case CSL 26 Figure 114 ...

Page 281: ...documents You could also use a memory card for different applications or address books For additional memory the 64 MB memory card DTS 64 can be purchased on the www Communicatorworld net web page in accessories for the 9290 Communicator RS 232 Adapter cable DLR 2L Figure 115 This versatile adapter cable provides convenient computer connectivity for data transfer with your Nokia 9290 Communicator ...

Page 282: ...264 Accessories guide ...

Page 283: ...ommunicator 1 Phone or communicator interface does not start both displays remain blank Make sure that the battery is properly installed and charged Make sure that the contacts on the battery and the desktop stand are clean The battery charge may be too low for operation Check the display and listen for the low battery warning tones Charge the battery as described on page 80 If the NOT CHARGING me...

Page 284: ...ted for your SIM card Check if there is an error message on the display after switching on If so contact your local dealer Check that the SIM card is correctly installed see the Getting Started Guide 4 Communicator interface is not activated or applications stop responding Close the cover and open it again If this does not help close the cover and remove the battery Replace the battery and open th...

Page 285: ...yformattingtheinternal memoryofthecommunicator Note that formatting the memory removes all items except the standard applications that have been factory pre installed in ROM memory If you have made a full backup of the contents of your communicator with PC Suite you can use PC Suite to format the memory before restoring the backed up files to your communicator For more information see the PC Suite...

Page 286: ...and remove the battery to restart the communicator 2 Insert the battery and open the cover 3 When you see the Nokia 9290 Communicator Welcome screen immediately press and hold down the Ctrl Shift F keys The F key should be pressed last 4 Formatting starts It takes at least two minutes to complete 5 With Windows Explorer locate the All_Nokia_9290_data sis installation package in the Preinstalled in...

Page 287: ...nd or drop the call by pressing the key on the phone keypad 6 Call quality is poor Your location may not allow better call quality This problem may occur especially in a moving car or train Move to a location where the radio signal reception is better See GSM data transmission on page 43 Reception is usually better above ground level outdoors and while stationary Sometimes even moving the communic...

Page 288: ...se may be invalid or the called number has not answered within 10 tries or you are calling to a wrong phone number The phone may be busy data or fax is being sent or received the communicator is being used as a fax modem Wait for the data fax transmission to end or drop the call by pressing the key on the phone keypad Fax data restrictions or fax forwards may be active You can define the Fax restr...

Page 289: ... in the Document outbox see Outbox on page 179 If you receive service provider error messages when connecting to your remote mailbox contact your remote mailbox service provider Your remote mailbox may contain corrupted mail messages or the mail server settings may be incorrect If you have problems sending mail with attachments select Cancel sending and try again If this does not help try the key ...

Page 290: ...s settings See page 150 for details If the phone number is correct the reason may be in poor system conditions or a congested GSM network Also check the Data call settings in the Internet Access settings connection type data call type and maximum connection speed See page 150 for details Contact your system service provider if you have problems with data call establishment and your Internet Servic...

Page 291: ...on If the connection still does not succeed contact your Internet Service Provider If the status indication reads Loggingintosystemor Connected the problem is mostlikelyinyour Internet AccessPoint settings Seepage150fordetails or your Internet Service Provider s dial up system or you might need a script in order to connect to your Internet Service Provider Disconnect the data call wait for a coupl...

Page 292: ...nnection must have an IrDA compatible infrared port installed and activated IrDA drivers and Microsoft Windows 95 98 98SE Me For more information on IrDA drivers and their use in Windows contact Microsoft If you have an IBM Thinkpad laptop with Windows 98 SE installed you may encounter problems with infrared connections If problems occur proceed as follows 1 Click the Windows Start button and sele...

Page 293: ... fail to establish an infrared connection transfer the file to a PC and use the PC to print the document Alternatively you can fax the document to the nearest fax machine See Write and send a new fax on page 184 14 PC connectivity problems Make sure that PC Suite for Nokia 9290 Communicator is installed and running on your PC See the PC Suite Guide for more information If you use a cable connectio...

Page 294: ...ng a data connection with the remote modem try fixingthedatatransmissionrateby usinganATcommand CommonATcommands basedontheGSM07 07standardandsupportedbytheNokia9290Communicator and are listed in the CD ROM supplied with your communicator You can find this file in the documentation section of the CD ROM For information on how to use the AT commands and fax modem drivers consult the documentation o...

Page 295: ...sfer them to your PC if possible See the PC Suite Guide for more details You have tried to download a large WWW page See see item 19 on this troubleshooting list You can check the memory usage in the Memory application of Control panel See Memory on page 239 18 Cannot connect to the Internet when roaming You are able to connect to the Internet when in your home country You are now roaming and your...

Page 296: ...any other applications that you may have opened after starting the WWW browser To do that press the Menu key and check the leftmost menu for tasklist of open applications Select and close each item If you still experience problems turn off the setting which allows loading images automatically One last action is to exit the WWW browser application start it again and try to download the page once mo...

Page 297: ...st Operating environment Remember to follow any special regulations in force in any area and always switch off the phone of your communicator whenever it is forbidden to use it or when it may cause interference or danger When connecting the communicator or any accessory to another device read its user guide for detailed safety instructions Do not connect incompatible products As with other mobile ...

Page 298: ...ion of 20 cm 6 inches be maintained between a hand held wireless phone and a pacemaker to avoid potential interference with the pacemaker These recommendations are consistent with the independent research by and recommendations of Wireless Technology Research Persons with pacemakers Should always keep the communicator more than 20 cm 6 inches from their pacemaker when the phone is switched on Shou...

Page 299: ...uel injection systems electronic anti skid anti lock braking systems electronic speed control systems air bag systems Check with the manufacturer or its representative regarding your vehicle You should also consult the manufacturer of any equipment that has been added to your vehicle Posted notices Switch off the phone of your communicator in any facility where posted notices so require Potentiall...

Page 300: ...ent in your vehicle is mounted and operating properly Do not store or carry flammable liquids gases or explosive materials in the same compartment as the communicator its parts or accessories For vehicles equipped with an air bag remember that an air bag inflates with great force Do not place objects including both installed or portable wireless equipment in the area over the air bag or in the air...

Page 301: ...services and or phone features are in use Check with local service providers To make an emergency call 1 If the device cover is open close it 2 If the phone is not on switch it on by pressing the key Some systems may require that a valid SIM card is properly inserted in the communicator 3 Press and hold the key for several seconds to ready the phone for calls and to end possible active data or fax...

Page 302: ...plied with power from a Lithium ion battery and chargers ACP 12U and LCH 9 Other usage will invalidate any approval given to this apparatus and may be dangerous Use only batteries chargers and accessories approved by the communicator manufacturer for use with this particular communicator model The use of any other types will invalidate any approval or warranty applying to the communicator and may ...

Page 303: ...nt known as the Specific Absorption Rate or SAR The SAR limit set by the FCC is 1 6W kg Tests for SAR are conducted using standard operating positions accepted by the FCC with the phone transmitting at its highest certified power level in all tested frequency bands Although the SAR is determined at the highest certified power level the actual SAR level of the phone while operating can be well belo...

Page 304: ...der the Display Grant section of http www fcc gov oet fccid after searching on FCC ID PDNRAB 3N For body worn operation this phone has been tested and meets the FCC RF exposure guidelines when used with the Nokia accessories supplied or designated for this product Use of other accessories may not ensure compliance with FCC RF exposure guidelines In the United States and Canada the SAR limit for mo...

Page 305: ...measurement known as the Specific Absorption Rate or SAR The SAR limit set by the Industry Canada is 1 6 W kg Tests for SAR are conducted using standard operating positions with the phone transmitting at its highest certified power level in all tested frequency bands Although the SAR is determined at the highest certified power level the actual SAR of the phone while operating can be well below th...

Page 306: ... to enjoy this product for many years When using your communicator battery charger OR any accessory Keep it and all its parts and accessories out of small children s reach Keep it dry Precipitation humidity and liquids contain minerals that will corrode electronic circuits Do not use or store it in dusty dirty areas Its moving parts can be damaged Do not store it in hot areas High temperatures can...

Page 307: ...properly take it to your nearest qualified service facility The personnel there will assist you and if necessary arrange for service Accessory safety A few practical rules for accessory operation Keep all accessories out of the reach of small children When you disconnect the power cord of any accessory grasp and pull the plug not the cord Check regularly that any vehicle installed accessories are ...

Page 308: ...use Do not leave the battery connected to a charger for longer than a week since overcharging may shorten its lifetime If left unused a fully charged battery will discharge itself over time Temperature extremes can affect the ability of your battery to charge Leaving the battery in hot or cold places such as in a closed car in summer or winter conditions will reduce the capacity and lifetime of th...

Page 309: ...r end user 3 The limited warranty extends only to Consumers who purchase the Product in the United States of America 4 During the limited warranty period Nokia will repair or replace at Nokia s sole option any defective parts or any parts that will not properly operate for their intended use with new or refurbished replacement items if such repair or replacement is needed because of product malfun...

Page 310: ... limited warranty if any of the following conditions are applicable a The Product has been subjected to abnormal use abnormal conditions improper storage exposure to moisture or dampness unauthorized modifications unauthorized connections unauthorized repair misuse neglect abuse accident alteration improper installation or other acts which are not the fault of Nokia including damage caused by ship...

Page 311: ...d or error free operation of the Product If a problem develops during the limited warranty period the Consumer shall take the following step by step procedure a The Consumer shall return the Product to the place of purchase for repair or replacement processing b If a is not convenient because of distance more than 50 miles or for other good cause the Consumer shall ship the Product prepaid and ins...

Page 312: ...phone number listed at the end of this warranty if you need a loaner and the repair of the Product has taken or is estimated to take more than ten 10 days f If the Product is returned during the limited warranty period but the problem with the Product is not covered under the terms and conditions of this limited warranty the Consumer will be notified and given an estimate of the charges the Consum...

Page 313: ...ARTIES INCLUDING CUSTOMERS AND INJURY TO PROPERTY RESULTING FROM THE PURCHASE OR USE OF THE PRODUCT OR ARISING FROM BREACH OF THE WARRANTY BREACH OF CONTRACT NEGLIGENCE STRICT TORT OR ANY OTHER LEGAL OR EQUITABLE THEORY EVEN IF NOKIA KNEW OF THE LIKELIHOOD OF SUCH DAMAGES NOKIA SHALL NOT BE LIABLE FOR DELAY IN RENDERING SERVICE UNDER THE LIMITED WARRANTY OR LOSS OF USE DURING THE PERIOD THAT THE P...

Page 314: ...ot contained herein shall modify these terms 14 This limited warranty allocates the risk of failure of the Product between the Consumer and Nokia The allocation is recognized by the Consumer and is reflected in the purchase price 15 Any action or lawsuit for breach of warranty must be commenced within eighteen 18 months following purchase of the Product 16 Questions concerning this limited warrant...

Page 315: ...66 5889770 5896369 5898925 5907823 5914796 5915440 5917868 5920826 5930233 5946651 5956633 5960354 5960389 5963901 5966374 5966378 5970059 5987137 5991716 5991857 6005857 6011853 6014573 6026161 6028567 6038238 6043760 6047196 6049796 6069923 6081534 6084962 6094587 6111545 6112099 6115617 6119180 6122498 6138091 6144243 6144676 6154745 6163609 6164547 6170073 6188909 6195338 6199035 6201876 62122...

Page 316: ...repair or replace the defective product free of charge Replacement Product may be either new or remanufactured or refurbished However if Nokia determines that the warranty conditions cannot be applied the purchaser will be billed for the repair and shipping EXCEPTIONS This warranty is subject to the following exceptions 1 Mobile or fixed installation which is not in accordance with the installatio...

Page 317: ... Ajax Ontario Canada and sold either in Canada or Bermuda 8 Removal alteration or defacing of the Serial Number Plate or the accessory Date Code Labels will void the warranty In no event shall Nokia be liable for incidental special or consequential damages direct or indirect loss of unanticipated benefits or profits loss of use of its wireless telephone resulting from the use of its wireless phone...

Page 318: ... OR IMPLIED INCLUDING BUT NOT LIMITED TO ANY IMPLIED WARRANTY OR MERCHANTABILITY OR FITNESS FOR A PARTICULAR PURPOSE OR USE Some provinces do not allow limitations on how long an implied warranty lasts so the above limitations may not apply to you FOR WARRANTY SERVICE LOCATION CONTACT YOUR SERVICE PROVIDER RETAILER DEALER OR DIRECTLY TO NOKIA PRODUCTS LIMITED 601 Westney Road South Ajax Ontario L1...

Page 319: ...to evaluate your use of the Web site what you are interested in what you want to read and so on DNS Domain Name Service An Internet service that translates domain names like www nokia com into IP addresses like 192 100 124 195 Domain names are easier to remember but this translation is needed because the Internet is based on IP addresses Domain name and Host name The terms domain name and host nam...

Page 320: ...lobal System for Mobile GSM communication standard in 1999 HSCSD is comparable to the speed of many computer modems that communicate with today s fixed telephone systems HTML Hypertext Mark up Language A language used to define the appearance and content of WWW documents HTTP Hypertext Transfer Protocol A document transfer protocol used in the WWW HTTPS HTTP over a secure connection See Secure Soc...

Page 321: ...rce IETF are responsible for most of the Internet standardization Nokia 9290 Communicator is using many IETF specifications In the callback settings one of the settings is specified by IETF whereas the other methods are specified by Microsoft ISDN connections ISDN connections are a way to establish a data call between the Communicator and your Internet Access Point ISDN connections are digital fro...

Page 322: ...safe place separate from the communicator MCN Micro Cellular Network technology Microcells are used for increasing the capacity of wireless networks in urban areas MIME Multipurpose Internet Mail Extensions A standard Internet format which permits for instance multiple mail objects in a single message The mail objects can be for example formatted multifont text messages and non textual elements su...

Page 323: ...t can be used for accessing the Remote mailbox Point to point protocol PPP A common networking software protocol which enables any computer with a modem and a phone line to connect directly to the Internet Protocol A formal set of rules that govern how data is transferred between two devices Proxy In some networks the connection between the WWW and the site you want to connect to is blocked by a f...

Page 324: ... If you enter an incorrect PUK2 code ten times in succession you will not be able to access the functions which require the PIN2 code To use these functions again you will need to obtain a new SIM card from your system service provider You cannot change the PUK2 code Restriction password The restriction password is a 4 digit code needed to change fax and voice call restrictions see Restrict voice ...

Page 325: ...d identifies your phone number to your service provider When you subscribe for service your service provider gives you a SIM card and phone number If you have several GSM 1900 phones you can move the phone number from one phone to another by moving the SIM card to the phone you wish to use Simple Mail Transport Protocol SMTP An Internet protocol governing the transfer of electronic mail TCP port I...

Page 326: ...w you to communicate with voice mailboxes computerized telephony systems etc Transport Layer Security A security protocol similar to SSL offering end to end encrypted and authenticated connections The server to which the connection is established is authenticated by the use of certificates Data transfers are secured with encryption algorithms The Nokia 9290 Communicator supports TLS version 1 See ...

Page 327: ...e can leave you voice messages WAP Wireless Application Protocol The transport protocol for WAP services used by the WAP browser WAP access point An extension to an Internet access point see IAP which provides additional information that the WAP browser needs in order to be able to connect to a WAP service ...

Page 328: ...310 Glossary ...

Page 329: ...CTIA Cellular Telecommunications Internet Association to all users of mobile phones 2001 Cellular Telecommunications Internet Association All Rights Reserved 1250 Connecticut Avenue NW Suite 800 Washington DC 20036 Phone 202 785 0081 ...

Page 330: ...t priority when behind the wheel of a car Wireless telecommunications is keeping us in touch simplifying our lives protecting us in emergencies and providing opportunities to help others in need When it comes to the use of wireless phones safety is your most important call Wireless Phone Safety Tips Below are safety tips to follow while driving and using a wireless phone which should be easy to re...

Page 331: ... phone 9 Use your wireless phone to help others in emergencies Your wireless phone provides you a perfect opportunity to be a Good Samaritan in your community If you see an auto accident crime in progress or other serious emergency where lives are in danger call 9 1 1 or other local emergency number as you would want others to do for you 10 Call roadside assistance or a special wireless non emerge...

Page 332: ...314 ...

Page 333: ...315 Appendix B Message from the FDA U S Food and Drug Administration to all users of mobile phones July 18 2001 For updates http www fda gov cdrh phones ...

Page 334: ...ever the agency has authority to take action if wireless phones are shown to emit radiofrequency energy RF at a level that is hazardous to the user In such a case FDA could require the manufacturers of wireless phones to notify users of the health hazard and to repair replace or recall the phones so that the hazard no longer exists Although the existing scientific data do not justify FDA regulator...

Page 335: ...elephone wiring in a house typically operate at far lower power levels and thus produce RF exposures far below the FCC safety limits 4 What are the results of the research done already The research done thus far has produced conflicting results and many studies have suffered from flaws in their research methods Animal experiments investigating the effects of radiofrequency energy RF exposures char...

Page 336: ... influential result of this work has been the development of a detailed agenda of research needs that has driven the establishment of new research programs around the world The Project has also helped develop a series of public information documents on EMF issues FDA and the Cellular Telecommunications Internet Association CTIA have a formal Cooperative Research and Development Agreement CRADA to ...

Page 337: ... guidelines 9 What steps can I take to reduce my exposure to radiofrequency energy from my wireless phone If there is a risk from these products and at this point we do not know that there is it is probably very small But if you are concerned about avoiding even potential risks you can take a few simple steps to minimize your exposure to radiofrequency energy RF Since time is a key factor in how m...

Page 338: ...nd defibrillators are safe from wireless phone EMI FDA has tested hearing aids for interference from handheld wireless phones and helped develop a voluntary standard sponsored by the Institute of Electrical and Electronic Engineers IEEE This standard specifies test methods and performance requirements for hearing aids and wireless phones so that no interference occurs when a person uses a compatib...

Page 339: ...es 132 Creating task lists 144 Day view 140 Defining entry information 132 Deleting entries 136 Deleting task lists 145 Editing entries 136 Editing task lists 145 Entries 131 General commands 138 General settings 147 Month view 139 Searching entries 145 Sending entries 132 Settings 147 Symbols 144 Task lists 144 Task lists view 141 View settings 147 Views 138 Week view 140 Weekly time schedule vie...

Page 340: ...g fields 118 Attaching pictures 120 Attaching ringing tones 120 Changing fields 118 Changing group memberships 124 Creating 116 Creating SIM contact card 125 Field information 119 Opening 117 Receiving 127 Renaming fields 119 Searching 118 Sending 126 Sending via SMS 129 Settings 128 SIM directory options 126 Storing touch tones 122 Templates 121 Troubleshooting 270 VIP Group settings 129 Contact ...

Page 341: ... folders 221 Viewing properties 223 Files sis files 36 Saving 83 Fixed dialing 111 Flight profile 113 Folders Default saving folder 239 Frames changing size 164 opening as a new page 165 G General features 80 Glossary 301 H Help Key 79 Troubleshooting 265 Viewing 39 56 Home city 228 I Image albums Creating 242 Viewing 242 Images Albums 241 Creating new 243 Moving 242 Receiving via infrared 244 Res...

Page 342: ... Writing 180 192 Measurement unit 239 Memory Card 7 Details 239 Troubleshooting 277 278 Memory card Backups 225 Inserting 7 Restoring from 225 Menu key 79 Menus In phone 56 57 Scrolling 56 Shortcuts 57 Message box cleanup 182 Messages Opening 176 Messaging Application 175 Center 176 Deleting messages 182 freeing up memory 182 Inbox 176 178 Opening folders and messages 176 Outbox 176 179 Selecting ...

Page 343: ... card 225 Restriction password Changing 232 Restriction status 233 Ringing tone Attaching to a contact card 120 Playing 120 S Safety information Care and Maintenance 288 Electronic devices 280 Emergency calls 283 Operating environment 279 Potentially explosive atmospheres 281 Traffic safety 279 Vehicles 282 Screen Settings 236 Security sis files 36 Security certificates 233 Security of phone 42 23...

Page 344: ...ntact 270 Cannot send or receive 270 Deleting temporary files 267 Downloading large pages 278 Fax modem 276 flashing display 265 Formatting memory 267 Infrared 274 Internet connections 272 Internet when roaming 277 Invalid SIM card 269 Lock codes 276 Low memory 277 278 Message too long 272 No response 266 Not charging 265 PC connectivity 275 Phone does not work 266 Poor call quality 269 Printing 2...

Reviews: