


Connecting the laser to a PC with CONTROL
54
Ethernet connection
To connect the laser to the PC using Ethernet, the PC and the laser must have
their Ethernet ports connected to the same or separate IPv4 subnets. If separate
subnets are used they must be accessible to each other. However, to configure
the laser’s IPv4 address and port, you must first connect to it using a USB cable
directly from a PC using CONTROL.
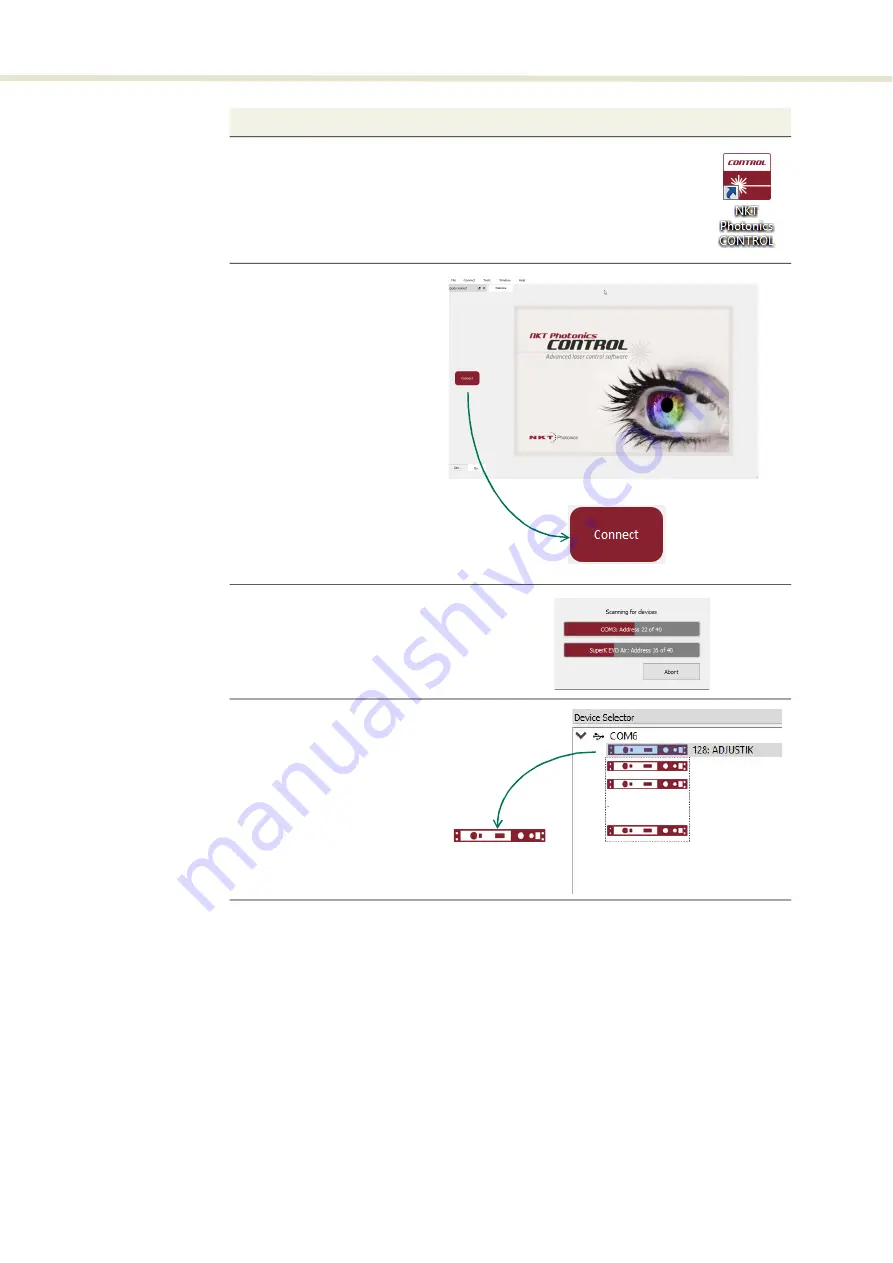
4 Launch the CONTROL software by either:
u
clicking on Windows – Start – Programs – NKT Photonics –CONTROL
– or –
u
double clicking the CONTROL shortcut on the desktop
5 The CONTROL window opens.
Click on the “Connect” button
in the upper left region of the
window.
6 CONTROL automatically scans
for any connect lasers and
accessories available on both
COM and configured Ethernet
ports.
7 The CONTROL and STATUS
panels for the laser will open.
If multiple lasers are connected
to the PC, click on the
ADJUSTIK laser icon from the
device selector list to open the
CONTROL panels for the
desired laser
Action
2
Summary of Contents for Koheras ADJUSTIK
Page 1: ...Koheras ADJUSTIK PRODUCT GUIDE Low Noise Single Frequency Laser System ...
Page 10: ...10 ...
Page 12: ...12 ...
Page 16: ...16 ...
Page 18: ...18 ...
Page 32: ...Chassis labels 32 ...
Page 44: ...44 ...
Page 52: ...Overview 52 ...
Page 78: ...78 ...
Page 82: ...Placing the laser on a table or shelf 82 ...
Page 88: ...Connecting the optical output 88 ...
Page 90: ...90 ...
Page 93: ...93 Table 17 Mechanical dimensions ...
Page 94: ...94 ...
Page 104: ...Installing CONTROL 104 ...
Page 105: ...Koheras ADJUSTIK Product Description Revision 1 0 01 2020 W 10456 ...


