


Doc XCAM190
NiteDevil Traditional Wide Dynamic
Email:
Last Revised: 03/011/2010
D-EFFECT
This option covers the display effects that can be selected.
FREEZE
OFF / ON
This option if set to ON will freeze current picture. Select OFF to revert to normal video
MIRROR
MIRROR / ROTATE / V-FLIP / OFF
This option allows the normal video displayed to be switched to vertical flip, horizontal flip, both or none.
MIRROR
This flips the camera view vertically on the screen.
ROTATE
This flips the camera view horizontally on the screen.
V-FLIP
This flips the camera horizontally and vertically on the screen.
D-ZOOM
OFF / ON
This option switches on digital zoom
GAMMA
The standard value is O.45 The values 0.05 ~ 1.00 can be set.
NEG IMAGE OFF / ON
A colour negative image can be set.
RETURN
Returns to the SPECIAL menu.
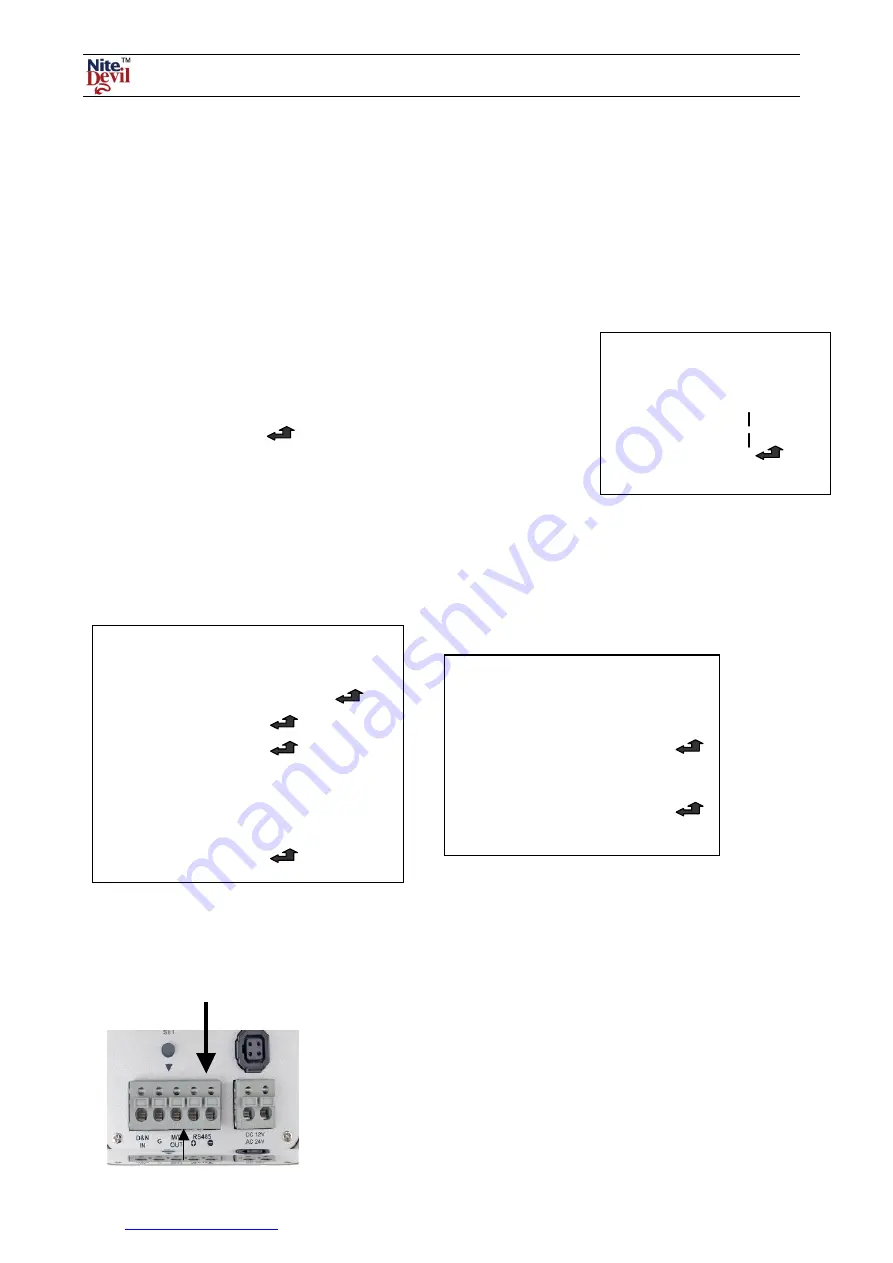
The RS485 option allows you to control these menu settings by connecting a CAT5 matched pair to the RS485
connections on the back of the camera and the other end of the cable to an RS485 keyboard controller or a DVR that
has PTZ functionality. Ensure that the polarity is correct to the control device. On the DVR you will need to connect
to the T+ and T- RS485 transmit connections.
D-ZOOM
DZOOM
x1 ~ x32
PAN
_______ 0
TILT
_______ 0
RETURN
RET
SPECIAL
1. CAM TITLE
OFF / ON
2. D-EFFECT
3. RS485
4. MOTION
OFF
5. PRIVACY
OFF
6. SYNC
INT
7. LANGUAGE
ENGLISH
8. RETURN
In order to see the camera menu it will be necessary to set the
camera ID number and the baud rate. The camera is set to the
Pelco-D protocol and this cannot be changed. The baud rate is
usually set to 2400 baud. This will give the longest distance
coverage. These settings will have to be reflected in the control
device, whether it is a keyboard or a DVR.
Note that you need to check that the DVR used has this
functionality.
RS485
CAM ID
1
ID DISPLAY
BAUDRATE
2400
RETURN