nitedevil CAM190 Manual Download Page 7

  www.nitedevil.com

                          Doc XCAM190


NiteDevil Traditional Wide Dynamic

Email:

[email protected]

Last Revised: 03/011/2010

DELAY

The seconds before the switch from one mode to the next mode.

S-LEVEL

The setting of the brightness illumination before switching from colour to b/w

E-LEVEL

The setting of the brightness illumination before switching from b/w to colour

EXT

This deactivates the EXT function.

BW

This option will always display in black and white.

SPECIAL NOTE:

You cannot control the DAY/NIGHT menu when AGC in the EXPOSURE menu is set to OFF.

If it is, then DAY and NIGHT mode will operate only in COLOUR mode.

OFF

Deactivates 3DNR. Noise is not reduced.

ON


Activates 3DNR so that noise is reduced.

SPECIAL NOTE:

You cannot set the 3DNR to ON or OFF when the AGC mode in the EXPOSURE menu is set to OFF.
When adjusting the noise reduction level in this mode, the higher the setting the more the noise level will be reduced
but the more likely ghosting will occur.
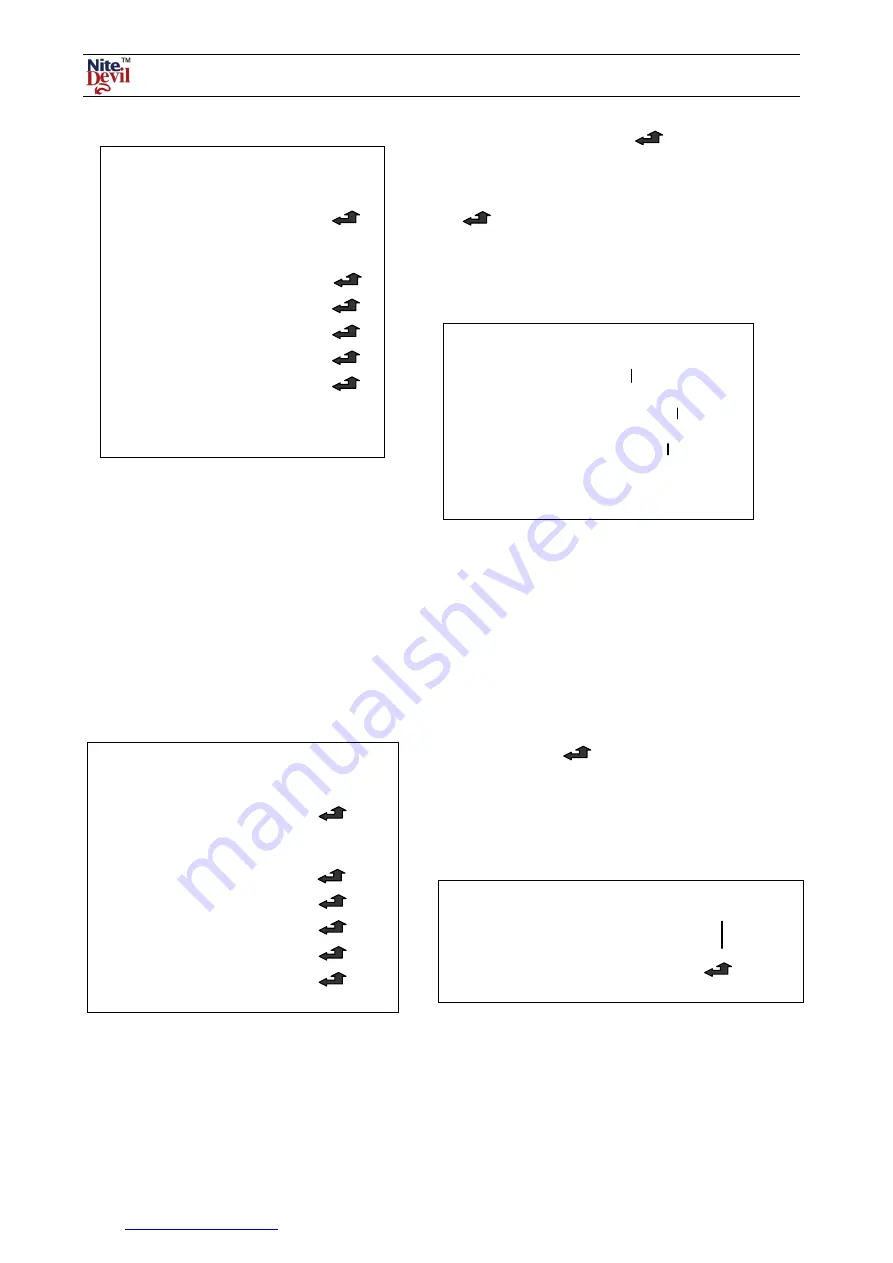
MENU SETTINGS

1.  LENS

      MANUAL

2.  EXPOSURE
3.  WHITE BAL

AWB

4.  DAY NIGHT

           AUTO

5.  3DNR

       ON

6.  SPECIAL

7.  ADJUST

8.  RESET

9.  EXIT

DAY NIGHT  COLOUR / AUTO

/

EXT / BW

COLOUR

The option will always display in colour.

AUTO

This option allows colour mode during day

and b/w at night or when ambient light levels are low. To setup
the switching time or speed press the SET button.

DAY NIGHT AUTO

DELAY

__________    8

S-LEVEL

__________   63

E-LEVEL

__________   55

RETURN

MENU SETTINGS

1.  LENS

MANUAL

2.  EXPOSURE
3.  WHITE BAL

AWB

4.  DAY NIGHT

AUTO

5.  3DNR

      ON

6.  SPECIAL

7.  ADJUST

8.  RESET

9.  EXIT

3DNR   OFF / ON

Digital Noise Reduction reduces the background noise in a
low light environment.

Select ON and press SET button to enter 3DNR menu.

3DNR

LEVEL

____________  56

RETURN

RET

Summary of Contents for CAM190

Page 1: ...ty The earthing arrangement of an intruder type alarm PSU may give rise to problematic earth loops and poor voltage regulation can give poor noisy image quality We offer no technical support or warran...

Page 2: ...ttached to the camera It is important that this connector is wired correctly If you bought the lens from SystemQ and it s a direct drive lens this will be pre wired and you can simply plug the lens in...

Page 3: ...the camera or you may damage one or the other device A C mount lens fitted on a CS mount camera may protrude too far into the camera and cause irreparable damage Setting Up an Auto Iris Direct Drive...

Page 4: ...the camera in damp or humid conditions This can affect image quality This camera requires stable lighting conditions to operate effectively Do not touch the front lens of the camera Fingerprints can s...

Page 5: ...a SENSE UP OFF AUTO x2 x4 x8 x16 x32 x64 x128 x256 When it is dark the camera automatically detects the light level and tries to compensate by maintaining a clear picture OFF The option is deactivated...

Page 6: ...there is a bright light e g headlights on a car using the HSBLC menu may compensate for this condition so allowing you to view a car number plate that would otherwise be obliterated by the light level...

Page 7: ...F when the AGC mode in the EXPOSURE menu is set to OFF When adjusting the noise reduction level in this mode the higher the setting the more the noise level will be reduced but the more likely ghostin...

Page 8: ...o title is displayed on the monitor even if one is entered Move up and down buttons to select CAM TITLE and switch it ON Then press the SET button and move to the required character using the directio...

Page 9: ...nu The RS485 option allows you to control these menu settings by connecting a CAT5 matched pair to the RS485 connections on the back of the camera and the other end of the cable to an RS485 keyboard c...

Page 10: ..._________ 38 HEIGHT __________ 30 SENSITIVITY __________ 34 MOTION VIEW OFF ON RETURN END MOTION Motion can be detected in 1 4 areas You can select 1 4 areas in SENSITIVITY setting To see the MOTION D...

Page 11: ...8 Select the area required AREA DISPLAY ON OFF Determines whether to use the area selected in AREA SELECT LEFT RIGHT Determines the vertical axis for area WIDTH Adjusts the selected vertical area TOP...

Page 12: ...e the blue and red colour SHARPNESS This sets the sharpness by moving the direction keys to right or left Parameter ranges from 0 31 BLUE This sets the overall blue hue Parameter ranges from 0 100 RED...

Page 13: ...al Zoom On Off 0x 32x Motion Detection On Off 4 zone selectable external closed contact Privacy Masking On Off 8 zone selectable 3DNR Digital Noise Reduction On Off Selectable Sens up Frame Integratio...

Reviews: