7
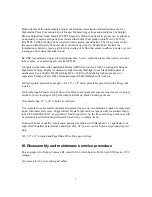
P) manually run the Autofocus up and down and lube the four bearings. There are two short post-
type bearings on the bottom of both sides of the mechanism. And there are two fork type bearings
that slide up and down on the upper X-axis shaft. Also lube the four contact points on the two leaf
springs on bottom that provide return pressure on the mechanism
It is considered that Teflon lube and manually working it is an especially important step for the
Autofocus mechanism. When moving it up and down, observe to make it as smooth as possible,
although it will appear to be jerky at the ends of range
Q) the Autofocus stepper motor has a threaded metallic-colored shaft that can barely be seen buried
within the mechanism. Use Teflon lube and surface tension of a drop of lube on screwdriver tip,
lube it several times. Manually run it up and down some more. When satisfactory, return it to
middle of its range, where movement must be smooth
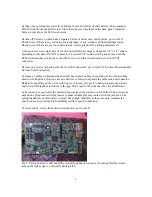
R) replace the circuit board, flexible connector, 7 connectors. Replace 4 screws on back panel and
4 screws on circuit board. Tighten the back panel screws first, then the circuit board screws second
Make sure that the bundle of 10 individual orange wires that pass through the black ferrite core are
looped appropriately and are free & not kinked when the scanning assy is moved back and forth
Time to test the bare mechanism under live power; be careful to not touch power supply
parts which may have dangerous high voltage.
Plug in power cord and turn on power switch
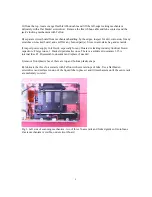
S) watch the shaft of Z-axis Autofocus stepper motor during the beginning part of the boot process,
it must rotate back and forth. The carriage can be manually moved out of mid-range in both X-axis
and Z-axis so that the smooth operation can be observed.
When satisfactory, move and center the stepper motor bronze clip over the shaft and secure with
the tiny screw.
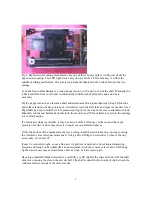
T) with a test slide in the MA-20 module inserted, watch the X-axis movement as the mechanism
moves from a central position, back to the inner-most position and to a central position during the
boot process. The green light must be blinking slowly on several boot trials. You may have to
manually help the carriage to move back and forth to the front-most position until the X-axis
stepper motor logic has autocalibrated itself. Repeat under its own power until satisfactory
U) using a Q-tip or Texwipe swab and alcohol or lens cleaner, clean the mirrors and lenses as
needed, inspect with a bright light.
V) attach data cable when test computer is off, boot-up Nikon, then computer and test with
NikonScan app with Preview scan and final Scan. Inspect scanned image for sharpness; night
scenes with pin-point street lighting can be a good test subject.
W) re-attach the front bezel and watch for satisfactory boot operation.


