

English
- 36 -
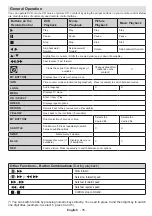
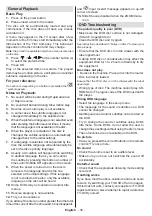
General Playback
Basic Play
1.
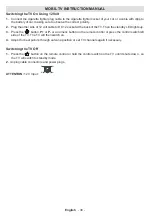
Press on the power button
2.
Please insert a disc to the loader.
The disc will be automatically loaded and play
commences if the disc does not have any menus
recorded on it.
A menu may appear on the TV screen after a few
moments or the film may start immediately after the
introduction of the Film Company. This behaviour
depends on the disc content and may change.
Note
: Step 3 and 4 is available only when a menu is recorded
on the disc.
3.
Press “ ” / “ ” / / or the number button (s)
to select the preferred title.
4.
Press OK.
Play of the selected items now starts. The played
item may be a motion picture, a still picture or another
submenu depending on the disc.
For your reference:
If an action corresponding to a button is prohibited the “
” symbol appears.
Notes on Playback:
1.
No sound will be heard during Rapid advance
or Rapid reverse.
2.
No sound will be heard during Slow motion play.
3.
Reverse slow motion play is not available.
4.
In some cases, the subtitle language is not
changed immediately to the selected one.
5.
When the preferred language is not selected even
after pressing the button several times, it means
that the language is not available on the disc.
6.
When the player is restarted or the disc is
changed, the subtitle selection is automatically
changed back to the initial settings.
7.
If a language is selected, not supported by the
disc, the subtitle language will automatically be
set to the disc’s priority language.
8.
Usually a circulation will happen while switching
to another language, that is you can cancel
the subtitle by pressing this button a number of
times until “Subtitle Off” appears on the screen.
9.
When the power is turned on or the disc is
removed, the language heard is the one
selected at the initial settings. If this language
is not recorded on the disc, only the available
language on the disc will be heard.
10.
Some DVDs may not contain root and/or title
menus.
11.
Reverse stepping is not available.
12.
For your convenience:
If you attempt to enter a number greater than the total
time of the current title, the time search box disappears
and “
Input Invalid” message appears on up-left
corner of screen.
13.
Slide Show is disabled when the ZOOM mode
is on.
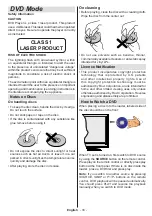
DVD Troubleshooting
The picture quality is poor (DVD)
•
Make sure the DVD disc surface is not damaged.
(Scratch, fingerprint etc.)
•
Clean the DVD disc and try again.
See instructions described in “Notes on Discs” to clean your
disc properly.
•
Ensure that the DVD disc is in the drawer with the
label uppermost.
•
A damp DVD disc or condensation may effect the
equipment. Wait for 1 to 2 hours in Stand-by to dry
the equipment.
Disc does not play
•
No disc in the machine.
Place a disc into the loader.
•
Disc incorrectly loaded.
Ensure that the DVD disc is in the drawer with the label
uppermost.
•
Wrong type of disc. The machine cannot play CD-
ROMS etc.• The region code of the DVD must match
the player.
Wrong OSD language
•
Select the language in the set-up menu.
•
The language for the sound or subtitles on a DVD
cannot be changed.
•
Multilingual sound and/or subtitles not recorded on
the DVD.
•
Try to change the sound or subtitles using DVD’s
title menu. Some DVD’s do not allow the user to
change these settings without using the disc’s menu
•
These functions are not available on the DVD.
No picture
•
Have you pressed the correct buttons on the remote
control? Try once more.
No sound
•
Check the volume is set to an audible level.
•
Make sure you have not switched the sound off
accidentally.
Distorted sound
•
Check that the appropriate listening mode setting
is correct.
If nothing works
If you have tried the above solutions and none seem
to work, try switching your TV-DVD off and on again.
If this does not work, contact your supplier or TV-DVD
repair technician. Never attempt to repair a defective
TV-DVD yourself.