


Chapter 15: Advanced Menu
15.2 Network Menu
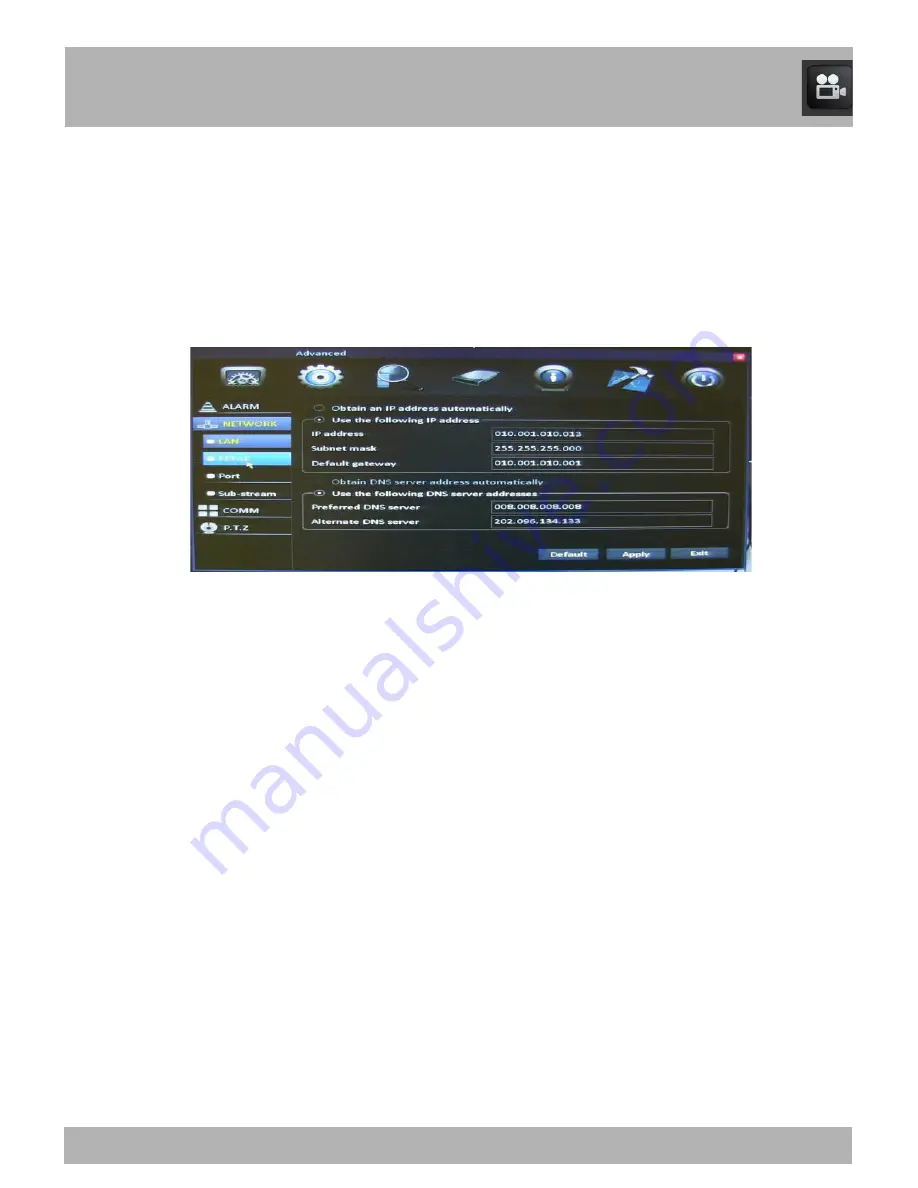
15.2.1 LAN Menu
The LAN Menu allows you to configure the IP address for your DVR. Make
sure that the DVR is plugged directly into your internet router.
To access the LAN Menu, select the Advanced button, select
Network
from the list on the left side of the screen, and then select
LAN
.
•
The IP address/DNS server information can automatically be
obtained by the DVR if it is connected to a router/modem that is
connected to the internet. Select
Obtain an IP address
automatically
and
Obtain DNS server address automatically.
•
You can manually enter the IP address/DNS server information into
the DVR by selecting
Use the following IP address
and
Use the
following DNS
address and entering the correct information.
•
IP Address:
This is the identification of the DVR when it is
connected to a network.
•
Subnet Mask:
Describes the range of IP addresses that can be
found in the network. It should always be set to 255.255.255.000.
•
Default Gateway:
This is the connection between two networks.
This should be the router’s IP Address.
•
Preferred DNS Server:
The primary DNS (Domain Name System).
•
Alternate DNS Server:
The secondary DNS server.
51
Summary of Contents for B-X Series
Page 1: ...PRO Series 8CH Elite Series 8CH...
Page 7: ...Contents 7 Chapter 2 Package Contents Your DVR Security Kit includes the following items...
Page 12: ...14 Chapter5 Troubleshooting 12...
Page 13: ...13 Chapter 6 DVR Components 6 1 Back Panel of DVR...
Page 14: ...Chapter 6 DVR Components 6 2 Front Panel of DVR 14 14...
Page 119: ...119 Chapter 26 DVR Specifications...
Page 124: ...Chapter 28 Warranty 123...


