13
D. CLEANING AND DISASSEMBLY
Turn broiler off and close the main gas valve. Disconnect the power supply to the broiler before cleaning or
servicing. If this broiler is connected using a restraint, and disconnection of the restraint is necessary for clean-
ing or moving the broiler, the restraint must be reconnected after the broiler has been returned to its originally
installed position. Allow to cool for 30 minutes prior to cleaning/disassembly. Leave the ventilation system on
during cooling. Use only approved cleaning, degreasing and sanitizing solutions.
ALL PARTS ARE CLEANED ON A DAILY BASIS UNLESS OTHERWISE NOTED
Follow the steps for proper disassembly. Reverse the order for reassembly.
CAUTION
Follow the Disassembly and
Reassembly steps to ensure proper
operation of the broiler. Failure to
do so may result in operational
problems.
WARNING
BROILER PARTS ARE HOT. DO
NOT ATTEMPT TO DISASSEMBLE
THE BROILER UNTIL IT IS FULLY
COOL. FAILURE TO FOLLOW THIS
INSTRUCTION MAY RESULT IN
SEVERE INJURY.
WARNING
LEAVE THE VENTILATION HOOD
ON DURING COOLING. FAILURE
TO DO SO COULD POSE A FIRE
SAFETY HAZARD.
Nieco Corporation - Model JF92G
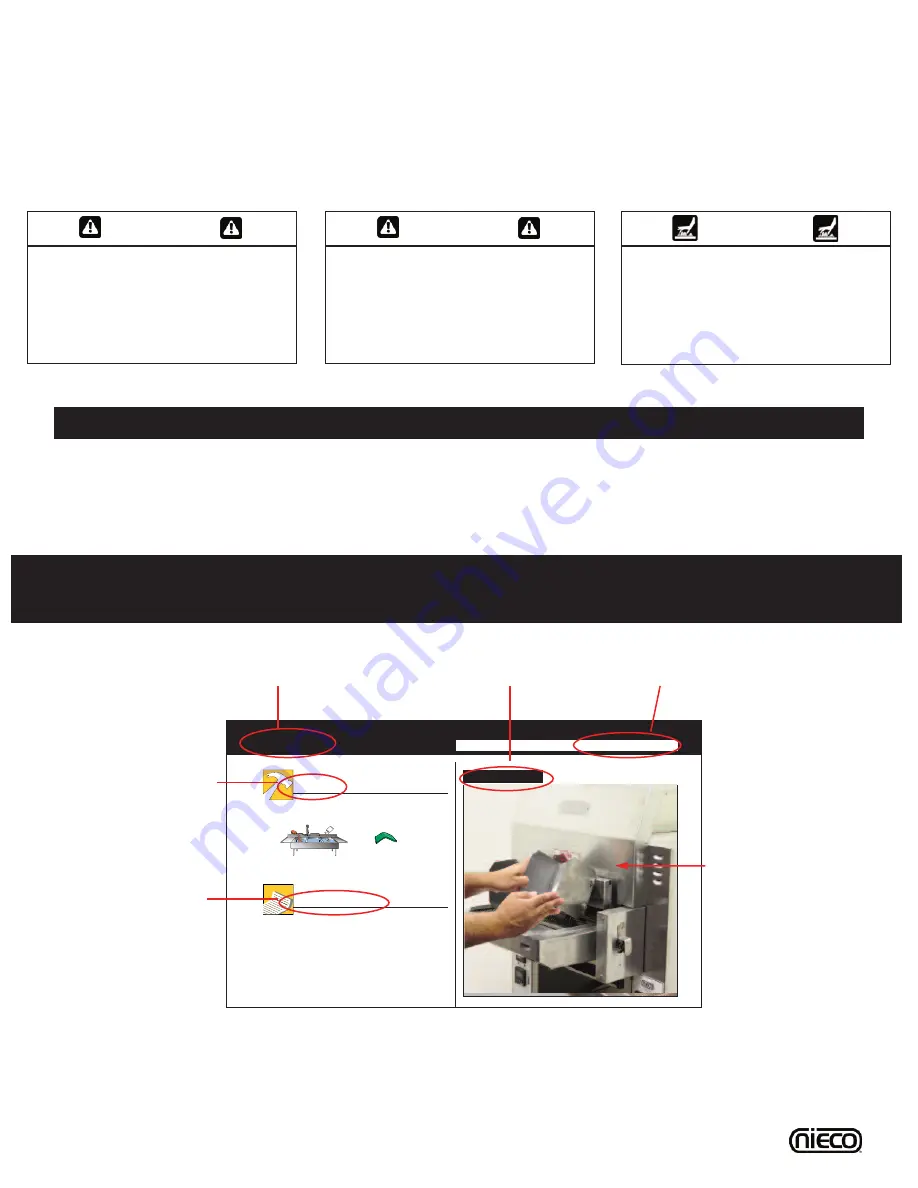
How to read the cleaning section
The location of the part.
17
Nieco Corporation - Model MPB94
Instructions
1. Allow the broiler to run free of product for 10
minutes before turning it off. This allows any
residue to burn off the chains.
Shut the broiler off and let it cool for 30 minutes
before disassembly and cleaning.
Close the main gas valve and unplug the broiler
before cleaning.
Always leave the ventilation hood on during the 30
minute cool down period.
Use only approved cleaning solutions.
Allow parts to air dry after cleaning.
Cleaning the Broiler
3
-Compartment Sink
No-Scratch Pad
Scrub Pad
Towel
Heat
Resistant
Gloves
Degreaser
Soft Bristle
Brush
Utility
Knife
Small Orifice
Brush
Shaft Cleaning
Tool
T o o l s N e e d e d
1
.
2
.
This “Stop” sign shows a step in the procedure that
must be followed exactly or personal safety could
be affected.
This warning symbol shows a step in the procedure
that must be followed exactly or broiler
performance could be affected.
This “puzzle” symbol shows a step in the
reassembly procedure that must be followed.
3
.
4
.
5
.
Important Symbols
S TO P
6
.
Large Orifice
Brush
Pull each meat guide out slightly from the bottom,
then lift off.
W ash, rinse, and sanitize in the 3-compartment
sink.
Meat Guides
Feed End
T ools
Instructions
3
-Compartment Sink
Clean: Every 4 hours
1
.
2
.
Scrub Pad
When to clean the part.
Picture of the part to
be removed and
How to remove and
clean the parts.
The tools needed
to clean the part
The name of the part to be


