background image

 8 - 20

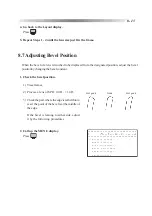
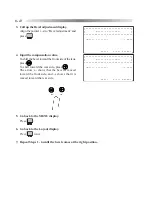
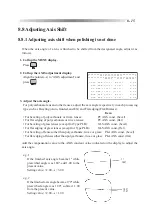
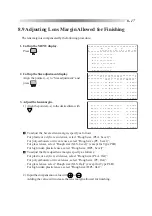
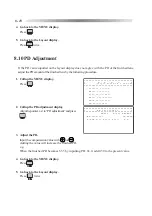
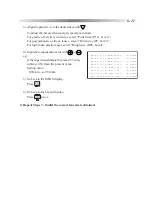
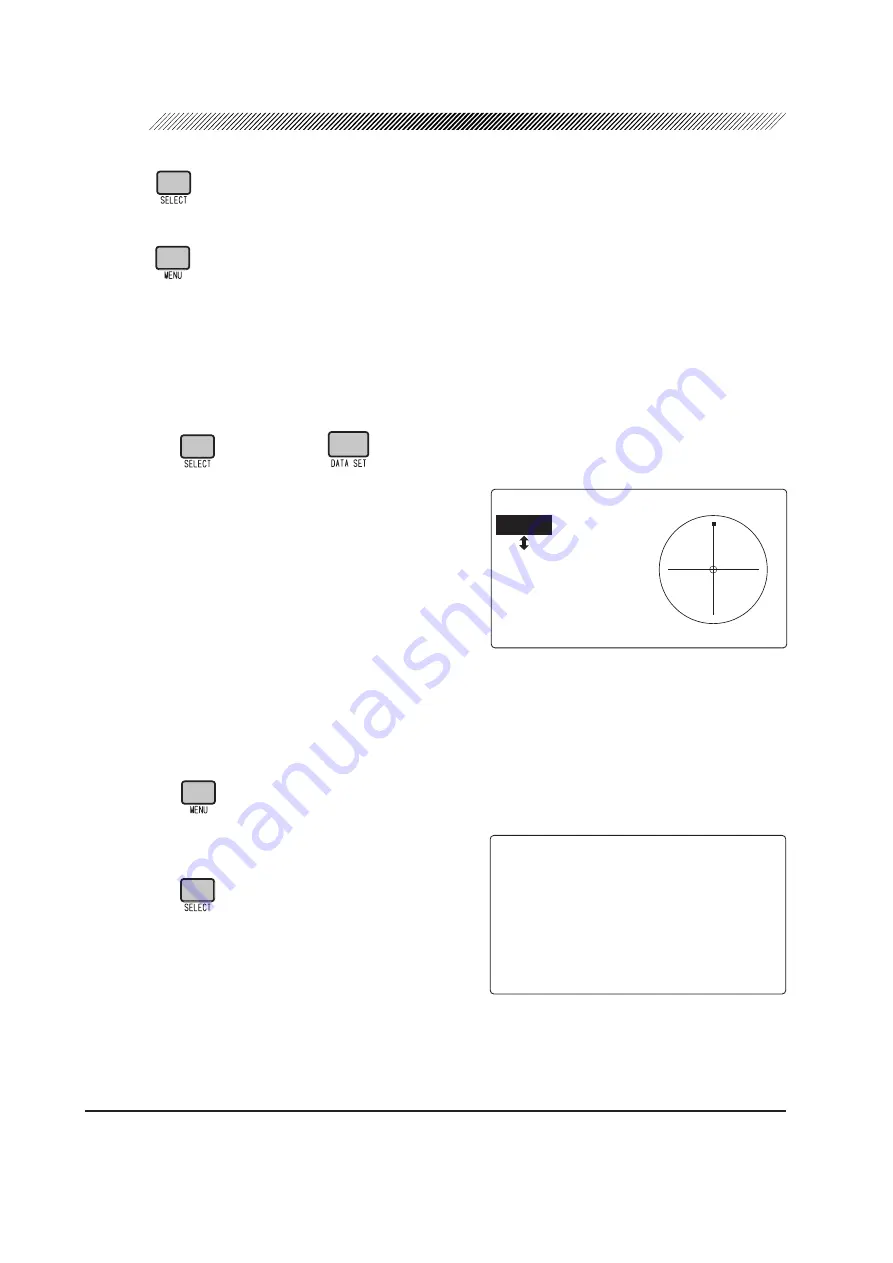
4. Go back to the MENU display.

Press

.

5. Go back to the Layout display.

Press

 twice.

6. Repeat Steps 1 - 5 until the whole edge is polished evenly. *

1

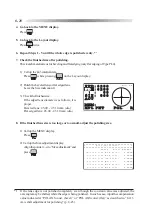
7. Check the finished size after polishing.

Check each material lens for beveling and flat edging (only flat edging of Type PL4).

1) Call up the 

I

45 internal data.

Press

 while pressing 

 on the Layout display.

2) Polish the beveled lens or flat edged lens.

Leave the Size indication 0.

3) Check the finished size.

If the edged lens diameter is as follows, it is
proper.
Beveled lens: 45.00 -  45.10 mm (dia.)
Flat edged lens: 45.00 - 45.10 mm (dia.)

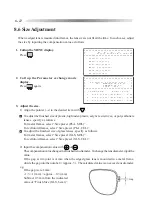
8. If the finished lens size is too large or too small, adjust the polishing size.

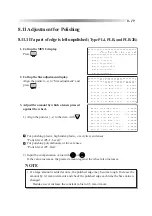
1) Call up the MENU display.

Press

.

2) Call up the Size adjustment display.

Align the pointer (

o

) to “Size adjustment” and

press

.

*1 If the lens edge is not polished completely even though the constant value was adjusted, the

axis angle may be shifted, while the edge is being polished.  In such a case, input the compensation
value indicated at “POL AXS const. (bevel)” or “POL AXS const. (flat)” as described in “8.11.3
Axis shift adjustment for polishing” (p. 8-23).

㧖㧖㧖㧖㧖㧖㧖㧖㧖㧖㧖㧖㧖㧖㧖㧖㧖㧖㧖㧖㧖㧖㧖㧖㧖㧖㧖㧖㧖㧖㧖㧖
㧖ޓޓޓޓޓޓޓ㧿㨕㨦㨑ޓ㨍㨐㨖㨡㨟㨠㨙㨑㨚㨠ޓޓޓޓޓޓޓޓ㧖
㧖㧖㧖㧖㧖㧖㧖㧖㧖㧖㧖㧖㧖㧖㧖㧖㧖㧖㧖㧖㧖㧖㧖㧖㧖㧖㧖㧖㧖㧖㧖㧖
ޓޓޓޓޓޓޓޓޓޓޓ㧖㧱㨄㧵㨀ޓ㧦ޓ㧼㨞㨑㨟㨟ޓ㧿㧱㧸㧱㧯㨀ޓ

ޓψ㧲㨕㨚㨕㨟㨔ޓ㨟㨕㨦㨑㧔㧼㧸㧭㧘㨎㨑㨢㨑㨘㧕㧦ޓ㧜㧚㧜㧜㨙㨙

ޓޓ㧲㨕㨚㨕㨟㨔ޓ㨟㨕㨦㨑㧔㧼㧸㧭㧘㨒㨘㨍㨠㧕ޓ㧦ޓ㧜㧚㧜㧜㨙㨙

㧲㨕㨚㨕㨟㨔ޓ㨟㨕㨦㨑㧔㧼㧯㧘㨎㨑㨢㨑㨘㧕ޓ㧦ޓ㧜㧚㧜㧜㨙㨙

ޓ
ޓޓ㧲㨕㨚㨕㨟㨔ޓ㨟㨕㨦㨑㧔㧼㧯㧘㨒㨘㨍㨠㧕ޓޓ㧦ޓ㧜㧚㧜㧜㨙㨙
ޓ
ޓޓ㧲㨕㨚㨕㨟㨔ޓ㨟㨕㨦㨑㧔㧳㧸㧿㧘㨎㨑㨢㨑㨘㧕㧦ޓ㧜㧚㧜㧜㨙㨙

ޓޓ㧲㨕㨚㨕㨟㨔ޓ㨟㨕㨦㨑㧔㧳㧸㧿㧘㨒㨘㨍㨠㧕ޓ㧦ޓ㧜㧚㧜㧜㨙㨙

㧚ޓ

㧚ޓ

ޓ㧚

㧚ޓ

㧹㧵㧺ޓޓ㧠㧤

㧲㧼㧰㧦㧢㧞㧜㧜ޓޓޓޓޓޓޓޓ

㧼㧰

ޓ㧦㧢㧞㧜㧜ޓޓޓޓޓޓޓޓ

ޓޓޓ㧦ޓޓ㧜㧜ޓޓޓޓޓޓޓޓ

㧿㧵㨆㧦ޓ㧜㧜㧜ޓޓޓޓޓޓޓޓ

㧭㧯㨀ޓޓޓޓޓޓޓޓޓޓޓޓޓ

㧹㧱㧹㧦ޓޓޓޓޓޓޓޓޓ

㧴㧼㧸㧼㧺㨀ޓޓޓ㧼㧻㧸ޓޓ㧾

Summary of Contents for LE-9000LX

Page 1: ...PATTERNLESS EDGER Model LE 9000LX OPERATOR SMANUAL ...

Page 2: ...o Ku Tokyo 113 0033 Japan Telephone 81 3 5844 2641 Facsimile 81 3 5844 2642 NIDEKINCORPORATED 47651 Westinghouse Drive Fremont California 94539 U S A United States Agent Telephone 510 226 5700 Facsimile 510 226 5750 NIDEK SOCIETE ANONYME Europarc 13 rue Auguste Perret 94042 CRETEIL France Authorized Representative Telephone 01 49 80 97 97 Facsimile 01 49 80 32 08 September 2006 40340 P902H Printed...

Page 3: ...cedures cautions for safety specifications accessories and maintenance IEC and UL standards are applied in this manual For correct use this manual is needed Especially cautions for safety and operating procedures must be thoroughly understood before using the instrument Keep this manual handy to verify use If you encounter any problems or have questions about the instrument during use please conta...

Page 4: ... 1 1 Tracing both rims 4 4 4 3 1 2 Tracing single rim 4 5 4 3 1 3 Semiauto tracing 4 5 4 3 1 4 Tracing goggle type frames 4 6 4 3 2 Tracing pattern 4 7 4 3 3 Tracing dummy lens 4 8 4 3 4 Tracing during processing 4 10 4 3 5 Stopping tracing 4 10 4 3 5 1 Stopping frame tracing 4 10 4 3 5 2 Stopping pattern or dummy lens tracing 4 10 4 4 Layouts 4 11 4 4 1 Selecting processing conditions and inputti...

Page 5: ...Type PL4 PLB and PLB 2R 4 46 4 6 3 4 Glass soft processing 4 47 4 6 3 5Inputtingframetiltangleinflatedging 4 48 4 7 Checking Lens Size 4 49 4 7 1Checkinglenssize 4 49 4 7 2Retouchinglens 4 49 4 8 Processing the Opposite Lens 4 51 4 9 Removing the Lens Cup 4 51 4 10TreatmentafterDailyUse 4 52 4 11 Daily Checks 4 53 4 11 1 Daily check before use 4 53 4 11 2 Daily check after use 4 54 4 12 Periodical...

Page 6: ...8 17 8 10 PDAdjustment 8 18 8 11AdjustmentforPolishing 8 19 8 11 1 If a part of edge is left unpolished Type PL4 PLB and PLB 2R 8 19 8 11 2 If the front edge or rear edge is left unpolished Type PLB and PLB 2R 8 22 8 11 3Axis shift adjustment for polishing Type PL4 PLB and PLB 2R 8 23 8 12Tracer Calibration 8 25 8 13ListofConsumableArticles 8 26 9 SPECIFICATIONS 9 1 10ACCESSORIES 10 1 10 1 NIDEK t...

Page 7: ...aced outline and the lens layout and the processing unit edges a lens into the desired shape Several kinds of processing wheels are provided in the processing unit and therefore this instrument selects the most suitable wheels and the processing sequences according to the lens material to be processed Lens materials and processing modes Processing is available Processing is unavailable F Processin...

Page 8: ...the cover This symbol on the power switch indicates that the power is ON This symbol on the power switch indicates that the power is OFF Thissymbolindicatesthecontrastadjustment Thissymbolmeansthefuserating Thissymbolindicatesthattheinstrumentmustbesuppliedonlywithalternatingcurrent Thissymbolindicatesthedateofmanufacture Thissymbolindicatesthemanufacturer Thissymbolindicatesthatthisproductshallbe...

Page 9: ...proof cover closed during processing Sprayincludingprocessingwastemaycauseeyedamage Should abnormal conditions such as cracks or bare areas on the processing wheel have been found stopusingtheinstrumentimmediatelyandcontactNIDEKoryourauthorizeddistributor Continued use of the instrument may cause the wheel to break and scatter causing injury Release the chuck by pressing aftermakingsurethatthewhee...

Page 10: ...n them they will become damp and may cause short circuit or fire Plug in the power cord correctly until its prongs are fully inserted into the socket Iftheinstrumentisusedwithaninsecureconnection firemayoccur In the event that the instrument gives off smoke or a strange smell etc turn off the power and unplug the power cord After smoke stops coming out of the instrument contact NIDEK or yourauthor...

Page 11: ...torage packed Conditions Temperature 25 70ºC Humidity 10 100 Pressure 700 1060 hPa 2 3 Transport CAUTION Whenmovingtheinstrument askforassistance Movingtheinstrumentmaycausebackinjuryorinjurybyfalling When moving the instrument hold A and B for both of the right and left sides Be sure not to hold the cover Only hold the metal part of the underside The instrument may be dropped by holding the cover...

Page 12: ...ng enough for the instrumentweight 42kg Vibrations and noises may produce or normal processings may not be performed Use a stage whose size is larger than the measurements of the figure to the right Also set the adjuster at the foot of the stage so that the stage can be adjusted without tilt or play Itisnecessarytomakeopeningsinthetopto draw the pipe and cord through Opening A For power cord of pu...

Page 13: ...oftheplug itwillbecomedamp andshortcircuit or fire may occur Clean the processing unit after the last use of the day Ifitisleftforseveraldaysafteruse theprocessingwastebecomessettledandhardtoremove Turn the power switch off and keep the tracing unit cover and soundproof cover closed when theinstrumentisnotinuse Ifdustsettles itmayaffectthemeasurementaccuracyorcausemalfunction 2 7 Maintenance and C...

Page 14: ...al processing cannot be performed Be sure to replace a dressing stick worn some 4 cm with a new one It is hard to hold the shortened dressing stick and hand injury may occur Be sure to wear protective glasses for wheel dressing Sprayincludingprocessingwastemaycauseeyedamage Neverdresstheroughingwheelforplasticlenses The wheel may be damaged In the dressing mode the cover sensor is released and the...

Page 15: ...come clogged Never use an organic solvent such as paint thinner to clean the exterior of the instrument This could affect the surface 2 8 Disposal NOTE Follow local governing ordinances and recycling plans regarding disposal or recycling of device components When disposing packing materials sort them by material and follow local governing ordinances and recycling plans When disposing of the wastes...

Page 16: ...2 8 2 9 Labels The following labels provide safety information about each part Front view Rear view 6 8 9 40 0 4 5 1 4 4 2 75 5 4 4 537 0 0 4 2 4 75 1 0 37 574 016 or or 115 V regions only ...

Page 17: ...2 9 Top view or or ...

Page 18: ...ous Besides open the soundproof cover only after making sure that the wheels have come to a complete stop Stop key Thisisakeytostopprocessing Processingcanbestoppedimmediatelyunderabnormalconditions To switch off the system after stop turn the power switch OFF To restart processing after stop press Self check function Operation conditions are checked all the time by this function If something unus...

Page 19: ...2 11 ...

Page 20: ...nector Connector for barcode scanner Outlet for pump 1 Outlet for pump 2 Power switch Contrast control Inlet Cooling fan Table Tracing unit cover Display panel Control panel for tracing unit Control panel for processing unit Drawer 3 CONFIGURATION Soundproof cover ...

Page 21: ...ol according to its use envi ronment to clear the screen RS 232C interface connector This is a connector to communicate with an external computer This connector conforms to RS 232C interface The optional quick pattern tracer can also be connected Connector for barcode scanner This is a connector to which the optional barcode scanner or numeric keypad is connected Outlet for pump 2 Outlet for pump ...

Page 22: ...3 3 Processing unit Feelers Chamber cleaning nozzle Adapter Lens clamp Feedwater nozzle Wheels ...

Page 23: ...zzle washes processing wastes away before they scatter within the process ing chamber Water prevents the process ing wastes from settling in a space between the processing wheels and the bottom of the chamber which adversely affect the processing ability of the instrument Adapter The blocked lens is set to the adapter When edging a half eye lens replace the adapter with the one for half eye lens L...

Page 24: ...3 5 Tracing unit Control panel for tracing unit Lower slider Upper slider Stylus Pattern setting unit support Rim clips Rim clips Pattern tracing pin ...

Page 25: ...asures a pattern or dummy lens shape by tracing it Normally this pin is stored in the tracer Stylus Measures a frame shape by tracing its bevel groove Pattern setting unit support The pattern setting unit with a pattern or a dummy lens is set on this support Starts a single tracing of the left rim Starts both tracing of the right and left rims Starts a single tracing of the right rim ...

Page 26: ...rocessing MTL CEL ZYL EX Flat rimless edging PNT NYL blank EX lens flat rimless edging PNT EX Control panel for processing unit Selects a lens material PLA plastic HPL high index plastic PC polycarbonate GLS glass ACR acrylic resin or TRX trivex With Type PLB GLS cannot be selected Selects processing conditions ...

Page 27: ...t data etc Enters prescription data etc Moves the cursor Switches the display in the following or der Layout display MENU display Pa rameter exchange mode display This key does not function during process ing 1 1 When this key is pressed in the beveling during the roughing process the display is switched between Bevel simulation display and Layout display Stops processing Starts processing Fixes a...

Page 28: ...raced outline Minimum lens diameter Rim center Optical center Up direction Frame pupillary distance FPD Input the distance between the right and left rim centers 30 00 99 50 mm step 0 50 mm The rim centers are calculated by the boxing system It is possible to input DBL by aligning the cursor to FPD and pressing Pupillary distance PD Input the pupillary distance referred in the prescription 30 00 9...

Page 29: ...x is indicated Frame material MTL metal CEL celluloid ZYL PNT two point or NYL nylor Processing mode Indicates the processing mode AUT GUI EX or Blank Blank indicates the flat edging without groove Polishing indication Indicates the polishing mode Frame changing indication Indicates the frame changing mode R L indication Indicates the selected side of a lens to be edged R L Traced outline Represen...

Page 30: ...d with the tilting function and are added to the display with the tilting function OFF 㧮 48㧦㧭㧡 㧜 㧼㧺㨀㧦 ޓ 㧜 㧢 㧲 48㧦 ޓ 㧡 㧜 㧳㨁㧵 ޓޓޓޓ 㧾 Edge thickest point Edge thinnest point Sectional view position line Bevel sectional view Bevel curve Bevel tip point Frame curve 㧮 48㧦㧭㧠 㧟 㧼㧺㨀㧦 ޓ 㧜 㧜 㨀 㧵 㧸 㨀 㧦 ޓ 㧜 㧜 㧲 48㧦 ޓ 㧡 㧜 㧳㨁㧵 ޓޓޓޓ 㧾 Bevel tilting amount Tilt base position ...

Page 31: ...t it is cal culated by computer and is the optimum value Bevel sectional view Represents the bevel section where Sec tional view position line is on the traced outline The mark over the scale represents the bevel tip point One graduation of the scale is equal to 0 2 mm Sectional view position line Represents the position of the indicated bevel section along the traced outline Bevel tilting amount ...

Page 32: ...ޓޓ 㧦 ޓޓ 㧰㧱㨀㧭 ޓ 㧿㧱㨀 ޓޓޓޓޓޓ ޓ ޓ ޓ ޓ ޓ ޓ ޓ ޓ ޓ ޓ ޓ ޓ ޓ ޓޓޓޓޓ 㧯㧭㧺㧯㧱㧸 ޓޓޓޓޓ 㧦 ޓޓ 㧿㧱㧸㧱㧯㨀 ޓޓޓޓޓޓޓޓ ޓ ޓޓ 㧱㧾㧾㧻㧾 ޓޓޓޓ 㧜㧞㧜㧢 ޓ ޓޓ ޓޓޓޓ ޓ ޓ ޓ ޓ ޓ ޓ ޓ ޓ ޓ ޓ ޓ ޓ ޓ ޓ ޓ ޓ ޓ ޓ ޓ ޓ ޓ ޓ ޓ ޓ ޓ ޓ ޓ ޓ ޓ ޓ ޓ ޓ ޓ ޓ ޓ ޓ ޓ ޓ ޓ ޓ ޓ ޓ ޓ ޓ ޓ ޓ ޓ ޓ ޓ ޓ ޓ ޓ ޓ ޓ ޓ ޓ ޓ ޓ ޓ ޓ ޓ ޓ ޓ ޓ ޓ ޓ ޓ ޓ ޓ ޓ ޓ ޓ ޓ ޓ ޓ ޓ ޓ ޓ ޓ ޓ ޓ ޓ ޓ ޓ ޓ ޓ ޓ ޓ ޓ ޓ ޓ ޓ ޓ ޓ 㧼㨞㨑㨟㨟 ޓ 㧿㨀㧭㧾㨀 ޓ 㧿㨃㧚 㧖㧖㧖㧖㧖㧖㧖㧖㧖㧖㧖㧖㧖㧖㧖㧖㧖㧖㧖㧖㧖㧖㧖㧖㧖㧖㧖㧖㧖㧖㧖㧖 㧖 ޓ 㧹 㧱 㧺 㨁 ޓ 㧖 㧖 ޓޓޓޓޓޓ 㧸㨑㨚㨓㨠㨔 ޓ 㧾㧦...

Page 33: ...he barcode scanner p 5 9 o5 4 2 When the edger is connected to the barcode scanner p 5 10 4 4 Layouts o4 4 1 Selecting processing conditions and inputting layout data p 4 11 o4 4 2 Inputting height from lens outline p 4 14 o4 4 2 1 Layout of bifocal lens p 4 15 o4 4 2 2 Layout of progressive power lens p 4 16 o4 4 3 Eye point layout p 4 17 5 4 Storing and Calling Up the Traced Data o5 4 1 When the...

Page 34: ... p 4 32 o4 6 2 Flat rimless edging p 4 36 o4 6 2 1 Flat rimless edging mode p 4 36 o4 6 2 2 Flat rimless edging mode p 4 38 o4 6 3 Other processings p 4 40 o4 6 3 1 Processing for frame changing p 4 40 o4 6 3 2 Processing half eye lenses p 4 43 4 7 Checking the Lens Size o4 7 1 Checking the lens size p 4 49 o4 7 2 Retouching lenses p 4 49 4 8 Processing the Opposite Lens p 4 51 End of processing P...

Page 35: ...1 Plug the power cord in the wall outlet CAUTION Do not put many loads on one electrical outlet It may cause fire Pins of the plug must be fully inserted into the socket Incompleteconnectionmaycausefire 2 Turn the power ON ...

Page 36: ...w the lower slider and set the frame top between the rim clips on the upper slider 3 Set the bottom of the frames Slowly release the lower slider placing the frame bottom between the rim clips on the lower slider 4 Bring the frames to the center of the tracing unit 2 Start tracing both rims Press Tracing is complete when the frames are released 3 Call up the traced data on the display Press The tr...

Page 37: ...ing the rim for left eye Press For tracing the rim for right eye Press NOTE FPD Frame Pupillary Distance cannot be measured when a single rim is traced Measure it manually and input the data on the Layout display 4 3 1 3 Semiauto tracing This is a procedure to bring the stylus into the bevel groove of the frame with fingers when the stylus cannot be set in the groove automatically 1 Set frames int...

Page 38: ...other side during tracing The following only describes the procedure for the right rim since either rim can be traced in the same way 1 Set a rim for the right eye horizontally to the tracing unit Do not set the left rim Hold the left temple of the frame to keep the right rim horizontal 2 Start tracing Press NOTE Though the rim clips hold the right rim securely do not take your hand off the temple...

Page 39: ...g unit 1 Open the cover of the tracing unit 2 Set the pattern setting unit to the tracing unit Draw the lower slider and set the pattern setting unit onto the pattern setting unit support Fit the pins of the pattern setting unit to the two circular holes on the pattern setting unit support The pattern setting unit is fixed to the pattern setting unit support by magnet Nasal side Nasal side Tempora...

Page 40: ...ed It is easy to remove the unit from the left side NOTE FPD Frame Pupillary Distance cannot be measured when a pattern is traced Measure it manually and input the data on the Layout display 4 3 3 Tracing dummy lenses 1 Block the convex side of a dummy lens with a lens cup 1 Mark the estimated center of a dummy lens with a lensmeter Set the dummy lenses mounted in the frames and make sure that the...

Page 41: ...unit 3 Trace the dummy lens in the same manner as Step 2 4 of 4 3 2 Tracing pattern p 4 7 However press to trace the right eye lens and press to trace the left eye lens NOTE FPD Frame Pupillary Distance cannot be measured when a dummy lens is traced Measure it manually and input the data on the Layout display Instead of inputting FPD you may also use the eye point layout See 4 4 3 Eye point layout...

Page 42: ...he traced outline will be set and shown on the display 4 3 5 Stopping tracing To stop tracing follow the instructions below 4 3 5 1 Stopping frame tracing 1 Press The stylus will return to its original position and the frames will be released 4 3 5 2 Stopping pattern or dummy lens tracing 1 Press 2 Take off the pattern setting unit The tracing pin will be stored ...

Page 43: ... acrylic resin or TRX 4 trivex CAUTION Be sure to specify the correct lens material If not the useful life of processing wheel may be shortened 2 Select the beveling or flat rimless edging with MTL CEL ZYL PNT NYL Flat rimless edging Select PNT or NYL suited to the frame form Beveling Select MTL or CEL suited to the lens material 3 Select a processing mode The processing mode can be selected with ...

Page 44: ...ctionisavailableonlywhentheflatedgingisselected Press again to cancel the polishing mode 2 As necessary change the setting of the layout mode Align the cursor C to the layout mode indication and select the desired mode with See ACT Active mode BF Bifocal mode PAS Passive mode of A 3 Selection of Blocking p A 4 3 Input each data of the lens layout Input values of FPD 5 PD and height of the optical ...

Page 45: ...adapter lens clamp and lens cup with the ones for half eye lens See 4 6 3 2 Processing half eye lenses p 4 43 6 It is also possible to input PD by monocular PD It is a method of inputting the bridge center to the eye point distance for the right and left lenses separately 1 Align the cursor to PDC and press PDC changes to 1 2PD 2 Input a monocular PD value with or 7 It is also possible to input a ...

Page 46: ...line is 23 5 mm PD 23 5 e g If the height at the level of the opti cal center from the lowest point of the outline is 25 8 mm BT 25 8 㧚 ޓ 㧚 ޓ ޓ 㧚 㧚 ޓ 㧹㧵㧺 ޓޓ 㧢㧤 㧲㧼㧰㧦㧢㧥㧜㧜 ޓޓޓޓޓޓޓޓ 㧼㧰 ޓ 㧦㧢㧞㧜㧜 ޓޓޓޓޓޓޓޓ 㧼㧰 ޓ 㧦 ޓ 㧞㧠㧜 ޓޓޓޓޓޓޓޓ 㧿㧵㨆㧦 ޓ 㧜㧜㧜 ޓޓޓޓޓޓޓޓ 㧭㧯㨀 ޓޓޓޓޓޓޓޓޓޓޓޓޓ 㧹㧱㧹㧦 ޓޓޓޓޓޓޓޓޓ 㧼㧸㧭 㧹㨀㧸㧭㨁㨀 ޓޓޓޓޓ 㧾 㧚 ޓ 㧚 ޓ ޓ 㧚 㧚 ޓ 㧹㧵㧺 ޓޓ 㧢㧤 㧲㧼㧰㧦㧢㧥㧜㧜 ޓޓޓޓޓޓޓޓ 㧼㧰 ޓ 㧦㧢㧞㧜㧜 ޓޓޓޓޓޓޓޓ 㧼㧰 ޓ 㧦 ޓ 㧞㧟㧡 ޓޓޓޓޓޓޓޓ 㧿㧵㨆㧦 ޓ 㧜㧜㧜 ޓޓޓޓޓޓޓޓ 㧭㧯...

Page 47: ...ditions See 4 4 1 Selecting processing conditions and inputting layout data p 4 11 2 Select BFC bifocal for the layout mode 3 Input the prescribed PD for the near vision PD of segment at PDC 4 Align the cursor to and select 㧼㧰 or 㧮㨀 with 5 Input the segment at the center of top line PD Height of the center point of the seg ment top line to the straight down point on the lens outline BT Height of t...

Page 48: ...ressive power lens 1 Select processing conditions See 4 4 1 Selecting processing conditions and inputting layout data p 4 11 2 Select ACT Active for the layout mode 3 Input the prescribed PD at PD 4 Input the height of the eye point marked on a dummy lens See 4 4 2 Inputting height from lens outline p 4 14 For the blocking procedure see 4 5 1 1 Blocking progressive power lenses p 4 18 ...

Page 49: ...shows the position of the eye point The display with FPD will return if is pressed again 2 Input the distance from the eye point to its nasal level point on the lens outline at 3 Input the height of the eye point from its straight down point on the lens outline at 㧼㧰 ޓ ޓ 㧚 ޓ ޓ 㧚 㧚 ޓ 㧹㧵㧺 ޓޓ 㧢㧡 ޓޓޓޓޓޓޓޓ ޓޓޓ 㧦 ޓ 㧞㧢㧡 ޓޓޓޓޓޓޓޓ 㧼㧰 ޓ 㧦 ޓ 㧞㧟㧜 ޓޓޓޓޓޓޓޓ 㧿㧵㨆㧦 ޓ 㧜㧜㧜 ޓޓޓޓޓޓޓޓ 㧭㧯㨀 ޓޓޓޓޓޓޓޓޓޓޓޓޓ 㧹㧱㧹㧦 ޓޓޓޓޓޓޓޓޓ 㧼...

Page 50: ... 2 Block the convex surface of the lens with a suction cup The cup has blocking direction as shown with the top mark Be careful not to block the wrong side up especially for dual tone colored lens It is recommended to use NIDEK centering device Model CE 1 for blocking NOTE For processing a polycarbonate lens be sure to use a lens cup in order to prevent the cup from moving during processing 4 5 1 ...

Page 51: ...p 1 of 4 5 1 Blocking in active mode p 4 18 2 Block the convex surface of the lens with a suction cup Decenter the optical center in accordance with the indication at PAS e g PAS o 2 0 p 5 0 Decenter the optical center 2 0 mm to the right and 5 0 mm to the bottom to block NOTE For processing a polycarbonate lens be sure to use a lens cup in order to prevent the cup from moving during processing 㧲㧼...

Page 52: ...4 15 Block a lens at 5 mm up and 5 mm outside position from the top line center of the segment with a lens cup When using the NIDEK centering device CE 1 NOTE The edger is factory configured so that a lens is blocked at 5 mm up and 5 mm outside position with the NIDEK centering device CE 1 The provided layout mark of segment on the screen of the CE 1 allows an operator to easily block a lens at 5 ...

Page 53: ...lat edging ofType PL4 4 6 1 Beveling For beveling select the optimum mode suited to the lens material Optimum mode Recommended mode NOTE EX lenses cannot be processed in the auto processing mode and guided processing mode ProcessanEXlensinEXlensprocessingmode See 4 6 1 4EXlensprocessingmode p 4 32 Cataract lenses cannot be processed in auto processing mode Edge a cataract lens after setting the be...

Page 54: ...apter and fully insert the cup If not correct processing cannot be done As for the lens cup if it the attached lens cup to the adapter is upside down the lens cup cannot be held securely by the adapter Positions of the top mark CAUTION Be careful not to get your fingers caught when chucking fixing a lens Top mark Top mark 㧲㧼㧰㧦㧢㧥㧜㧜 ޓޓޓޓޓޓޓޓ 㧲㧼㧰㧦㧢㧥㧜㧜 ޓޓޓޓޓޓޓޓ 㧼㧰 ޓ 㧦㧢㧞㧜㧜 ޓޓޓޓޓޓޓޓ ޓޓޓ 㧦 ޓޓ 㧞㧜 ޓޓޓޓޓޓޓޓ...

Page 55: ...en the display changes to the Bevel simulation display in Step sectional view position line rotates along the traced outline and bevel section at that position will be shown A The glass lens contact position can be moved laterally in the roughing Type PL4 and PLB 2R By changing the position where the glass lens contacts the roughing wheel the partial wear of the roughing wheel for glass lens will ...

Page 56: ...ghing If the sharply warped or high minus plastic lens is detached from the roughing wheel change the position where the plastic lens contacts the roughing wheel To adjust the contact position press or duringroughing The contact position with the wheel will shifttotheright The contact position with the wheel will shifttotheleft NOTE The adjusted contact position with the wheel is effective only in...

Page 57: ...udingprocessingwastemaycauseeyedamage 4 Press Lens shape measurement p The display changes to the Bevel Simulation display and the system stops 5 Simulate the bevel section at each point of the traced outline on the display Thesectionalviewpositionlinerotatescounterclockwise Thesectionalviewpositionlinerotatesclockwise To stop the line movement press or again Thesectionalviewpositionlinejumpstothe...

Page 58: ...e bevel curve that is processed in the auto processing mode The front base curve FRNT rear base curve REAR or ratio will be selected o Specifiedcurvevalueo Front base curve o Rear base curve o Ratio curveprofiling curveprofiling the front surface the rear surface of lens of lens NOTE The curve value can only be selected within a range that the bevel is on the lens edge Therefore the bevel will nev...

Page 59: ...parallel to itself while the bevel curve value was 5 0 NOTE In order to avoid the bevel being off the lens edge be sure to watch the simulation at the thinnestpositionwhilechangingthevalue As distinct from changing the bevel curve value it is possible to specify a bevel tip point which produces a single sided bevel 7 Check the bevel section 1 Press to turn off the cursor 2 Simulate the whole bevel...

Page 60: ...heturningwheelsanditsscatteringmaycauseinjury It is also possible to switch the processing mode to the guided processing mode even in the middle of auto processing To do so press while the roughing is being processed After the roughing is completed the instrument goes into the guided processing mode and it stops While the Simulation display is shown it can be changed to the Layout display by press...

Page 61: ...2 Adjust the bevel position 1 Press or to move the sectional view position line to the base position and check the bevel sectional view at that point The most appropriate tilt base position is the thinnest point of the lens edge or a diagonally opposite point through the frame center to where the bevel tip point is to be moved 2 AlignthecursortoTILTwith or and press to determine the tilt base posi...

Page 62: ...self The whole bevel moves toward the front surface parallel to itself m at the head of the value shows that the bevel is moved forward o at the head of the value shows that the bevel is moved backward 5 Align the cursor to TILT with or and set the tilting amount with or TILT shows the amount of tilting the bevel tip point at the diagonally opposite point to the tilt base position The bevel moves ...

Page 63: ...jury 5 When subsequently processing the opposite lens by switching the R or L side the former setting for the lens side will be shown on the display If one side of the lens is edged with the tilting function the Bevel simulation display will automatically appear after the other side is edged by switching R or L The former values such as the tilt base position amount of tilting bevel bevel curve an...

Page 64: ... to the lens shape measurement error NOTE Use a lens cup for blocking A suction cup cannot hold the convex surface of a lens well enough The cup may move during blocking 1 Check the processing conditions MTL or CEL ZYL EX 2 Set a lens to the adapter in the processing unit See Step 2 of 4 6 1 1 Auto processing mode 3 Close the soundproof cover Processing does not start even if is pressed unless the...

Page 65: ...TE As for the curve value do not change but leave it as the rear base curve REAR The specified curve front base curve or ratio is not appropriate for proper beveling 6 Start processing Press Roughing p Finishing p Polishing Only when is selected by Type PLB or PLB 2R p Processings are complete The Layout display returns 7 Remove the lens WARNING Openthesoundproofcoveraftermakingsurethatthewheelsha...

Page 66: ... is edged with the tilting function As illustrated the bevel on the thick upper part of the lens is moved toward the front surface of the lens in the range that the bevel barely remains at the edge thinnest point The following describes the procedures of processing the EX lens into a nice appearance by adjusting the bevel position on the upper part to the front surface with the tilting function Se...

Page 67: ...h width place the bevel tip point at 1 3 from the rear surface of the edge Do not input the tilting amount and leave TILT 0 0 Upper position diagonally opposite point to the tilt base point Move the bevel position forward as much as possible in the range that the bevel on the edge thinnest point remains on the edge Increase the tilting amount TILT to the minus direction to tilt the bevel toward th...

Page 68: ...ed WARNING Be sure to keep the soundproof cover closed while processing a lens If the soundproof cover is opened during processing the instrument does not stop Spray including processing waste may cause eye damage 4 Start processing Press Lens shape measurement 10 p Roughing p Finishing p Polishing Only when is selected by Type PL4 PLB or PLB 2R p Processings are complete The Layout display return...

Page 69: ...e chuck is released before the wheels have not stopped completely and a lens is dropped it may contact the turning wheels and its scattering may cause injury NOTE When the lens which is hard to be processed or whose edge is thick is polished a part of the edge may remain unpolished In such a case retouch the lens without changing size compensation value See 4 7 2 Retouching lenses p 4 49 ...

Page 70: ...e Step 2 of 4 6 1 1 Auto processing mode 3 Close the soundproof cover Processing does not start even if is pressed unless the soundproof cover is closed WARNING Be sure to keep the soundproof cover closed while processing a lens If the soundproof cover is opened during processing the instrument does not stop Sprayincludingprocessingwastemaycauseeyedamage 4 Start processing Press Lens shape measure...

Page 71: ...he chuck is released before the wheels have not stopped completely and a lens is dropped it may contact the turning wheels and its scattering may cause injury NOTE When the lens which is hard to be processed or whose edge is thick is polished a part of the edge may remain unpolished In such a case retouch the lens without changing size compensation value See 4 7 2 Retouchinglenses p 4 49 ...

Page 72: ...cal mode is selected the simple frame changing mode is established and outlines are not overlaid While the frame changing mode is active does not function 4 Block a lens with a lens cup 1 With lenses fit in frames mark the optical centers and horizontal direction with a lensmeter 2 Remove the lenses from the frames 3 Block the convex surface of the lens with a lens cup using a centering device 㧚 ޓ...

Page 73: ...he lens size is large enough for the frame 11 Check if the whole frame outline thin line is within the lens outline thick line 11 If the lens size is not large enough for the frame it is possible to move the location of the frame outline into the lens outline by changing the PD or value The finished lens however will not follow prescription 㧚 ޓ ޓ ޓ 㧚 㧚 ޓ 㧲㧼㧰㧦㧢㧥㧜㧜 ޓޓޓޓޓޓޓޓ 㧼㧰 ޓ 㧦 ޓޓޓޓޓޓޓޓ ޓޓޓ 㧦 ޓޓ ...

Page 74: ...r the new frame there is no need of lens tracing Skip Steps 5 6 8 and 9 so that trouble for lens tracing can be saved The ICE 9000 blocks a lens whose frame is to be changed with a lens cup at the rim center Pressing in the FC mode establishes the simple frame changing mode automatically This is because the ICE 9000 has already checked that the lens size is sufficient and outlines do not need to b...

Page 75: ... half eye lenses 1 Remove the standard adapter Loosen the set screw on the standard adapter with a provided hex driver to remove the adapter 2 Set the half eye lens adapter Align the kerf on the adapter with the pin on the shaft making sure that the set screw is facing toward you to fit the adapter Then tighten the set screw to fix it 2 Replace the lens clamp with that for half eye lenses 1 Loosen...

Page 76: ...lf eye lens cup that is not suitable for the front curve is used 4 Set the lens to the adapter See Step 2 of 4 6 1 1 Auto processing mode NOTE Alignthetopmarkonthelenscupwiththetopmarkontheadaptertofitthelenscutintothe adapter If not the adapter cannot hold the lens cup securely 5 Close the soundproof cover and press The Usechuckforhalf eyelens messagewillappear Make sure that the lens adapter len...

Page 77: ...ng a lens If the soundproof cover is opened during processing the instrument does not stop Sprayincludingprocessingwastemaycauseeyedamage 6 Start processing Press NOTE After processing a half eye lens be sure to replace the adapter and the lens clamp with the standard ones ...

Page 78: ...ޓޓޓޓޓޓޓޓޓޓޓޓޓ 㧹㧱㧹㧦 ޓޓޓޓޓޓޓޓޓ 㧼㧸㧭 㧺㨅㧸 ޓޓޓ 㧼㧻㧸 ޓޓ 㧾 4 6 3 3 Polishing Type PL4 PLB and PLB 2R Thisisamodetopolishthelensedgetosaveyourtimerequiredtobuffthelensedgeafterthefinishing Set POL by pressing before starting processing with NOTE Glass lenses cannot be polished ForTypePL4 polishingcannotbeperformedinbeveling ...

Page 79: ...ot be selected in the bifocal mode When glass lenses are broken in the half eye lens processing use a white lens cup or the optional pliable cup Setting the soft processing mode at all times Set the GLS soft grind parameter to Exec on the Parameter exchange mode screen See 5 2 Parameter Settings p 5 2 When the lens material is set to GLS the soft processing mode is automatically turned on To switc...

Page 80: ...e and then set the value back to the original after processing 1 Roughly measure the frame tilt angle using a piece of graph paper 2 Call up the MENU display Press 3 Call up the PD adjustment display After moving the cursor o to PD adjustment press 4 After moving the cursor o o o o o to Frame Tilt Angle flat enter the frame tilt angle using or Range 0 0 to 30 0 step 0 5 5 Go back to the MENU displ...

Page 81: ...n SIZ can be changed Reference guide for size correction Subtract one third of the gap size at the rim joint from SIZ e g If the gap is 1 mm 1 3 1 mm approx 0 3 mm Subtract 0 3 from SIZ 2 Set the lens to the adapter Align the top mark on the cup with that of the adapter to reset the lens Then press to fix the lens 3 Start retouching Close the soundproof cover and press 4 After the process check th...

Page 82: ...cessing process a lens with its size 3 mm larger In the actual processing do not perform retouching but follow the instructions below beginning with roughing 1 Change the size value 2 Press twice 3 Press to start processing Retouching cannot be performed such as when removing the suction cup switching R L or reading other frame data ...

Page 83: ... the Lens Cup When removing the suction cup or lens cup use the provided cup remover Insert the cup remover into the lens cup and remove the lens cup while prying the cup with the remover Since the lenses such as polycarbonate lenses are thin prying the cup may crack the coated surface of the lens In such cases remove the lens cup while turning the remover CAUTION When removing the lens cup while ...

Page 84: ...t NOTE Clean the processing unit after each use of the day Be sure to clean it on the day that the instrument is used If it is left for several days after use the processing waste becomes settled and hard to remove 2 Turn the power OFF 3 Perform after use daily checks See 4 11 2 Daily check after use p 4 54 4 Close the cover of the tracing unit 5 Store accessories in a customary place Wipe the dir...

Page 85: ...irty water the lens edge may not be well polished C Does the stocking filter have enough free space If it is filled with processing wastes replace the stocking filter See 8 2 Replacing the Water and Filter p 8 4 D Does the layout display appear when the power is turned ON 1 Turn the power ON 2 Make sure that the Layout display appears without an error E It is recommended to calibrate the tracing u...

Page 86: ...each day It is recommended to provide a check list to make sure everything is checked A Is the power turned OFF B Is the processing unit well cleaned C Is there any stain or breakage on the main body D Do all accessories have no breakage For accessories see 10 ACCESSORIES ...

Page 87: ...f the wheel Periodical maintenance item Maintenance contents Belt for wheel rotation Check the tension of the belt and stretch the belt again if the tension is below standard Replace the belt if it is damaged or deteriorates Wheel Check if there is no deterioration on the processing performance Replace the wheel if its grinding surface is frayed which will be a problem in practical use Spindle uni...

Page 88: ...plastic lenses with the glass roughing wheel the process counter of high index plastic lenses is included in Glass 㧖㧖㧖㧖㧖㧖㧖㧖㧖㧖㧖㧖㧖㧖㧖㧖㧖㧖㧖㧖㧖㧖㧖㧖㧖㧖㧖㧖㧖㧖㧖㧖 㧖 ޓ 㧹 㧱 㧺 㨁 ޓ 㧖 㧖 ޓޓޓޓޓޓ 㧸㨑㨚㨓㨠㨔 ޓ 㧾㧦㧝㧠㧟㧚㧣㧤 ޓ 㧸㧦㧝㧠㧟㧚㧣㧢㧖 㧖㧖㧖㧖㧖㧖㧖㧖㧖㧖㧖㧖㧖㧖㧖㧖㧖㧖㧖㧖㧖㧖㧖㧖㧖㧖㧖㧖㧖㧖㧖㧖㧖 ޓޓޓ ޓ ψ ޓ 㧼㨞㨛㨏㨑㨟㨟 ޓ 㨏㨛㨡㨚㨠㨑㨞 ޓޓޓޓޓޓޓޓޓޓޓޓޓޓޓ ޓޓޓ 㨃㨔㨑㨑㨘 ޓ 㨐㨞㨑㨟㨟㨕㨚㨓 ޓޓޓޓޓޓޓޓޓޓޓޓޓޓޓޓ ޓ ޓ ޓ ޓ ޓ ޓޓޓ 㧿㨕㨦㨑 ޓ 㨍㨐㨖㨡㨟㨠㨙㨑㨚㨠 ޓޓޓޓޓޓޓޓޓޓޓޓޓޓޓ ޓ ޓ ޓ ޓ ޓޓޓ 㧮㨑㨢㨑㨘 ޓ 㨍㨐㨖㨡㨟㨠㨙㨑㨚㨠 ޓޓ...

Page 89: ... ޓޓޓ 㧮㨑㨢㨑㨘 ޓ 㨍㨐㨖㨡㨟㨠㨙㨑㨚㨠 ޓޓޓޓޓޓޓޓޓޓޓޓޓޓ ޓ ޓ ޓޓޓ 㧭㨄㧵㧿 ޓ 㨍㨐㨖㨡㨟㨠㨙㨑㨚㨠 ޓޓޓޓޓޓޓޓޓޓޓޓޓޓޓ ޓ ޓ ޓ ޓ ޓޓޓ 㧼㧰 ޓ 㨍㨐㨖㨡㨟㨠㨙㨑㨚㨠 ޓޓޓޓޓޓޓޓޓޓޓޓޓޓޓޓޓ 㧖㧖㧖㧖㧖㧖㧖㧖㧖㧖㧖㧖㧖㧖㧖㧖㧖㧖㧖㧖㧖㧖㧖㧖㧖㧖㧖㧖㧖㧖㧖㧖 㧖 ޓޓޓޓޓޓޓޓޓޓޓޓޓޓޓޓޓޓޓޓޓޓޓޓޓޓޓޓޓޓ 㧖 㧖 ޓޓޓ 㧼㨍㨞㨍㨙㨑㨠㨑㨞 ޓ 㨑㨤㨏㨔㨍㨚㨓㨑 ޓ 㨙㨛㨐㨑 ޓޓޓޓ 㧖 㧖 ޓޓޓޓޓޓޓ 㨂㨑㨞㧚 ޓ 㧹㧭㧿㨀㧱㧾 ޓ 㨂㧝㧚㧜㧤㧚㧝㧝 ޓޓޓޓ 㧖 㧖 ޓޓޓޓޓޓޓޓޓޓޓޓ 㨀㧾㧭㧯㧱㧾 ޓ 㨂㧞㧚㧜㧝 ޓޓޓޓޓޓޓ 㧖 㧖 ޓޓޓޓޓޓޓޓޓޓޓޓ 㨀㨅㧼㧱 ޓ 㧦 ޓ 㧼㧸㧠 ޓޓޓޓޓޓޓޓޓ 㧖 㧖㧖㧖㧖㧖㧖㧖㧖㧖㧖㧖㧖㧖㧖㧖㧖㧖㧖㧖㧖㧖㧖㧖㧖㧖㧖㧖㧖㧖㧖㧖㧖 ψ ޓ 㧸 㧭...

Page 90: ...F F Factorysetting 2 0 mm Presetstheheightoftheopticalcenter Setthevalueastheheightoftheopticalcenterfromthe rim center When inputting each data of the lens layout this value is automatically set at could be PD or BT This setting is not effective for eye point layout 8 Measure in flat edge None Exec Factorysetting Exec Selects whether to measure the lens shape during flat rimless edging When Exec ...

Page 91: ... Selectswhetherornottocalloutlayoutdataaswellasthelensshapewhencallingupthedata withthememoryfunction In the following display data in area show that it can be called up to the display at each setting When setting at None When setting at Exec 12 Bar Code memory None Exec Factorysetting None Selects whether or not to use an optional barcode scanner to call up the data from the internal memory By co...

Page 92: ...forblockingthebifocallens Specifytheshiftedvaluesfromthetoplinecenter of the segment in blocking the bifocal lens When using the NIDEK Centering device Model CE 1 leavethesettingatthefactorysetting 5mmoutside 5mmup andneverchangeit 17 TILT Function None Exec Factorysetting None Selects whether or not to use the tilting function in guided edging mode If a lens has an extremedifferenceinwidthbetween...

Page 93: ...rchamferingnorgroovingisperformedintheflatedging 21 GLS soft grind None Exec Factorysetting None Selects whether or not to perform the soft processing of a glass lens as default When this parameter is set to Exec and GLS is selected for the lens material the soft processingmodeisautomaticallyturnedon Insoftprocessingmode theprocessingsoundis reduced and a lens becomes hard to break during processi...

Page 94: ...ACT BF or PAS Layout mode PLA HPL PC GLS ACR orTRX Lensmaterial ExceptforglasslensesofTypePLB MTL CEL ZYL PNT or NYL Frame material AUT GUI EX or Blank Grinding mode POL or Blank Whether or not to perform polishing only for Type PL4 PLB and PLB 2R R or L The side which appears first after is pressed Each value on the display cannot be stored For setting the respective preset values for FPD PD and ...

Page 95: ...ng the traced outline on the display When the called data is abnormal the error code Error 0906 will appear Restore the data without edging NOTE Concurrent use of communication function and memory function is impossible Only when Ext interface issetto None thememoryfunctionbecomesavailable The stored data is battery protected even though the power is turned OFF Since this battery is a rechargeable...

Page 96: ...rocessing mode and polishing on off Method for calling up Tocallupthetracedoutlineonly setthe 11 Layoutmemory parameterto None inadvance seep 5 4 1 Align the cursor to MEM with 2 Select the memory address with or An indication of the address whose data has already been stored is reversed 3 Hold down until the instrument produces two beeps The traced outline will appear on the Layout display 2 Memo...

Page 97: ...hen the instrument was changed from the standard specifications to the barcode specification all the data stored with memory address will be erased NOTE Make sure that the barcode scanner is connected to the connector for the barcode on the rear panel of the instrument see p 3 1 Storing method 1 Perform tracing 2 Call up a traced outline to the display with 3 Input each data of lens layout as nece...

Page 98: ...racedoutlineandnotstoringthelenslayoutdata setthe Layoutmemory parameter to None in advance see p 5 4 1 Read the barcode of the frame whose data to be called up The display will change to the Barcode display and the read barcode will be shown 2 Press to call up the data After calling up the data the corresponding traced outline to the barcode will appear on the display NOTE To cancel the data call...

Page 99: ...and left rims Difference 1 mm or more Trace a single rim and then edge a lens The message Use chuck for half eye lens appears and the instrument stops Use the adapter set for half eye lens See 4 6 3 2 Processing half eye lens p 4 43 During the lens shape measurement the display changes to the Bevel simulation display and a part of the traced outline blinks The size of the set lens is not large eno...

Page 100: ... outlet If settled dust in and on an instrument attracts moisture it may cause a short circuit or a fire 1 Unplug the power cable from the wall outlet 2 If the instrument will be not used for a long time drain water in the tank and feedwater pumps 3 Shut the cover of the tracing unit and the soundproof cover 4 Store accessories Store them in a customary place such as the drawer of a table to avoid...

Page 101: ...e due to clogging of the glass roughing wheel or finishing wheel it is stopped and the Rough Wheel Dressing Reminder or FinishWheelDressingReminder messageappears Accordingtothemessage dress the wheel Pressing duringwheeldressingstopswaterfromthechamber cleaningnozzletoprevent thechamberfromgettingsoiled Ifwaterdischargefromthechamber cleaningnozzlehasbeenstoppedaccidentally press againtoresumedis...

Page 102: ...replace the dressing stick worn some 4 cm with the new one Especially replace the dressing stick for the polishing wheel when it becomes shorter than 5 cm It is hard to hold a shortened dressing stick and your fingers may get hurt or the wheels may be damaged Dressing the roughing wheel for glass lenses and the finishing wheel 1 Press Water will run for a few seconds and the wheels will begin to t...

Page 103: ...running and the wheels will stop turning CAUTION After ispressed applyingthedressingsticktothepolishingwheelwhichisturningby the force of inertia will damage the wheel and normal processing will not be able to be performed The dressing of the polishing wheel is intended to make the wheel surface smooth Gently apply the dressing stick so as not to scratch or streak the wheel surface NOTE Soak the d...

Page 104: ...is stopped replace the processing water and stocking filter and remove the waste accumulated in the drain pipe connector 1 Take the tank out of the cabinet Open the cabinet and draw the tank toward you 2 Disconnect the two feedwater hoses Press the red button on the hose to disconnect 3 Disconnect the drain pipe from the tank 4 Drop the stocking filter into the tank 1 Remove the drain cover from t...

Page 105: ... 5 more minutes 7 Dispose of the waste in the tank following local governing ordinances Put a plastic bag etc over the tank and turn it upside down to remove the waste 8 If the waste is stuck inside the tank wash it out using a scrubber 9 Throw away the filtered water in the FP 100 1 Remove the hose of the FP 100 from the filter joint and bring it around the drain outlet Disconnect the hose while ...

Page 106: ...lter to the drain pipe connector Stocking filters cannot be reused Use a new one 13 Set the drain cover as it was see the figure of Step 4 Place the drain cover in the drain pipe connector on the tank Place it with the larger diameter side up 14 Put the tank back into the cabinet 15 Connect the feedwater hoses and drain pipe Press into the feedwater hose until you hear it click NOTE As for both PU...

Page 107: ...cabinet and draw the tank toward you 2 Disconnect the two feedwater hoses Press the red button on the hose to disconnect 3 Disconnect the drain pipe from the tank 4 Drop the stocking filter into the tank 1 Remove the drain cover from the drain pipe connector Drop the waste accumulated on top of the drain cover into the tank 2 Bind the opening of the stocking filter so that the waste will not come ...

Page 108: ...ing filters cannot be reused Use a new one 11 Set the drain cover as it was see the figure of Step 4 Place the drain cover in the drain pipe connector on the tank Place it with the larger diameter side up 12 Put the tank back into the cabinet 13 Connect the feedwater hoses and drain pipe Press into the feedwater hose until you hear it click NOTE As for both PUMP 1 and PUMP 2 be sure to connect the...

Page 109: ...nector 1 Take the tank out of the cabinet Open the cabinet and draw the tank toward you 2 Disconnect the two feedwater hoses Press the red button on the hose to disconnect 3 Disconnect the drain pipe from the tank 4 Remove the stocking filter held with a rubber band on the cover Drop the stocking filter with the opening bound into the tank so that the processing water will not come out 5 Remove th...

Page 110: ...ION Use the stocking filter only that NIDEK specifies Other stockings may become clogged or cause the feedwater hose clogged The stocking filter is a disposable article Do not reuse it Otherwise it may be ripped or run and will not function as a filter 11 Put the lid on the tank 12 Put the tank back into the cabinet 13 Connect the feedwater hoses and drain pipe Press into the feedwater hose until ...

Page 111: ... outlet 2 Disconnect the power cable from the inlet 3 Remove the fuse holder under the inlet Pulloutthefuseholderbypressingthelever 4 Remove the old fuses from the holder and replace them with new ones 5 Push the fuse holders in the body as before Inserttheholdersintothebodywhilepushingand turningthemclockwise 8 5 Cleaning the Exterior When the exterior of the instrument such as the covers or pane...

Page 112: ...he edged glass lens is mounted in a metal frame divide the gap into the number S approx 3 The calculated value is an excess lens diameter e g If the gap were 1 mm 1 3 1 mm approx 0 3 mm Subtract 0 3 mm from the indicated value of Finish Size GLS bevel 㧖㧖㧖㧖㧖㧖㧖㧖㧖㧖㧖㧖㧖㧖㧖㧖㧖㧖㧖㧖㧖㧖㧖㧖㧖㧖㧖㧖㧖㧖㧖㧖 㧖 ޓ 㧹 㧱 㧺 㨁 ޓ 㧖 㧖 ޓޓޓޓޓޓ 㧸㨑㨚㨓㨠㨔 ޓ 㧾㧦㧝㧠㧟㧚㧣㧤 ޓ 㧸㧦㧝㧠㧟㧚㧣㧢㧖 㧖㧖㧖㧖㧖㧖㧖㧖㧖㧖㧖㧖㧖㧖㧖㧖㧖㧖㧖㧖㧖㧖㧖㧖㧖㧖㧖㧖㧖㧖㧖㧖㧖 ޓޓޓ ޓ ψ ޓ 㧼㨞㨛㨏㨑㨟㨟 ޓ 㨏㨛㨡㨚㨠㨑...

Page 113: ...nto see if the point of the bevel is at the middle of the edge If the bevel is leaning to either side adjust it by the following procedures 2 Call up the MENU display Press 㧖㧖㧖㧖㧖㧖㧖㧖㧖㧖㧖㧖㧖㧖㧖㧖㧖㧖㧖㧖㧖㧖㧖㧖㧖㧖㧖㧖㧖㧖㧖㧖 㧖 ޓ 㧹 㧱 㧺 㨁 ޓ 㧖 㧖 ޓޓޓޓޓޓ 㧸㨑㨚㨓㨠㨔 ޓ 㧾㧦㧝㧠㧟㧚㧣㧤 ޓ 㧸㧦㧝㧠㧟㧚㧣㧢㧖 㧖㧖㧖㧖㧖㧖㧖㧖㧖㧖㧖㧖㧖㧖㧖㧖㧖㧖㧖㧖㧖㧖㧖㧖㧖㧖㧖㧖㧖㧖㧖㧖㧖 ޓޓޓ ޓ ψ ޓ 㧼㨞㨛㨏㨑㨟㨟 ޓ 㨏㨛㨡㨚㨠㨑㨞 ޓޓޓޓޓޓޓޓޓޓޓޓޓޓޓ ޓޓޓ 㨃㨔㨑㨑㨘 ޓ 㨐㨞㨑㨟㨟㨕㨚㨓 ޓޓޓޓޓޓޓޓޓޓޓޓޓޓޓޓ ޓ ޓ ޓ ޓ ޓ ޓޓޓ 㧿㨕㨦㨑 ޓ 㨍㨐...

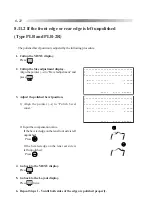
Page 114: ...lay Press twice 7 Repeat Steps 1 6 until the bevel comes at the right position 㧖㧖㧖㧖㧖㧖㧖㧖㧖㧖㧖㧖㧖㧖㧖㧖㧖㧖㧖㧖㧖㧖㧖㧖㧖㧖㧖㧖㧖㧖㧖㧖 㧖 ޓޓޓޓޓޓޓޓޓޓޓޓޓޓޓޓޓޓޓޓޓޓޓޓޓޓޓޓޓޓ 㧖 㧖 ޓޓޓޓޓޓޓ 㧮㨑㨢㨑㨘 ޓ 㨍㨐㨖㨡㨟㨠㨙㨑㨚㨠 ޓޓޓޓޓޓޓ 㧖 㧖 ޓޓޓޓޓޓޓޓޓޓޓޓޓޓޓޓޓޓޓޓޓޓޓޓޓޓޓޓޓޓ 㧖 㧖㧖㧖㧖㧖㧖㧖㧖㧖㧖㧖㧖㧖㧖㧖㧖㧖㧖㧖㧖㧖㧖㧖㧖㧖㧖㧖㧖㧖㧖㧖㧖 ޓ ψ㧮㨑㨢㨑㨘 ޓ 㨏㨛㨚㨟㨠㨍㨚㨠 ޓޓޓޓޓޓ 㧦 ޓޓ ψ㧝㧚㧞㧡㨙㨙 ޓޓޓޓޓޓޓޓޓޓޓ 㧖㧱㨄㧵㨀 ޓ 㧦 ޓ 㧼㨞㨑㨟㨟 ޓ 㧿㧱㧸㧱㧯㨀 ޓ 㧖㧖㧖㧖㧖㧖㧖㧖㧖㧖㧖㧖㧖㧖㧖㧖㧖㧖㧖㧖㧖㧖㧖㧖㧖㧖㧖㧖㧖㧖㧖㧖 㧖 ޓޓޓޓޓޓޓޓޓޓޓޓޓޓޓޓޓޓޓޓޓޓޓޓޓޓޓޓޓޓ...

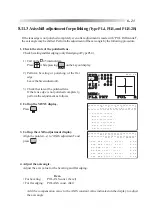
Page 115: ...nst flat For beveling of lenses other than polycarbonate trivex or glass PLAAXS const bevel For flat edging of lenses other than polycarbonate trivex or glass PLAAXS const flat Add the compensation value to the AXIS constant value indicated on the display to adjust the axis angle e g 1 If the finished axis angle became 1º while prescribed angle was 180º add 1 00 to the present value Setting value ...

Page 116: ...8 16 4 Go back to the MENU display Press 5 Go back to the Layout display Press twice 6 Repeat Steps 1 5 until the correct axis angle is obtained ...

Page 117: ...g the value will increase the lens margin allowed for finishing 㧖㧖㧖㧖㧖㧖㧖㧖㧖㧖㧖㧖㧖㧖㧖㧖㧖㧖㧖㧖㧖㧖㧖㧖㧖㧖㧖㧖㧖㧖㧖㧖 㧖 ޓ 㧹 㧱 㧺 㨁 ޓ 㧖 㧖 ޓޓޓޓޓޓ 㧸㨑㨚㨓㨠㨔 ޓ 㧾㧦㧝㧠㧟㧚㧣㧤 ޓ 㧸㧦㧝㧠㧟㧚㧣㧢㧖 㧖㧖㧖㧖㧖㧖㧖㧖㧖㧖㧖㧖㧖㧖㧖㧖㧖㧖㧖㧖㧖㧖㧖㧖㧖㧖㧖㧖㧖㧖㧖㧖㧖 ޓޓޓ ޓ ψ ޓ 㧼㨞㨛㨏㨑㨟㨟 ޓ 㨏㨛㨡㨚㨠㨑㨞 ޓޓޓޓޓޓޓޓޓޓޓޓޓޓޓ ޓޓޓ 㨃㨔㨑㨑㨘 ޓ 㨐㨞㨑㨟㨟㨕㨚㨓 ޓޓޓޓޓޓޓޓޓޓޓޓޓޓޓޓ ޓ ޓ ޓ ޓ ޓ ޓޓޓ 㧿㨕㨦㨑 ޓ 㨍㨐㨖㨡㨟㨠㨙㨑㨚㨠 ޓޓޓޓޓޓޓޓޓޓޓޓޓޓޓ ޓ ޓ ޓ ޓ ޓޓޓ 㧮㨑㨢㨑㨘 ޓ 㨍㨐㨖㨡㨟㨠㨙㨑㨚㨠 ޓޓޓޓޓޓޓޓޓޓޓޓޓޓ ޓ ޓ ޓޓޓ 㧭㨄㧵㧿 ޓ 㨍㨐㨖㨡㨟㨠㨙㨑㨚㨠 ޓޓޓޓޓޓޓޓޓޓޓޓ...

Page 118: ... 0 50 to the present value 4 Go back to the MENU display Press 5 Go back to the Layout display Press twice 㧖㧖㧖㧖㧖㧖㧖㧖㧖㧖㧖㧖㧖㧖㧖㧖㧖㧖㧖㧖㧖㧖㧖㧖㧖㧖㧖㧖㧖㧖㧖㧖 㧖 ޓ 㧹 㧱 㧺 㨁 ޓ 㧖 㧖 ޓޓޓޓޓޓ 㧸㨑㨚㨓㨠㨔 ޓ 㧾㧦㧝㧠㧟㧚㧣㧤 ޓ 㧸㧦㧝㧠㧟㧚㧣㧢㧖 㧖㧖㧖㧖㧖㧖㧖㧖㧖㧖㧖㧖㧖㧖㧖㧖㧖㧖㧖㧖㧖㧖㧖㧖㧖㧖㧖㧖㧖㧖㧖㧖㧖 ޓޓޓ ޓ ψ ޓ 㧼㨞㨛㨏㨑㨟㨟 ޓ 㨏㨛㨡㨚㨠㨑㨞 ޓޓޓޓޓޓޓޓޓޓޓޓޓޓޓ ޓޓޓ 㨃㨔㨑㨑㨘 ޓ 㨐㨞㨑㨟㨟㨕㨚㨓 ޓޓޓޓޓޓޓޓޓޓޓޓޓޓޓޓ ޓ ޓ ޓ ޓ ޓ ޓޓޓ 㧿㨕㨦㨑 ޓ 㨍㨐㨖㨡㨟㨠㨙㨑㨚㨠 ޓޓޓޓޓޓޓޓޓޓޓޓޓޓޓ ޓ ޓ ޓ ޓ ޓޓޓ 㧮㨑㨢㨑㨘 ޓ 㨍㨐㨖㨡㨟㨠㨙㨑㨚㨠 ޓޓޓޓޓޓޓޓޓޓ...

Page 119: ...㨔 ޓ 㨟㨕㨦㨑㧔㧼㧸㧭㧘㨒㨘㨍㨠㧕 ޓޓ 㧦㧗㧝㧚㧜㧜㨙㨙 ޓޓ 㧼㨛㨘㨕㨟㨔 ޓ 㨟㨕㨦㨑㧔㧼㧯㧘㨒㨘㨍㨠㧕 ޓޓޓ 㧦 ޓ 㧜㧚㧜㧜㨙㨙 ޓޓ 㧼㨛㨘㨕㨟㨔 ޓ 㨟㨕㨦㨑㧔㧴㧼㧸㧘㨒㨘㨍㨠㧕 ޓޓ 㧦 ޓ 㧜㧚㧜㧜㨙㨙 ޓޓ 㧼㧻㧸 ޓ 㧰㨕㨒㨒㨑㨞㨑㨚㨠㨕㨍㨘㧔㧼㧯㧕 ޓޓޓ 㧦 ޓ 㧜㧚㧞㧜㨙㨙 ޓ ψ㧼㨛㨘㨕㨟㨔 ޓ 㨘㨑㨢㨑㨘㧔㧼㧸㧭㧘㨒㨘㨍㨠㧕 ޓ 㧦 ޓ 㧜㧚㧟㧜㨙㨙 ޓޓ 㧼㨛㨘㨕㨟㨔 ޓ 㨘㨑㨢㨑㨘㧔㧼㧯㧘㨒㨘㨍㨠㧕 ޓޓ 㧦 ޓ 㧜㧚㧞㧜㨙㨙 8 11Adjustment for Polishing 8 11 1 If a part of edge is left unpolished Type PL4 PLB and PLB 2R 1 Call up the MENU display Press 2 Call up the Size adjustment disp...

Page 120: ...thepointer o to Sizeadjustment and press 1 If the lens edge is not polished completely even though the constant value was adjusted the axis angle may be shifted while the edge is being polished In such a case input the compensation value indicated at POLAXS const bevel or POLAXS const flat as described in 8 11 3 Axis shift adjustment for polishing p 8 23 㧖㧖㧖㧖㧖㧖㧖㧖㧖㧖㧖㧖㧖㧖㧖㧖㧖㧖㧖㧖㧖㧖㧖㧖㧖㧖㧖㧖㧖㧖㧖㧖 㧖 ޓޓޓޓޓޓޓ ...

Page 121: ...lens diameter became 45 5 mm subtract 0 50 from the present value Setting value 0 00 mm o 0 50 mm 5 Go back to the MENU display Press 6 Go back to the Layout display Press twice 9 Repeat Steps 7 8 until the correct lens size is obtained ޓޓ 㧾㨛㨡㨓㨔 ޓ 㨟㨕㨦㨑㧔㧳㧸㧿㧘㨎㨑㨢㨑㨘㧕 ޓ 㧦 ޓ 㧜㧚㧜㧜㨙㨙 ޓޓ 㧾㨛㨡㨓㨔 ޓ 㨟㨕㨦㨑㧔㧳㧸㧿㧘㨒㨘㨍㨠㧕 ޓޓ 㧦 ޓ 㧜㧚㧜㧜㨙㨙 ޓޓ 㧾㨛㨡㨓㨔 ޓ 㨟㨕㨦㨑㧔㧴㧼㧸㧘㨎㨑㨢㨑㨘㧕 ޓ 㧦 ޓ 㧜㧚㧜㧜㨙㨙 ޓޓ 㧾㨛㨡㨓㨔 ޓ 㨟㨕㨦㨑㧔㧴㧼㧸㧘㨒㨘㨍㨠㧕 ޓޓ 㧦㧗㧝㧚㧜㧜㨙㨙 㧼㨛㨘㨕㨟...

Page 122: ...lay Press 5 Go back to the Layout display Press twice 6 Repeat Steps 1 5 until both sides of the edge are polished properly 㧖㧖㧖㧖㧖㧖㧖㧖㧖㧖㧖㧖㧖㧖㧖㧖㧖㧖㧖㧖㧖㧖㧖㧖㧖㧖㧖㧖㧖㧖㧖㧖 㧖 ޓޓޓޓޓޓޓޓޓޓޓޓޓޓޓޓޓޓޓޓޓޓޓޓޓޓޓޓޓޓ 㧖 㧖 ޓޓޓޓޓޓޓ 㧮㨑㨢㨑㨘 ޓ 㨍㨐㨖㨡㨟㨠㨙㨑㨚㨠 ޓޓޓޓޓޓޓ 㧖 㧖 ޓޓޓޓޓޓޓޓޓޓޓޓޓޓޓޓޓޓޓޓޓޓޓޓޓޓޓޓޓޓ 㧖 㧖㧖㧖㧖㧖㧖㧖㧖㧖㧖㧖㧖㧖㧖㧖㧖㧖㧖㧖㧖㧖㧖㧖㧖㧖㧖㧖㧖㧖㧖㧖㧖 ޓ ψ㧮㨑㨢㨑㨘 ޓ 㨏㨛㨚㨟㨠㨍㨚㨠 ޓޓޓޓޓޓ 㧦 ޓޓ ψ㧝㧚㧞㧡㨙㨙 ޓޓ 㧼㨛㨘㨕㨟㨔 ޓ 㨎㨑㨢㨑㨘 ޓ 㨏㨛㨚㨟㨠㧚 ޓ 㧦 ޓޓޓ 㧜㧚㧜㧜㨙㨙 ޓޓޓޓޓޓޓޓޓޓޓ 㧖㧱㨄㧵㨀 ޓ...

Page 123: ...edging POLAXS const flat Add the compensation value to the AXIS constant value indicated on the display to adjust the axis angle 㧖㧖㧖㧖㧖㧖㧖㧖㧖㧖㧖㧖㧖㧖㧖㧖㧖㧖㧖㧖㧖㧖㧖㧖㧖㧖㧖㧖㧖㧖㧖㧖 㧖 ޓ 㧹 㧱 㧺 㨁 ޓ 㧖 㧖 ޓޓޓޓޓޓ 㧸㨑㨚㨓㨠㨔 ޓ 㧾㧦㧝㧠㧟㧚㧣㧤 ޓ 㧸㧦㧝㧠㧟㧚㧣㧢㧖 㧖㧖㧖㧖㧖㧖㧖㧖㧖㧖㧖㧖㧖㧖㧖㧖㧖㧖㧖㧖㧖㧖㧖㧖㧖㧖㧖㧖㧖㧖㧖㧖㧖 ޓޓޓ ޓ ψ ޓ 㧼㨞㨛㨏㨑㨟㨟 ޓ 㨏㨛㨡㨚㨠㨑㨞 ޓޓޓޓޓޓޓޓޓޓޓޓޓޓޓ ޓޓޓ 㨃㨔㨑㨑㨘 ޓ 㨐㨞㨑㨟㨟㨕㨚㨓 ޓޓޓޓޓޓޓޓޓޓޓޓޓޓޓޓ ޓ ޓ ޓ ޓ ޓ ޓޓޓ 㧿㨕㨦㨑 ޓ 㨍㨐㨖㨡㨟㨠㨙㨑㨚㨠 ޓޓޓޓޓޓޓޓޓޓޓޓޓޓޓ ޓ ޓ ޓ ޓ ޓޓޓ 㧮㨑㨢㨑㨘 ޓ...

Page 124: ...alue Setting value 1 00 o 1 50 e g 2 At the sight from the front of lens the upper right side is not polished subtract 0 50 from the present value Setting value 1 00 o 0 50 5 Go back to the MENU display Press 6 Go back to the Layout display Press twice 7 Repeat Steps 1 6 until the whole lens edge is polished ...

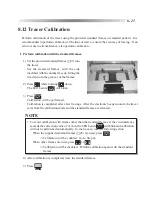
Page 125: ...beside will blink 3 Press Calibration will be performed Calibration is completed after a few tracings After the electronic beeper sounds the tracer exits from the calibration mode and the standard frames are released NOTE To avoid calibration with frames other than the standard frames if the circumference exceeds the correction value of 1 mm the LED beside will blink and calibration will not be pe...

Page 126: ...rcumference If it is not in the range of 162 83 0 10 perform calibration with the standard pattern again 7 Remove the standard pattern 8 13 List of Consumable Articles Articles Order No Dressing stick for roughing wheel 41002 M612 Dressing stick for finishing wheel 41002 M611 Dressing stick for polishing wheel 40140 M610 Stocking filter 40377 M061 Fuse 115 Vac 804 02 02149 Fuse 230 Vac 804 02 0215...

Page 127: ...m or more in diameter when replaced with the lens adapter and lens clamp for half eye lens up to min 21 mm dia vertical width 19 mm when the optional pliable cup is used up to min 32 mm dia vertical width 19 mm In beveling 30 mm or more in diameter when replaced with the lens adapter and lens clamp for half eye lens up to min 22 mm dia vertical width 20 mm when the optional pliable cup is used up ...

Page 128: ...wheel for flat edge and bevel 100 mm in diameter 17 5 mm in width Type PLB 2R Roughing wheel for plastic lens 100 mm in diameter 17 mm in width Roughing wheel for glass lens 100 mm in diameter 17 mm in width Finishing wheel 100 mm in diameter 17 5 mm in width Polishing wheel for flat edge and bevel 100 mm in diameter 17 5 mm in width Processing lens material and polishing for each wheel component ...

Page 129: ...acy 0 1 mm dia error in beveling AUT of I 45 internal data Flat edging size accuracy 0 1 mm dia error in flat edging NYL of I 45 internal data Axis angle 1º Specifications of tracing unit Tracing method 3 D binocular automatic tracing Traceable size Frame R9 R46 vertically up to max 30 mm from center Pattern R12 R46 vertically up to min 10 mm from center FPD measurement function Available Frame cl...

Page 130: ...ording to Clause 1 7 4 of Machinery Directive Environmental condition during transport storage Temperature 25 70ºC Humidity 10 100 Pressure 700 1060 hPa The conditions above indicate the state of the instrument packed Environmental condition during use Setting location Indoor Temperature 5 40ºC Humidity Relative humidity does not exceed 50 at a maximum temperature of 40ºC Pressure 700 1060 hPa Alt...

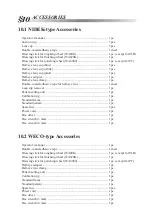
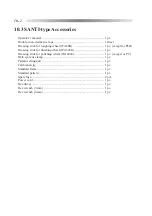
Page 131: ...emover 1 pc Pattern setting unit 1 pc Calibration jig 1 pc Standard frame 1 pc Standard pattern 1 pc Spare fuse 2 pcs Power cord 1 pc Hex driver 1 pc Hex wrench 3 mm 1 pc Hex wrench 4 mm 1 pc 10 2 WECO type Accessories Operator s manual 1 pc Double coated adhesive tape 1 sheet Dressing stick for roughing wheel WA80K 1 pc except for PLB Dressing stick for finishing wheel WA320K 1 pc Dressing stick ...

Page 132: ... 1 pc except for PLB Dressing stick for finishing wheel WA320K 1 pc Dressing stick for polishing wheel WA4000 1 pc except for PC Half eye lens clamp 1 pc Pattern setting unit 1 pc Calibration jig 1 pc Standard frame 1 pc Standard pattern 1 pc Spare fuse 2 pcs Power cord 1 pc Hex driver 1 pc Hex wrench 3 mm 1 pc Hex wrench 4 mm 1 pc ...

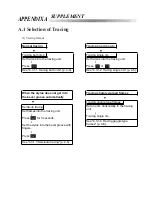
Page 133: ...ess or See 4 3 1 2 Tracing single rim p 4 5 Semiauto tracing Set frames into the tracing unit 㸣 Press for 3 seconds 㸣 Set the stylus into the bevel groove with fingers 㸣 Press 㩷㩷㩷㩷㩷㩷㩷㩷㪅 See 4 3 1 3 Semiauto tracing p 4 5 When the stylus does not get into the bevel groove automatically Tracing goggle type frames Set one rim horizontally to the tracing unit 㸣 Tracing single rim See 4 3 1 4 Tracing g...

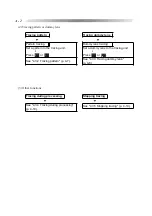
Page 134: ...ing processing p 4 10 Tracing pattern Pattern tracing Set a pattern to the tracing unit 㸣 Press or See 4 3 2 Tracing pattern p 4 7 Tracing dummy lens Dummy lens tracing Set a dummy lens to the tracing unit 㸣 Press or See 4 3 3 Tracing dummy lens p 4 8 Stopping tracing See 4 3 5 Stopping tracing p 4 10 ...

Page 135: ...nasal ends of right and left rims instead of FPD Inputting height from lens outline See 4 4 2 Inputting height from lens outline p 4 14 This is a form to input the height of optical center by measuring the distance from eye point to the bottom of the lens outline Inputting monocular PD 1 2PD See 5 of p 4 13 This is a form to input the distance from the frame bridge center to each eye point separat...

Page 136: ... amount Bifocal mode See 4 5 3 Blocking bifocal lens p 4 20 This if for bifocal lens Block at 5 mm up and 5 mm outside position from the top line center of segment with a lens cup Active mode See 4 5 1 Blocking in active mode p 4 18 This is for blocking a lens at the optical center Bifocal lens See 4 4 2 1 Layout of bifocal lens p 4 15 Passive mode See 4 5 2 Blocking in passive mode p 4 19 This is...

Page 137: ...l on EX lens Flat edging See 4 6 2 1 Flat rimless edging mode p 4 36 Polishing lens edge See 4 6 3 3 Polishing p 4 46 Adjusting bevel position Guided processing mode Select GUI 㸣 Press 㸣 Check the Bevel simulation display 㸣 Adjust the bevel curve and bevel position 㸣 Press See 4 6 1 2 Guided processing mode p 4 25 EX lens flat edging See 4 6 2 2 EX flat rimless edging mode p 4 38 ...

Page 138: ...ck for half eye lens appears Replace the adapter set with the one for half eye lens See 4 6 3 2 Processing half eye lens p 4 43 Processing for frame change Trace frames 㸣 Press 㸣 Press 㸣 Trace the lens 㸣 Set processing conditions and input layout data 㸣 Press See 4 6 3 1 Processing for frame changing p 4 40 Processing a lens which has already been mounted on one frame in order to fit it into anoth...

Page 139: ...nter after moving shaft 0204 After rear surface of lens is measured its front surface cannot be measured Action While front surface is measured hold feeler down lightly 0205 Data for lens measurement or lens measured result is abnormal Aciton Perform operation again from frame tracing 0206 First data in lens shape measurement is abnormal 0207 Data of start and end in lens shape measurement does no...

Page 140: ... writing of EEPROM 0901 Size constant in rough edging is out of its specified range 0902 Size constant is out of its specified range 0903 Bevel constant is out of its specified range 0904 Parameter of wheel position is out of its specified range 0905 Frame memory verification error 0906 Frame memory CRC check error ...

Page 141: ...ill set to the rear surface Eye point layout This is a form to input the eye points as the optical center by the distance measured from the nasal and bottom side of lens outline This form serves to specify the position of the eye point which is marked on the dummy lenses as the optical center FPD Frame Pupillary Distance This represents the distance between the right and left rim centers The rim c...

Page 142: ...center Polishing This is a processing method to polish the lens edge to save your time required to buff the lens edge after beveling or flat edging Semiauto tracing This is a procedure to manually bring the stylus into the groove of the frame in a case that the stylus cannot get in the groove automatically Simple frame changing mode This is a processing procedure to process a lens in the frame cha...

Page 143: ...mless edging 4 36 FPD 3 9 5 3 Frame pupillary distance 3 9 Front base curve 4 26 G Glass soft processing 4 47 Guided processing mode 4 25 I In a case that the stylus cannot be set in the groove automatically 4 6 Inputting the frame tilt angle in flat edging 4 48 L Layout 4 12 Layout display 3 9 Lens material 1 1 9 2 M Memory address 5 9 Memory function 5 4 5 8 MENU display 3 13 Minimum lens diamet...

Page 144: ...e 4 42 Size adjustment 4 13 4 49 8 12 Soundproof cover 3 1 Stocking filter 8 4 8 7 Storing initial display 5 7 Storing and calling up the traced data 5 8 Stylus 3 5 T Tilt base position 3 11 TILT function parameter 5 5 Tilting function 4 29 4 34 Tracer calibration 8 25 Tracing both rims 4 4 Tracing dummy lens 4 8 Tracing goggle type frames 4 6 Tracing pattern 4 7 Tracing single rim 4 5 Tracing uni...

Page 145: ......

Reviews:

Related manuals for LE-9000LX