6
|
ni.com
|
NI 8236 User Guide and Specifications
9.
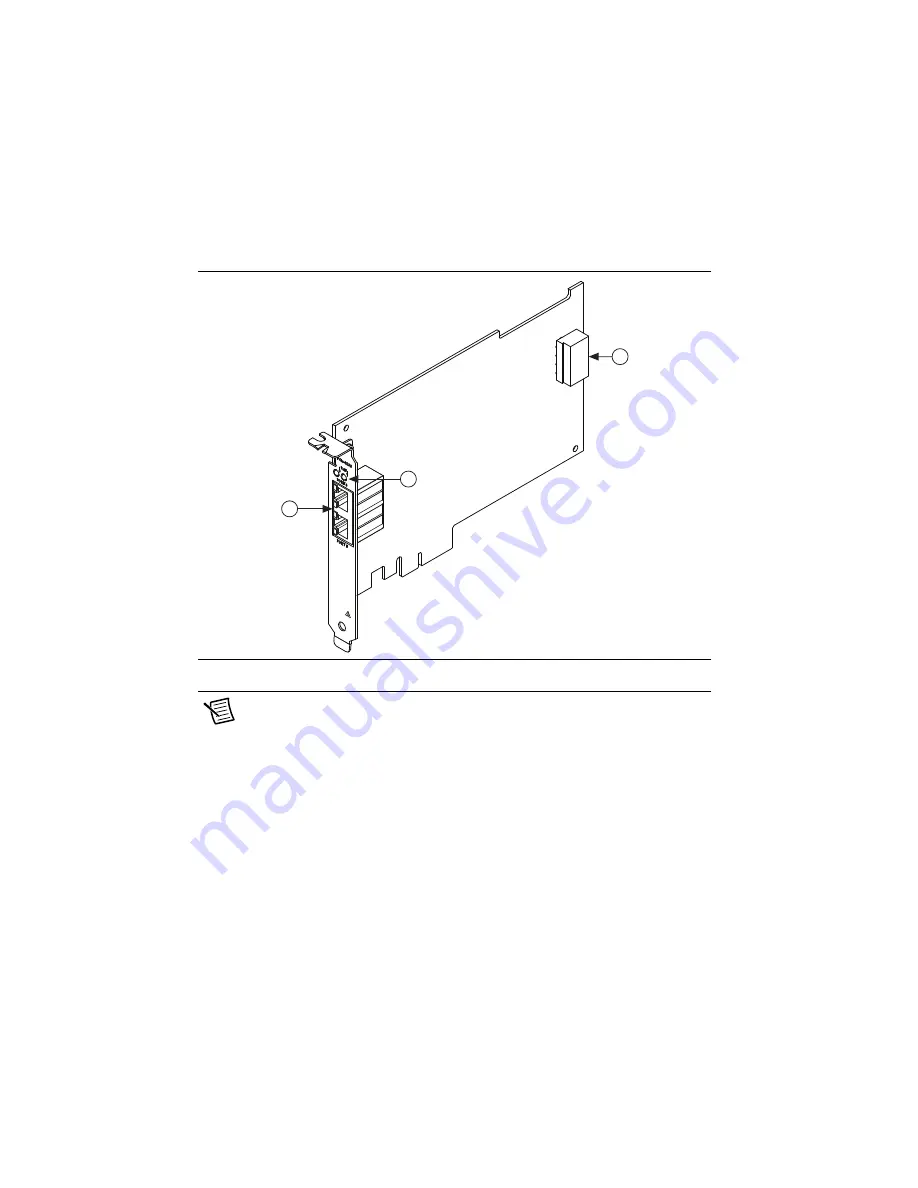
Connect an Ethernet cable to a GigE Vision camera, then connect the camera to the NI 8236
front panel. Refer to Figure 1 for the location of the Ethernet ports.
10. Plug in and power on the computer.
Figure 1.
NI 8236 Connections and Indicators
Note
The first time you start the development computer after installing the
hardware, allow several seconds for the drivers to load.
The NI 8236 is now installed and the camera is now connected.
Confirming the Device is Recognized
To confirm that the device is properly installed and the hardware is recognized, complete the
following steps:
1.
Ensure a compatible GigE Vision camera is connected.
2.
Select
Start»All Programs»National Instruments»Measurement & Automation
Explorer
to open Measurement & Automation Explorer (MAX).
3.
Expand
Devices and Interfaces
.
4.
Verify that the attached camera appears under
Devices and Interfaces»NI-IMAQdx
Devices
.
1
Gigabit Ethernet Ports
2
PoE Indicator LEDs
3
PoE Power Connection
1
3
2


