background image

2

Congratulations!

Congratulations on your purchase of the Nexxtech Electronic Keyboard! This electronic keyboard is a high quality with up 
to 128 voices, 100 styles and 100 songs. Before you use this keyboard, we recommend that you carefully read through 
this manual. Please keep the instruction manual for future reference.

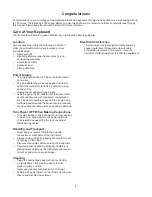
Care of Your Keyboard

Your keyboard will remain in good condition if you follow these simple guidelines:

Location

Do not expose the unit to the following conditions in 
order to avoid deformation, discolouration or more 
serious damage:
• 

Direct sunlight

• 

High temperatures (near heat sources or in an 
enclosed heated area)

• 

Excessive humidity

• 

Excessive dust

• 

Strong vibrations

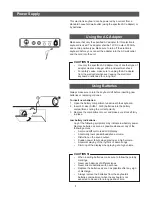
Power Supply

• 

Turn the power switch OFF when the instrument is 
not in use.

• 

The AC adapter should be unplugged from the AC 
outlet if the instrument is not to be used for a long 
period of time.

• 

Unplug the AC adapter during storms.

• 

Avoid plugging the AC adapter into the same outlet 
as other appliances with high power consumption, 
such as electric heaters or ovens. Also, avoid using 
multi-plug adaptor since these can result in reduced 
sound quality, operation errors and possible damage.

Turn Power OFF When Making Connections

• 

To avoid damage to the instrument and other devices 
to which it is connected, turn the power switches 
of all related devices OFF prior to connecting or 
disconnecting cables.

Handling and Transport

• 

Never apply excessive force to the controls, 
connectors or other parts of the instrument.

• 

Always unplug cables by gripping the plug firmly, but 
not pulling on the cable.

• 

Disconnect all cables before moving the instrument.

• 

Physical shocks caused by dropping, bumping or 
placing heavy objects on the instrument can result in 
scratches and more serious damage.

Cleaning

• 

Clean the cabinet and panel with a dry soft cloth.

• 

A slightly damp cloth may be used to remove 
stubborn grime and dirt.

• 

Never use cleaners such as alcohol or thinner.

• 

Avoid placing vinyl object on top of the unit (vinyl can 
stick to and discolor the surface).

Electrical Interference

• 

This instrument contains digital circuitry and may 
cause interference if placed too close to radio 
or television receivers. If this occurs, move the 
instrument further away from the affected equipment.

Summary of Contents for 61-Key Electronic Keyboard

Page 1: ...61 Key Electronic Keyboard INSTRUCTION MANUAL 4219634...

Page 2: ...electric heaters or ovens Also avoid using multi plug adaptor since these can result in reduced sound quality operation errors and possible damage Turn Power OFF When Making Connections To avoid dama...

Page 3: ...television reception which can be determined by turning the equipment off and on the user is encouraged to try to correct the interference by one or more of the following measures Reorient or relocate...

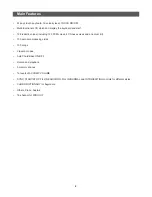
Page 4: ...123 PCM voices 4 Chinese voices and one drum kit 100 auto accompanying styles 100 songs 3 lesson modes Auto Chord Bass ON OFF Record and playback 5 memory spaces 16 levels of ACCOMP VOLUME SYNC START...

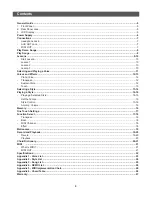
Page 5: ...ch 13 Selecting a Style 13 14 Playing a Style 14 16 Playing a Selected Style 14 15 Set the Tempo 15 Style Control 15 16 Accomp Volume 16 Memory 16 One Touch Settings 17 Function Select 17 18 Transpose...

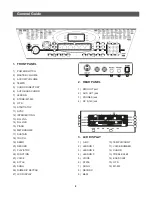
Page 6: ...FILL IN B 15 PIANO 16 METRONOME 17 SUSTAIN 18 TOUCH 19 DEMO 20 RECORD 21 PLAY STOP 22 FUNCTION 23 VOICE 24 STYLE 25 SONG 26 NUMERIC KEYPAD 27 LCD DISPLAY 2 REAR PANEL 1 MIDI OUT port 2 AUX OUT jack 3...

Page 7: ...sert new batteries 1 Open the battery compartment underneath the keyboard 2 Insert 6 D size SUM 1 R 20 batteries into the battery compartment noting the correct polarity 3 Replace the compartment cove...

Page 8: ...X IN of the ampli er The MIDI OUT Jack The MIDI IN connector receivers MIDI data from an external MIDI device The MIDI OUT connector transmit MIDI data generated by the electronic keyboard to an exter...

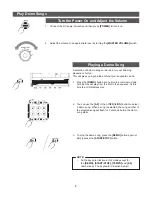
Page 9: ...0 9 or the OFF ON button to select a demo song When a song is selected the song number of the selected song will ash for 3 seconds before the demo song starts 3 To stop the demo song press the DEMO b...

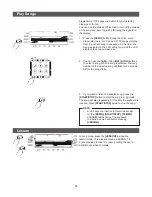
Page 10: ...OFF ON buttons to select a song When a song is selected the song number of the selected song will ash for 3 seconds before the song starts 3 If you want to listen to a speci c song press the START STO...

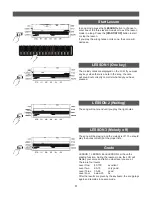
Page 11: ...ly no matter what keys you have pressed LESSON 2 Waiting The song will not sound until you play the right notes LESSON 3 Melody off The song will be playing and the melody is off You should play the n...

Page 12: ...e button to scroll rapidly through the voices in the corresponding direction The selected voice number shows on the display The Number Buttons The number buttons can be used to directly enter the numb...

Page 13: ...ys will make the keyboard exit PIANO mode The LCD and the voice will go back to the previous settings 3 If you don t use the PIANO to exit the voice will remain as the piano voice Transpose Press FUNC...

Page 14: ...can be used to provide fully orchestrated accompaniment The sophisticated Auto Accompaniment system can provide automated bass and chord backing that is perfectly matched to the selected accompanimen...

Page 15: ...e The new style will play with the old tempo Playing a Selected Style 1 Start a style Press START STOP button and the drum part of the style will play at once When the ABC is on you can hear the drum...

Page 16: ...tops the tempo will change with the style automatically to the default tempo When style is playing the tempo will not change with the style At this time pressing both TEMPO and TEMPO simultaneously wi...

Page 17: ...is playing Accomp Volume 1 Press ACC VOL ACC VOL button to change the style volume The LCD will display ACP XX The range is from 0 to 15 These buttons are inactive during SONG mode 2 Press both ACC V...

Page 18: ...e LCD M1 and M2 are used for normal M3 and M4 are used for variation M5 is not used here Press O T S again to exit the O T S mode Now the M1 M5 spaces are used as memory registers again NOTE You can o...

Page 19: ...wo times and the LCD displays MET 04 then use the to change the metro beat 0 2 3 4 5 6 7 8 9 MIDI Channel Press the FUNCTION button three times and the LCD displays CHA XX then use the to change the M...

Page 20: ...ss the RECORD button and the RECORD indicator on the LCD lights up Four beat dots will ash together indicating that it is in Ready Record mode You can now change the voice style and so on before you s...

Page 21: ...STOP again to stop playback NOTE The data in the memory will be lost if you turn off the keyboard You can only record one track and the re recording operation will replace the old one You can use this...

Page 22: ...to communicate The keyboard is equipped with MIDI OUT terminals which are located on the rear panel MIDI OUT The keyboard can send out several kinds MIDI messages such as PROGRAM CHANGE NOTE PITCH BE...

Page 23: ...Lesson 1 Lesson 2 Lesson 3 DEMO Song 6 demo songs Overall Controls Transpose Beat Split Point Pitch Bend Effect MIDI Channel Metronome Lesson O T S Touch Store Chord Dictionary Piano Accompaniment Con...

Page 24: ...24 Appendix 1 Voice List...

Page 25: ...25 Appendix 2 Style List Style Style Style...

Page 26: ...26 Appendix 3 Song List Song Name Song Name...

Page 27: ...Caug Cm Cm6 Cm7 Cm7b5 CmM7 Cdim7 C7 C7sus4 C7 13 Csus4 Chord C Major M Major Sixth 6 Major seventh M7 Major ninth M9 Augmented aug Minor m Minor sixth m6 Minor seventh m7 Minor seventh atted fth m7b5...

Page 28: ...r exclusion may not apply to you Defacing the serial number or using your Product for commercial or institutional purposes voids this warranty Are There Other Warranties There are no express warrantie...

Reviews: