www.nexusrobot.com Robot Kits manual
8
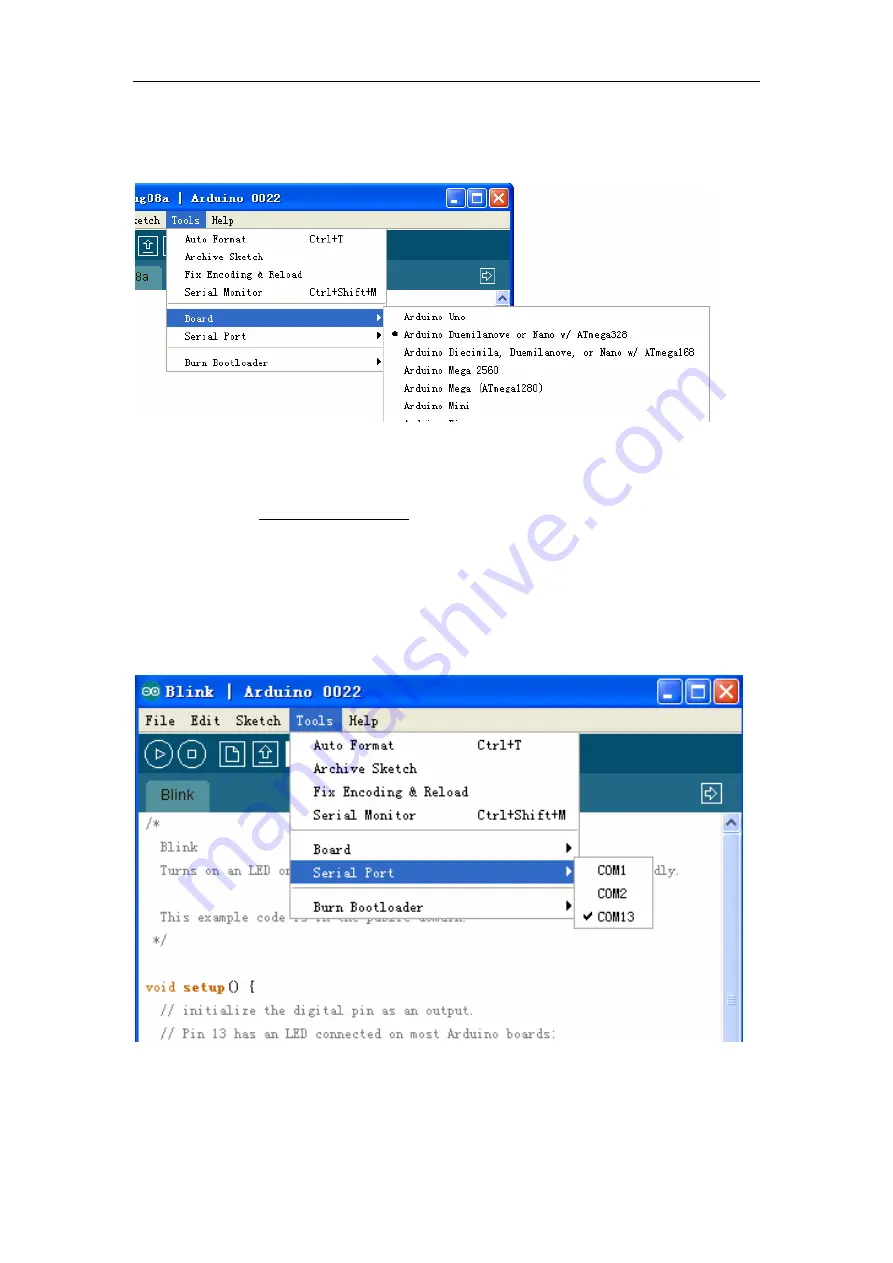
7 | Select your board
You'll need to select the entry in the
Tools > Board
menu that corresponds to your Arduino.
For Duemilanove Arduino boards with an ATmega328 (check the text on the chip on the board), select
Arduino Duemilanove or Nano w/ ATmega328
. Previously, Arduino boards came with an ATmega168;
for those, select
Arduino Diecimila, Duemilanove, or Nano w/ ATmega168
. (Details of the board menu
entries are available on the environment page.)
8 | Select your serial port
Select the serial device of the Arduino board from the Tools | Serial Port menu. This is likely to be
COM3
or higher (
COM1
and
COM2
are usually reserved for hardware serial ports). To find out, you can
disconnect your Arduino board and re-open the menu; the entry that disappears should be the Arduino
board. Reconnect the board and select that serial port.
9 | Upload the program
Now, simply click the "Upload" button in the environment. Wait a few seconds - you should see the RX
and TX leds on the board flashing. If the upload is successful, the message "Done uploading." will appear
Summary of Contents for Nexus Robot
Page 74: ...www nexusrobot com Robot Kits manual 70 Sample Wiring Diagram for RB004 2WD V2 0...
Page 92: ...www nexusrobot com Robot Kits manual 88 Diagram for Omni3WD_V1 0...
Page 96: ...www nexusrobot com Robot Kits manual 92 Diagram_Omni3WD_V3 3...
Page 118: ...www nexusrobot com Robot Kits manual 114 Sample Wiring Diagram for RB011 Mecanum 4WD V4 1...


