background image

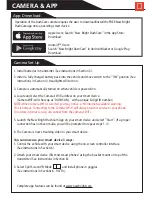
Operation of the DashCam camera requires the user to download/install the FREE New Bright 

DashCam app onto an existing smart device. 

Apple Users: Search “New Bright DashCam” in the App Store; 

Download. 

Android™ Users:

Search “New Bright DashCam” in Android Market or Google Play; 

Download.

Camera Set Up

App Download

CAMERA & APP

5

Complete app features can be found at www.newbright.com 

1. Install batteries in transmitter (See instructions in Section 3).

2. Install a fully charged battery pack into the vehicle and move switch to the “ON” position (See 

instructions in Section 4). Headlights will turn on.

3. Camera is automatically turned on when vehicle is powered on.  

4. Locate and select the Camera’s WiFi address on your smart device.

(Camera WiFi will show up as ‘DASHCAM_’ with a unique 6-digit ID number)

NOTE: When camera WiFi is selected you may notice a ‘No Internet Available’ warning.
This is normal. Connecting to the camera’s WiFi will disrupt internet service to your phone. 
To resume internet service, disconnect from the camera’s WiFi.

5. Launch the New Bright DashCam App on your smart device and select “Start”. (If a proper 

connection has not been made, you will be prompted to repeat steps 1-4).  

6. The Camera is now streaming video to your smart device. 

You can now use your smart device 3 ways:

1. Control the vehicle with your smart device using the on-screen controller interface

(See instructions in Section 6). 

2. Attach your smart device (fits most smart phones) using the bracket mount on top of the 

transmitter (See instructions in Section 8).

3. Select Split Screen VR Mode             and install phone in goggles

(See instructions in Sections 6, 9 & 10).

Summary of Contents for 614VR

Page 1: ...Thank you for choosing a premium New Bright product OWNER S MANUAL Please read and understand all precautions prior to use INPUT 120VAC60Hz8W OUTPUT 14 4VDC440mA L370102856 JN284 16...

Page 2: ...o be damaged or leaking Always unplug Charger when not in use Always remove Battery Pack from Battery Compartment when not in use Do not dispose batteries in fire Leakage explosion and personal injury...

Page 3: ...a vertical or wall mount position 3 Allow battery to charge for 1 1 5 Hours Charging Status Light be solid red while battery is charging When charging is complete light will blink green 4 To remove t...

Page 4: ...n that the Compartment tab has snapped into the locked position Note When replacing Transmitter batteries Do not mix old and new batteries Do not mix alkaline standard or rechargeable batteries Use al...

Page 5: ...locking tab to keep battery pack secure Battery Installation VEHICLE ON OFF Switch 4 If vehicle pulls to the left or right during forward driving the Steering Trim may need to be adjusted The Steering...

Page 6: ...t device Camera WiFi will show up as DASHCAM_ with a unique 6 digit ID number NOTE When camera WiFi is selected you may notice a No Internet Available warning This is normal Connecting to the camera s...

Page 7: ...e App Controller APP Interface Tap to take a photo Press and hold top arrow to drive Forward Release to Stop Press and hold bottom arrow for Reverse Drive Release to stop Press and hold left arrow to...

Page 8: ...o be raced at the same time Once vehicle and transmitter batteries have been correctly installed and vehicle ON OFF Switch is in the ON position the transmitter will automatically sync with the vehicl...

Page 9: ...rd Reverse Drive 1 Push right joystick to the left for left turning Release to stop Push right joystick to the right for right turning Release to stop Left Right Steering 2 Press once to turn Camera O...

Page 10: ...e phone holder to accommodate your device 5 Insert your device and push the sides in for a snug fit You may need to remove any protective phone case for a good fit 6 Insert phone holder back into the...

Page 11: ...he top strap by pulling the buckle towards the back of your head 3 Continue to to fit the headset by tightening or loosening the buckles on either side of your head The headset should be comfortable a...

Page 12: ...isorientation impaired balance impaired hand eye coordination nausea light headedness discomfort or pain in the head or eyes drowsiness fatigue or any symptoms similar to motion sickness 4 Anyone who...

Page 13: ...e certain that the vehicle ON OFF switch is in the ON position Problem Camera image not showing up on smart phone Is the camera turned ON See Sections 7 8 for Camera ON OFF button location Is the WiFi...

Page 14: ...Precautions Care PROPER USE 13...

Page 15: ...cular installation If this equipment does cause harmful interference to radio or television reception which can be determined by turning the equipment off and on the user is encouraged to try to corre...

Page 16: ...to us postage pre paid and insured by the consumer When returning a defective product please package the product the Product Return Form and a copy of the dated sales receipt as proof of purchase Be s...

Reviews: