Wireless Notebook Adapter
9
8
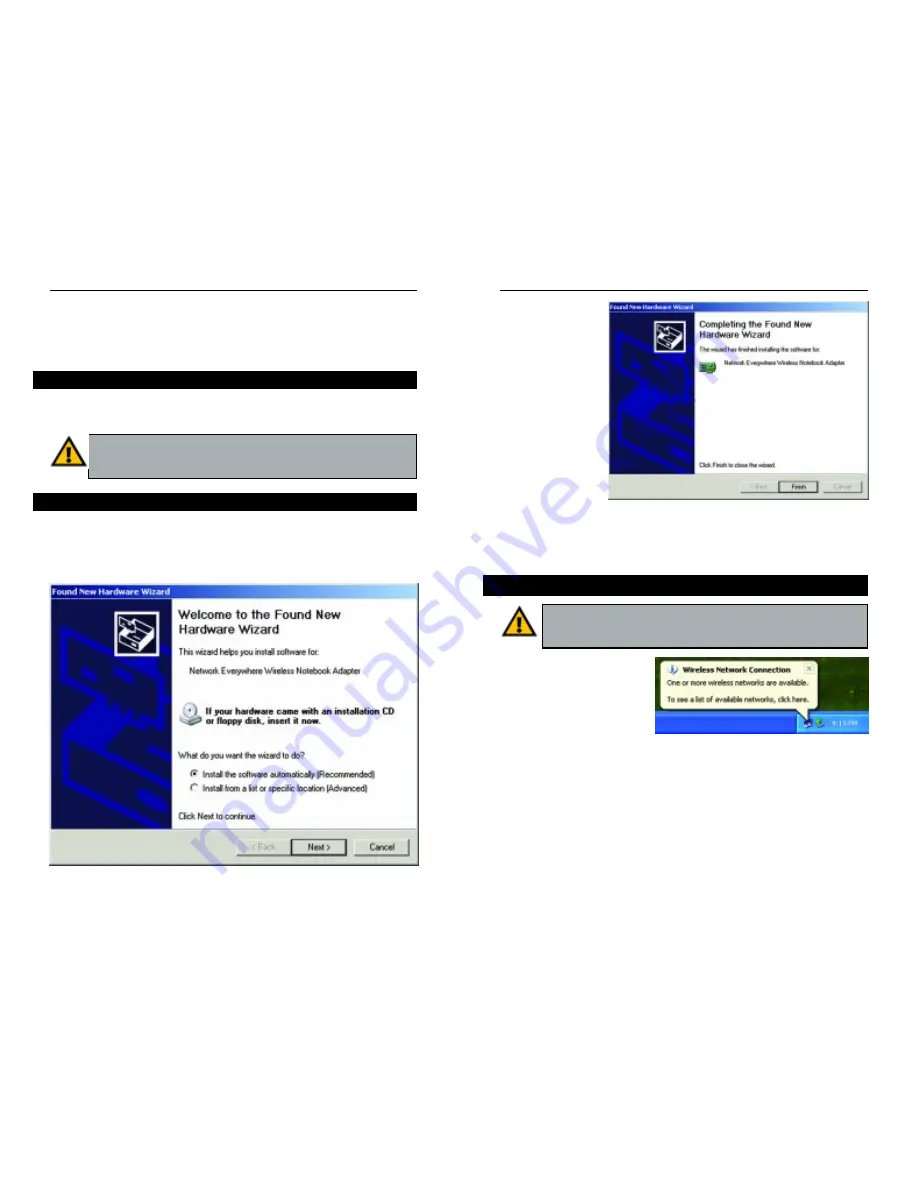
2. After Windows
has finished
installing the driv-
er, click the
Finish button, as
shown in Figure
4-2.
You have now completed the driver installation for
the Wireless Notebook Adapter. To configure the Adapter, proceed to
the next section, “Windows XP Wireless Zero Configuration.”
1. After installing the Adapter,
the Windows XP Wireless
Zero Configuration icon
will appear in your comput-
er’s system tray (see Figure
4-3). Double-click the icon.
Figure 4-2
Network Everywhere
™
Series
Chapter 4: Driver Installation and
Configuration for Windows XP
After inserting the Wireless Notebook Adapter into your computer, you will
install the driver and configure the Adapter.
1. Windows XP will automatically detect the Adapter. Insert the Setup Wizard
CD-ROM into your CD-ROM drive. Click the radio button next to Install
the software automatically (Recommended), as shown in Figure 4-1, and
click the Next button.
Important for Windows XP users: Do NOT run the Wireless Notebook
Adapter’s Setup Wizard. If the Setup Wizard runs automatically after the
Setup Wizard CD-ROM has been inserted, click the Exit tab.
Figure 4-1
Overview
Driver Installation for Windows XP
Windows XP Wireless Zero Configuration
Important for Windows XP users: Windows XP has a built-in con-
figuration tool. Use the Windows XP Wireless Zero Configuration (in
the system tray at the bottom of your screen) to configure the Adapter.
Figure 4-3


