


22
|
Chapter 4. Installation
GS752TXS Smart Switch Hardware Installation Guide
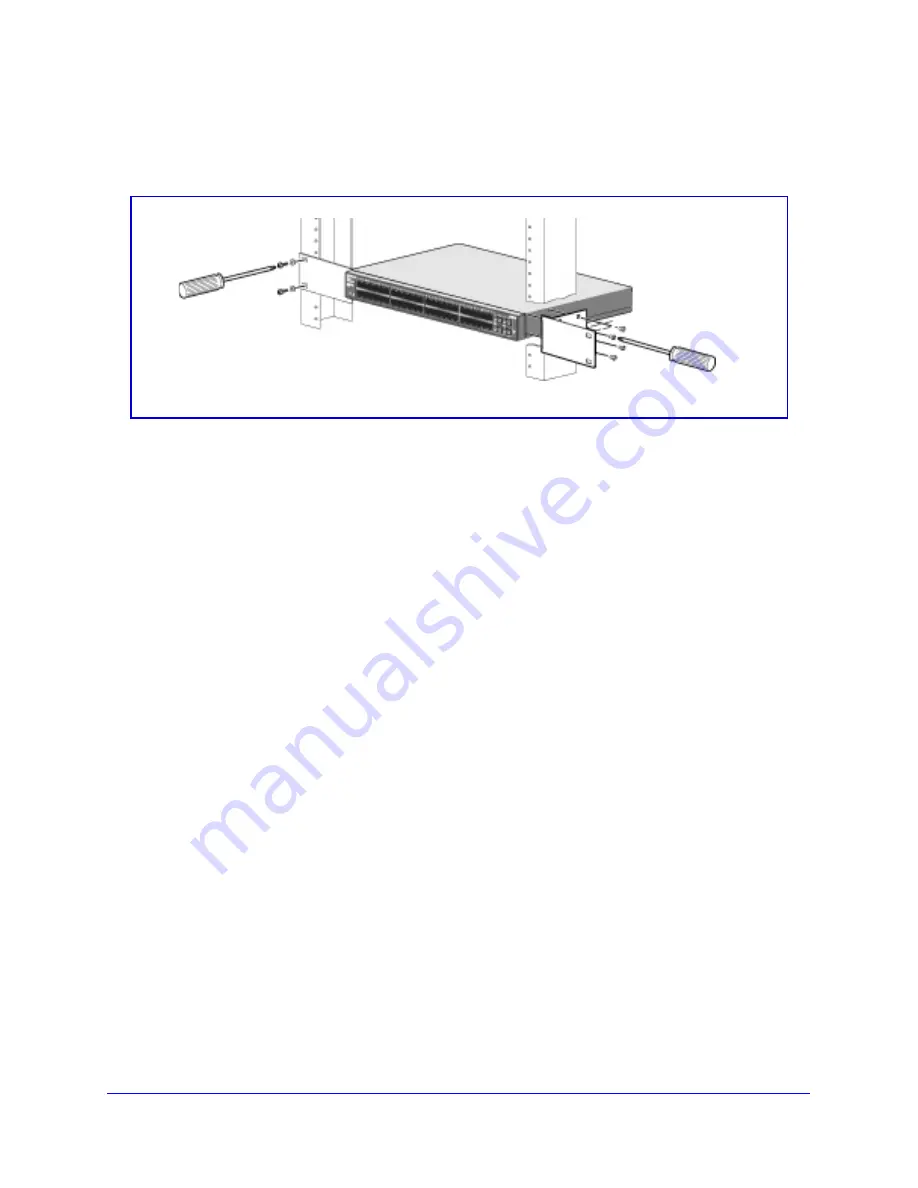
4.
Align the mounting holes in the brackets with the holes in the rack, and insert two pan-head
screws with nylon washers through each bracket and into the rack.
5.
Tighten the screws with a #2 Phillips screwdriver to secure mounting brackets to the rack.
Figure 6. Rack Mount
Step 3: Checking the Installation
Before applying power to the switch, perform the following steps:
•
Inspect the equipment thoroughly.
•
Verify that all cables are installed correctly.
•
Check cable routing to make sure cables are not damaged or creating a safety hazard.
•
Ensure all equipment is mounted properly and securely.
Step 4: Connecting Devices to the Switch
The following procedure describes how to connect PCs to the switch’s RJ-45 ports. The
GS752TXS Smart Switch contains Auto Uplink technology, which allows the attaching of
devices using either straight-through or crossover cables.
Summary of Contents for Smart Switch GS752TXS
Page 5: ...GS752TXS Smart Switch Hardware Installation Guide Contents 5 ...
Page 11: ...Chapter 1 Introduction 11 GS752TXS Smart Switch Hardware Installation Guide ...
Page 17: ...Chapter 2 Physical Description 17 GS752TXS Smart Switch Hardware Installation Guide ...
Page 32: ...32 Appendix Technical Specifications GS752TXS Smart Switch Hardware Installation Guide ...


