


ReadyNAS Pro Business Edition User Guide
Managing Levels of Service
6-5
v1.2, October 2008
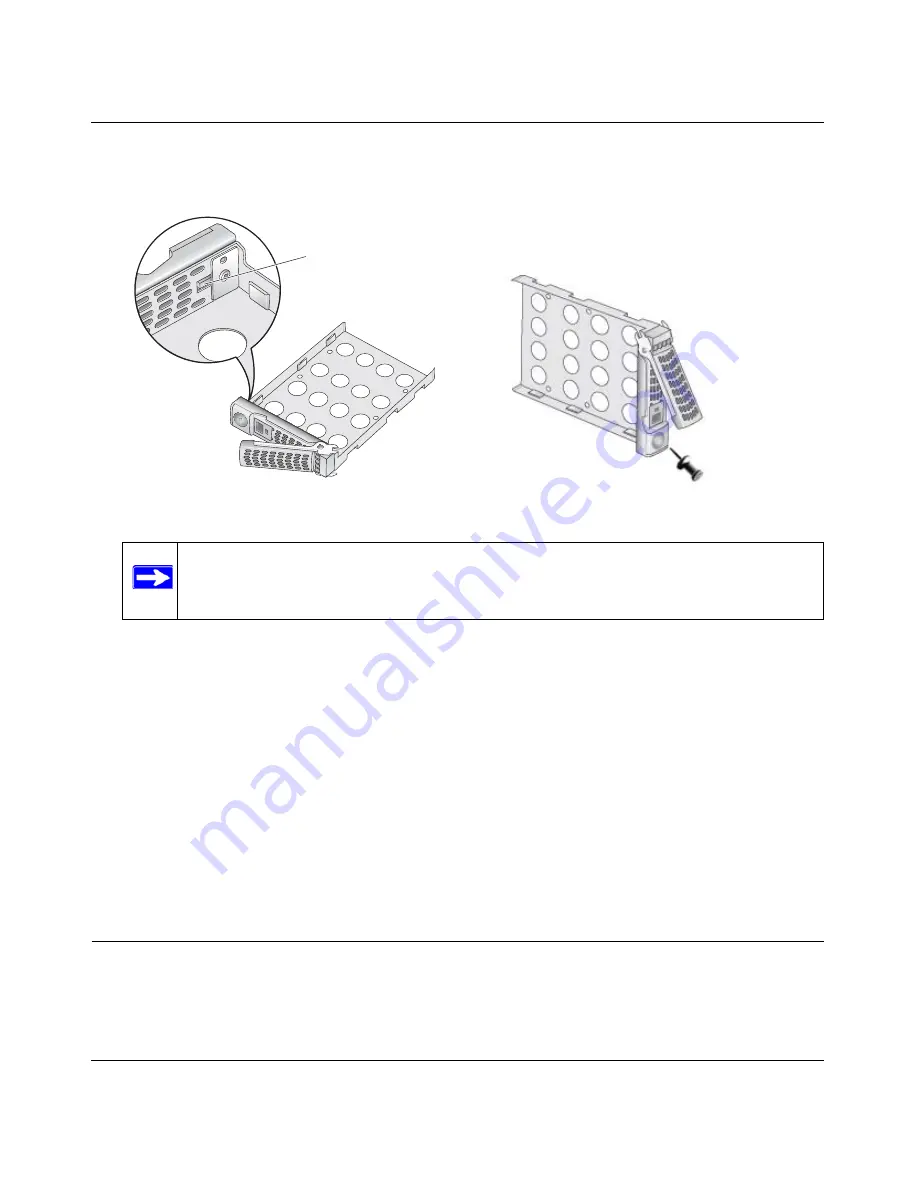
4.
If you want to prevent easy removal of the disk from the tray, set the tray lock: up is locked;
down is unlocked..
5.
Replace the failed disk, reassemble, and slide the disk tray back in. Make sure that the hard
disk connectors face the interior of the disk bay when you reassemble the disk.
Resynchronizing the Volume
If you had to power off to replace the failed disk, turn on the power on the ReadyNAS.
The RAID volume automatically resynchronizes with the new disk in the background. The process
takes several hours depending on disk size. During the resync process, the ReadyNAS can be used
as normal, although access will be slower until the volume is finished resynchronizing.
You will be notified by e-mail when the resync process is complete.
Using the System Diagnostic Menu
The recessed reset switch on the back of the unit (see the illustration
“Rear Panel” on page 1-6
)
allows you to perform six functions:
Figure 6-7
Note:
If you set the tray lock, you will need to use a push-pin or paper clip to open the
tray.
Locking
mechanism
Summary of Contents for ReadyNAS Pro Business
Page 4: ...v1 2 October 2008 iv...
Page 12: ...ReadyNAS Pro Business Edition User Guide xii About This Manual v1 2 October 2008...
Page 112: ...ReadyNAS Pro Business Edition User Guide B 2 Related Documents v1 2 October 2008...
Page 118: ...ReadyNAS Pro Business Edition User Guide Index 6 v1 2 October 2008...
Page 119: ...ReadyNAS Pro Business Edition User Guide Index 7 v1 2 October 2008...
Page 120: ...ReadyNAS Pro Business Edition User Guide Index 8 v1 2 October 2008...


