NETGEAR MS2110 - Stora NAS Server User Manual Download Page 20

NETGEAR Stora User Manual

1-12

Getting Acquainted

v1.0, September 2009

Configure your Stora

Use the CD that comes with the Stora unit to setup and configure your device and make it ready for 
storing data. At this time you will also be able to give your unit a unique name, and assign your 
own user name and password.

To Run the Setup Program:

1. Make a note of the Product key

, which is located on the Resource CD sleeve, and also on the 

bottom of the Stora unit. Write this down, as you will need it later in the installation process. 

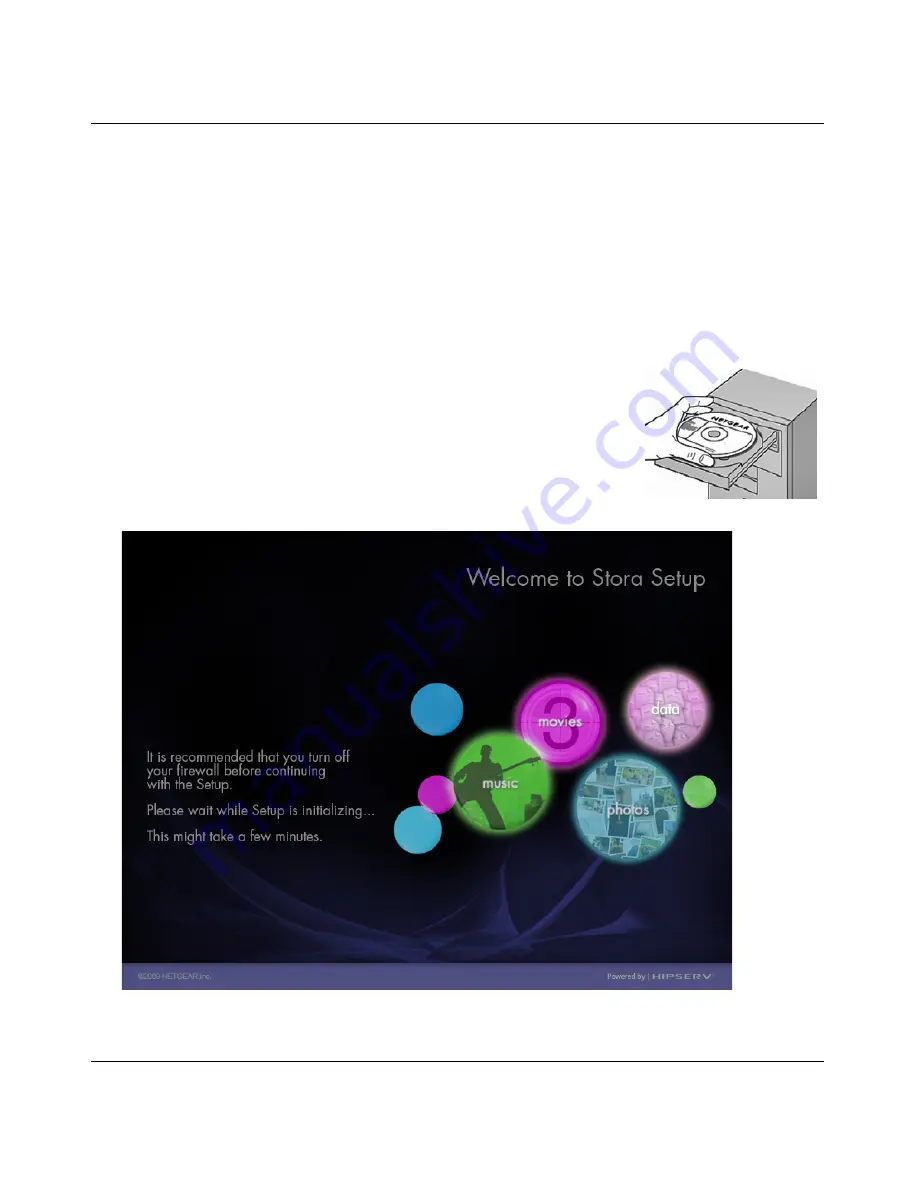
2. Insert the Resource CD into your computer. 

Wait approximately 2 minutes for the Setup program to initialize. 
The “Welcome to Stora” setup screen displays. 

If the CD does not start automatically, go to 

My Computer

 and 

double-click 

StoraSetup.exe

 to start the Setup program.


Figure 1-6  Stora Welcome Screen

Summary of Contents for MS2110 - Stora NAS Server

Page 1: ...202 10540 01 v1 0 September 2009 NETGEAR Inc 350 East Plumeria Drive San Jose CA 95134 USA NETGEAR Stora User Manual...

Page 2: ...itions set out in the BMPT AmtsblVfg 243 1991 and Vfg 46 1992 The operation of some equipment for example test transmitters in accordance with the regulations may however be subject to certain restric...

Page 3: ...t and Publication Details Model Number Model MS2110 Publication Date September 2009 Product Family Network Storage Product Name NETGEAR Stora Home or Business Product Home Language English Publication...

Page 4: ...ector Descriptions 1 9 Initial Setup 1 10 Check Package Contents 1 10 Connect the Stora to your Network 1 11 Configure your Stora 1 12 Installing a Disk 1 23 Replacing a Failed Disk 1 24 Installing th...

Page 5: ...king with Albums 3 23 Working with Files 3 30 Working with Images 3 35 Setting up Contacts 3 37 Social Media 3 38 Preferences 3 43 Displaying the Preferences page 3 43 User Preferences 3 44 Server Pre...

Page 6: ...NETGEAR Stora User Manual Contents iii v1 0 September 2009 Changing Account Settings 4 15 Help Menu 4 19 Index...

Page 7: ...nventions This manual uses the following typographical conventions Formats This manual uses the following formats to highlight special messages Italic Emphasis books CDs file and server names extensio...

Page 8: ...NETGEAR Stora User Manual ii About This Manual v1 0 September 2009 Revision History Part Number Version Number Publication Date Description 202 10540 01 1 0 September 2009 First publication...

Page 9: ...tora system and covers the unit s physical features and initial setup steps Topics discussed in this chapter include About the Stora File Types Stora Hardware Overview Initial Setup Installing a Disk...

Page 10: ...rnet For example it allows you to upload photos while you re on the road or on vacation See Accessing the Stora on page 1 32 for more information You can back up any PC and Mac on your home network to...

Page 11: ...uters on your home network Premium Features Premium features extend the Stora capabilities and are available to licensed users You will have the option to upgrade your subscription at the time of inst...

Page 12: ...t available to a wide variety of media players on your home network The media player must support the UPnP AV Universal Plug and Play Audio Visual DLNA Digital Living Network Alliance or Windows Media...

Page 13: ...tomatically optimize the mobile interface for the device Depending on the device mobile users can Browse albums Browse folders in the Media Library Create new folders in the Media Library Upload a fil...

Page 14: ...uttons and drive bays Front Panel The sleek front panel of the Stora indicates the active inactive status of the system and can be easily removed to access the disks and disk bays located behind it 1...

Page 15: ...that house up to two SATA disks These disks can be easily installed and removed by pressing the release latches located on the rear panel 1 Disk 1 Bay 2 Disk 2 Bay 3 Insert or remove disks Figure 1 2...

Page 16: ...gigabit Ethernet port a reset button and two disk release latches one for each disk 1 Disk Release latches 2 Serial numbers for PC and MAC 3 Power on off button 4 Power cable socket 5 Ethernet port 6...

Page 17: ...tem is powered off Disk 1 Top Disk 2 Bottom LEDs LED status indicators for Disk 1 and Disk 2 located on front of unit On Disk installed Solid Green Drive is operating normally Blinking Green The Stora...

Page 18: ...ora on page 1 12 Check Package Contents 1 Unpack the unit and check package contents Before starting installation unpack the unit and check your package contents to be sure all components are availabl...

Page 19: ...t The blue light will flicker while the unit boots and obtains an IP address then it will turn solid blue The first time you turn the unit on the disk LEDs will be solid amber After you complete the s...

Page 20: ...To Run the Setup Program 1 Make a note of the Product key which is located on the Resource CD sleeve and also on the bottom of the Stora unit Write this down as you will need it later in the installa...

Page 21: ...1 13 v1 0 September 2009 3 Setup Your Stora a Click Step 1 Set Up Your Stora to set up the Stora so that it can store data The software license agreement will display b Click the I Accept box Figure...

Page 22: ...also on the bottom of the Stora unit b Stora Name enter a unique name for your Stora unit c Click Next Your Stora will then register with http mystora com The page will change when the process is comp...

Page 23: ...m Your user name is case sensitive b Display Name This is a case sensitive name that guests will see when they view your shared files and photos c Password Enter your case sensitive password and confi...

Page 24: ...a This screen appears when there is a setup problem with your UPnP router or if your router is not UPnP capable Most users with newer routers should not see this message See UPnP Port Mapping on page...

Page 25: ...DAV access Port 21 For external access to the Stora FTP when service is enabled Outgoing Port Requirements Port 22 For connection to Central Server during setup re install Port 80 For Stora update che...

Page 26: ...0 September 2009 7 Summary Screen The summary screen will indicate the IP address the Stora unit will use It will also automatically check for any software updates that may have occurred since the CD...

Page 27: ...o the Stora a Enable private access check this box if you want to share a printer with the rest of the network or browse your private files using Windows Network b Workgroup Name Default name is WORKG...

Page 28: ...re you would like to be notified of any updates or messages regarding your NETGEAR Stora unit These messages will contain update information error information and other information needed to keep your...

Page 29: ...Stora subscription to include Premium features not available with the standard subscription See Table 1 1 on page 1 3 for a list of Premium features a Click Upgrade Now to start your premium service...

Page 30: ...will appear a Click the Finish button When the Setup screen re displays the checkbox next to Set Up Your Stora will be checked indicating that you have completed this step You can now exit and use the...

Page 31: ...23 3 Unlock the drive A lever on the back on the unit will release the hard drive from the locked position See Figure 1 18 on page 1 25 4 Insert the hard disk a The label must face the outside of the...

Page 32: ...Hardware Compatibility list on the NETGEAR support site for a list of disks qualified to be used in the Stora To Eject a Disk 1 Open the Stora application user interface 2 Click Preferences 3 Navigat...

Page 33: ...ch To Check Disk Status or Rebuild a Disk 1 Open the Stora application user interface 2 Click Preferences 3 Navigate to Administration RAID and locate the Rebuild button a If a rebuild button shows on...

Page 34: ...pleted the initial configuration of your Stora device you have the option to install those applications For information about using the Stora Desktop Applications see Chapter 2 Stora Agent Chapter 3 S...

Page 35: ...er 2009 2 Welcome Screen a Click Next to continue the installation 3 Destination Screen a Accept the default destination or change locations b Click Next to continue the installation Figure 1 21 Deskt...

Page 36: ...NETGEAR Stora User Manual 1 28 Getting Acquainted v1 0 September 2009 4 Setup Type a Typical Recommended setup b Custom Choose which applications you want to install...

Page 37: ...EAR Stora User Manual Getting Acquainted 1 29 v1 0 September 2009 c Click Next to continue the installation 5 Confirm Program Installation Figure 1 23 Typical and Custom Setup Options Custom Setup Opt...

Page 38: ...ual 1 30 Getting Acquainted v1 0 September 2009 a Click Next to continue the installation 6 Installation Screen a Click Next to continue the installation Figure 1 24 Program Confirmation Figure 1 25 I...

Page 39: ...eptember 2009 7 Installation Completed a Click Next to continue the installation 8 Check mark Confirms Successful Installation of Applications a Click Next to continue the installation Figure 1 26 Ins...

Page 40: ...in 1 Stora Agent The Stora Agent is software installed on a PC or Mac and is available from the bottom menu bar During installation it automatically adds a shortcut icon on your desktop that directly...

Page 41: ...be shared and even uploaded with a drag and drop interface however only specific default folders can be shared over the Internet A Premium Service subscription enables further remote access options in...

Page 42: ...ord Reset from the CD 1 Insert your Stora CD and open the folder You do not need to uninstall the software before resetting the system 2 Click the Reset Tools button 3 Choose an option a Refresh choos...

Page 43: ...ce locate the serial number on the label of your product and use it to register your product at http www NETGEAR com register Registration is required before you can use our telephone support service...

Page 44: ...2 1 v1 0 September 2009 Chapter 2 Stora Agent This chapter includes Stora Agent topics including Using the Stora Agent Starting the Stora Agent Stora Agent Menu Options...

Page 45: ...check for software updates to the desktop applications Some of the options vary between a PC and a Mac For instance only a PC menu will display your login status and provide Login and Logout options...

Page 46: ...in menu option allows you to select your Stora and then enter your User name and Password If you log in and then start one of the desktop applications you will have access to the Stora If you select...

Page 47: ...be available if no one is logged into the system This menu option is available on a PC only Log out The Log out menu option closes the current user s connection to the Stora Be sure to log out to prev...

Page 48: ...lable whether the Stora is located locally on the home network or remotely across the Internet Viewing Stora Folders Right click the Stora Agent icon and then select Explore My Stora Folders If prompt...

Page 49: ...eferences With the Stora application your content is always available using familiar file and folder views like those on Windows Explorer or Mac Finder This option is available whether the Stora is lo...

Page 50: ...computer on your home network can use Desktop Mirror to automatically backup files and folders to the Stora Stora standard allows backups if the computer is on the same home network as the Stora Addi...

Page 51: ...9 Preferences The Preferences menu option allows you to check for software updates to the desktop applications and displays the name and IP address of the Stora on your home network See Preferences on...

Page 52: ...s the version number of Stora Agent Exit Stora Agent The Exit Stora Agent menu option closes Stora Agent and removes the icon from the system tray To restart the Stora Agent on a Mac or PC see Startin...

Page 53: ...This chapter shows you how to work with and use the Stora Application Starting the Stora Application Logging into the Stora Application Stora Application Landing Page Media Library Working with Media...

Page 54: ...launch the Stora Application From the Desktop Double click the Navigate to My Stora www icon located on the desktop This icon was enabled during installation From the Stora Agent Right click the Stor...

Page 55: ...tion you will be asked to log in using the credentials you set up when you first installed your Stora system To log in 1 Select a language Your language preference may already be set as the default 2...

Page 56: ...subscription allows local and remote access to all three areas You can customize the landing page by adding an image to the background See Use as Landing Page Background on page 3 35 Premium Subscript...

Page 57: ...sequent pages the main menu also contains a Home option which lets you toggle between other application areas the Landing Page Albums and Preferences The Help menu displays the user manual connects to...

Page 58: ...tion landing page click Media Library Entering the Media Library brings you to the Media Sources page where you can manage your files folders and digital media and place them into albums that you can...

Page 59: ...potential You can click back or forward to see other tips If you do not want to see the tips you can disable it by checking the Don t show tips box at the bottom of the screen To enable it again go t...

Page 60: ...folders can also be shared with digital music adapters DMAs making the content available to media players on the home network See Let user access family folder on page 3 53 and Server Preferences on p...

Page 61: ...by placing the files in an album They can also be shared with DMAs making the content available to media players on the home network Windows networking must be enabled for users to see their MyLibrar...

Page 62: ...ers folder if your login credentials were used to configure the backup You can share content from your computer with family friends or the public by placing them in files in an album Folders within My...

Page 63: ...me file in multiple albums without taking up additional space However if you delete a file from the folder it will no longer be available in the albums You can add a theme to your album by displaying...

Page 64: ...reenshow shows that the MyMusic folder is selected from MyLibrary media source Expanding and Collapsing a Folder Expanding a folder shows its subfolders 1 To expand a folder click the right arrow besi...

Page 65: ...will be accessible to all users unless the user s account blocks access Only you can access a folder within MyLibrary 1 To add a folder a Select the area where you want to add the new folder b Click...

Page 66: ...el b Click the Delete Folder icon 2 Optional Method a Select the folder from the main window b Click to display the options c Select Delete from the menu You will be asked to confirm the action 3 Clic...

Page 67: ...oad files a Select the destination folder from the left panel or a folder on the main window b Display the menu c Select Upload to launch the Upload window d Select either Manual Upload or Drag and Dr...

Page 68: ...ediaSource list move the mouse over a folder A white arrow will appear beside the name 2 Click the arrow to display the options 3 To display the options from the subfolders move the mouse over a folde...

Page 69: ...See Uploading files on page 3 15 Add to Album See Adding Files to an Album on page 3 27 Share Selected Items See Creating a Shared Album on page 3 25 Share with DMA Unshare with DMA Enables or disable...

Page 70: ...beside the Files section Folder details include the name of the folder and the number of files and folders it contains 5 Alternatively to view details select the folder and then click the Show Detail...

Page 71: ...er Moving a folder puts it into a different location along with its subfolders and files 1 To move a folder a Drag and drop it to another folder b Alternatively you can cut and paste your files Select...

Page 72: ...folder will be accessible to all users unless the user s account blocks access Only you can access a folder within MyLibrary 1 To copy a folder a select the folder and display the menu b Select Copy...

Page 73: ...ges its name 1 To rename a folder a Select the folder b Display the menu c Select Rename d When prompted enter the new name e Click Rename Note If you rename a folder and an album contains a reference...

Page 74: ...dit and share them with other users An album allows you to group related pictures music videos and documents from multiple folders To view your albums select Albums from the Landing Page of the Stora...

Page 75: ...n You can leave the album unshared for your own enjoyment or you can share it with your family friends or everyone Displaying the Album Menu The Stora Application has a menu with commands for working...

Page 76: ...tails area to modify the settings 1 To add a new unshared album a Go to the Media Library section and click the New Album icon b Enter the Name of the album and an optional description c Select the th...

Page 77: ...th friends and the public on the Internet Images in an album can be shared through RSS Facebook or Flickr 1 To add a shared album a Go to the Media Library section and click the New Album icon b Enter...

Page 78: ...Share until Setting an End Date When you select the Share with friend or Share with everyone option the Share until option appears so you can set an expiration date if desired By default an album is...

Page 79: ...nloads for this album This option allows anyone with access to the album to download the files for their own use See Downloading a file on page 3 36 Adding Files to an Album You can add contents of an...

Page 80: ...the Album Cover Using a file as the album cover causes its image to appear in the album icon on the Albums page You can use an image music video or document A music file will use its album art if ava...

Page 81: ...hen select Autoplay The browser automatically plays each song and shows the album art and name of the current song 2 To play songs after displaying an album click Play All You can also play a song by...

Page 82: ...displays an image for each file that indicates what the file contains It also shows the file name size and caption Moving the mouse over a file in Thumbnail view shows the Options arrow which allows y...

Page 83: ...You can select a file in Thumbnail view or List view Selecting a file highlights it and allows you to perform an operation on it If the Details section is displayed it shows the file s details 1 To se...

Page 84: ...he album Copying a file Copying a file puts it in an additional folder while keeping it in the original folder You can copy multiple files at once Copying a file duplicates the original full resolutio...

Page 85: ...or RSS You can search for a file by entering text from its tags See Searching for Files and Folders on page 3 31 1 To add tags to a file start by selecting its folder 2 Select the file display the men...

Page 86: ...a file and an album contains a reference to that file the item will no longer be available from the album Downloading a file Downloading a file retrieves the original full resolution version of the fi...

Page 87: ...ct View If you play the slideshow it will display the other images within the selected folder or album See Running a Slideshow on page 3 28 Rotate clockwise Rotate counterclockwise Rotating an image c...

Page 88: ...s page or individual files after displaying an album 1 To download all the files using the Albums page select the album and then click Download A window lists all the files in the album Click the Down...

Page 89: ...ntact Name and Email Address and then click Add Once you add a friend to your address book you can add them to the contact list To remove a friend from your address book select the friend in the Addre...

Page 90: ...name caption and when it was added to the album The RSS reader will automatically receive new images as they are added to the album and will delete them as they are removed The RSS feed will not incl...

Page 91: ...window Click Authorization complete 3 Select an existing photo album or create a new photo album by entering its name and optional description and then click Submit Stora will upload the images to the...

Page 92: ...m the album not documents music or videos The images will be uploaded with their captions but not their tags If you add more images to the album Stora will automatically upload them However removing i...

Page 93: ...red If the Share with DMA command is available select it 2 Configuring an iTunes client Configuring an iTunes client ensures it will look for shared libraries including the FamilyMusic folder on the S...

Page 94: ...ansfer protocol FTP provides access to your MyLibrary folders If your account has access FTP also provides access to the FamilyLibrary folders The router must forward port 21 to the Stora This is set...

Page 95: ...age From the Landing page click Preferences From one of the other pages click Home in the Main menu and then select Preferences The Preferences page lists the sets of parameters that can be changed by...

Page 96: ...age list sets the language for the Stora Application user interface The selection of languages depends on your region The default language is from your computer s configuration 2 Sharing Emails Sender...

Page 97: ...your home network by default You can override the setting when you create or edit an album The media player must support the UPnP AV Universal Plug and Play Audio Visual DLNA Digital Living Network A...

Page 98: ...available Change Password 1 Password Enter your new password in the Password box 2 Confirm Password Re enter your new password in the Confirm Password box Figure 3 32 User Preferences Diskspace Area N...

Page 99: ...g list controls whether users can access their private folders through Stora Folders a Yes Users can access their private folders through Explorer Finder b No Users cannot access their private folders...

Page 100: ...different name Notifications The Notifications box sets the email address for notifications about the Stora 1 Notifications You can set one or more email addresses for notifications about the Stora U...

Page 101: ...e FamilyLibrary folders See Let user access family folder on page 3 53 1 Enable FTP access to your local LAN The Enable FTP access to your local LAN list controls whether a local user can FTP into the...

Page 102: ...ess automatically is set to No Server netmask The server netmask box sets the subnet mask The subnet mask determines the address range of the subnet Data to addresses within the subnet e g between you...

Page 103: ...te and time from NTP network time protocol servers In most cases use this setting Selecting Yes enables the Internet Time Servers box Internet Time Servers The Internet Time Servers box sets the NTP s...

Page 104: ...s if Set date and time from the Internet is set to No 3 Time The Time control sets the current time Set the time using the up and down arrows after clicking the hour and minute The Time control appear...

Page 105: ...n the Main menu of the Stora Application The display name will also appear in the Albums page before the user s albums If used it must be at least three characters 3 Password The Password box sets the...

Page 106: ...unt User Name The Account User Name list contains the users added previously and allows you to select the account to edit It must be at least three characters 2 Display Name The optional Display Name...

Page 107: ...trator permissions A user with administrator permissions has access to all the preferences A user without administrator permissions only has access to the User Diskspace and Change Password preference...

Page 108: ...he Stora click Shutdown 2 To restart the Stora click Restart Software updates You can check for software and firmware updates to the Stora 1 To check for updates click the Check Now button If there ar...

Page 109: ...s the disk type size of disk and RAID status 1 Eject allows you to safely remove and replace a disk without damaging the disk or losing data 2 Rebuild This button will only appear if there is a proble...

Page 110: ...er 2009 Chapter 4 Stora Desktop Mirror This chapter includes topics on system status alerts replacing failed disks and scheduling Desktop Mirror Overview Initial Configuration File Menu View Menu Tool...

Page 111: ...ated remotely across the Internet The directory structure within the MyComputers folder makes it easy to locate and restore single files or entire folders Starting Desktop Mirror There are two ways to...

Page 112: ...uired enter the Stora Name User Name and Password and then click Next a Stora Name enter a unique name for your unit If this is a re installation of the Desktop Applications the Stora name will be pre...

Page 113: ...C or Documents Mac folder is selected for backup a If you do not want your entire MyDocuments folder to be backed up uncheck the box If you uncheck the box you will still be able to add or modify fold...

Page 114: ...time daily or weekly or when you start Desktop Mirror a Timed Backup There are two options for timed backups Backup every choose your backup time Options range between every 5 minutes up to every 24 h...

Page 115: ...cessfully configured your Stora a As an option you can select or deselect Start backing up my folders when I click finish b Click Finish The Stora Desktop Mirror window will automatically launch with...

Page 116: ...olders in the subsequent backups or syncs 1 There are two ways to add folders to your Stora a Choose File Add a Alternately click the Add icon located on the right side of the interface 2 From the Bro...

Page 117: ...irror 4 8 v1 0 September 2009 Viewing Files with Folders 1 Once backed up double clicking the folder will display the files that are in the folder Figure 4 7 Viewing Backed up Files Double click the f...

Page 118: ...or syncs 1 Select the folder you want to remove from the backup 2 There are two ways to remove folders to your Stora a Choose File Remove b Alternately click the Remove icon located on the right side...

Page 119: ...NETGEAR Stora User Manual Stora Desktop Mirror 4 10 v1 0 September 2009 Quit 1 To exit Desktop Mirror select File Quit Figure 4 9 Quit Desktop Mirror...

Page 120: ...iew Report The Backup Activity window appears showing the backup data log The Backup Activity window will always show the most recent addition to the log at the top of the report Figure 4 10 View Repo...

Page 121: ...rs a Choose an option from the Tools menu Select Tools Synchronize Selected Items This option allows you to select only the folders you want to backup Select Tools Synchronize All Items This options b...

Page 122: ...s 1 During a synchronization click the x box on the status bar You will see Process aborted on the status bar Figure 4 12 Cancel Synchronization Process Process aborted Click the close box message on...

Page 123: ...ders and files back to the computer To restore files 1 Select Tools Restore Files and folders on the Stora are added to or replace those on the computer 2 Alternately you can easily restore a single f...

Page 124: ...enu and has three tab Identity Schedule and Advanced options Changing accounts settings lets you modify the device name user name password backup schedule or mode There are two ways to access account...

Page 125: ...the Tools menu to modify the Stora Name User Name or Password 1 Choose Tools Account Settings Identity You will need to use this option to change the device name see Registration on page 3 48 or if a...

Page 126: ...cks up synchronizes the files automatically You can select Backup every or Backup at Backup every lets you select the duration between backups syncs ranging from 5 minutes to 24 hours Backup at lets y...

Page 127: ...les on the computer will be copied to the Stora Deleted files will be removed from the Stora If you select Synchronization mode Desktop Mirror will synchronize the files in both directions between the...

Page 128: ...ber 2009 Help Menu View Online Help You can access the Stora User Manual online from this menu option About Stora This menu option provides details about the Stora Desktop Mirror installed on your com...

Page 129: ...nted 1 1 Chapter 2 Stora agent 2 1 Chapter 3 Stora Application 3 1 Chapter 4 Desktop Mirror 4 1 check disk status 1 25 configuration 1 12 configure Desktop Mirror 4 3 connect to network 1 11 Contacts...

Page 130: ...ng 3 31 setting the view 3 30 working with 3 30 Flickr 3 40 Folders add 3 13 copy 3 20 delete 3 14 display options 3 16 expanding collapsing 3 12 move 3 19 open 3 19 rename 3 21 selecting 3 12 FTP 3 4...

Page 131: ...43 premium features 1 3 premium subscription 1 21 3 4 product key 1 12 Q quit 4 10 R RAID 1 25 3 42 3 57 rebuild button 3 57 registration 1 14 1 35 3 48 remote access 1 33 replacing a disk 1 25 report...

Page 132: ...tart from MAC 3 2 start from PC 3 2 start from Stora agent 3 2 Stora updates 3 56 support 1 ii 1 35 T tags add 3 33 time 3 52 timed backup 4 5 Tip of the Day 3 7 trademarks 1 ii U update software 3 56...

Reviews: