


NP3680 User Guide
YML838 Rev
4. Select the desired printer driver and click
Set Port to Printer
.
5. If you cannot find any printer driver in Printer List, please install your printer driver first or click
Add New
Printer
to install the printer driver.
4.4.3 Using Standard Windows Method for Raw TCP Printing
Windows Platform: Windows 2000, XP and 2003
1. Open
Printers and Faxes.
2. Right-click the printer for which you want to change settings, and then click
Properties.
3. Clear
Enable bidirectional support
and click
Add
port, and then click
Standard TCP/IP Port
from the
dropdown and click
New
port.
4. The “
Add Standard TCP/IP Printer Port Wizard
” will pop up and click
Next
.
5. In the Printer Name or IP Address box, enter the Host Name of the Server (default: NP3680) or IP
address of the Server. In the Port Name box, enter USB1_RAW or USB2_RAW for printer connected to
USB1 port and USB2 port, respectively.
@
If your Server is running on a different LAN than your Windows PC such Internet PC, you
must enter the Server’s IP address in Printer Name or IP Address box.
6. Click
Next
.
7. Click
Custom/settings
.
8. The click
Settings
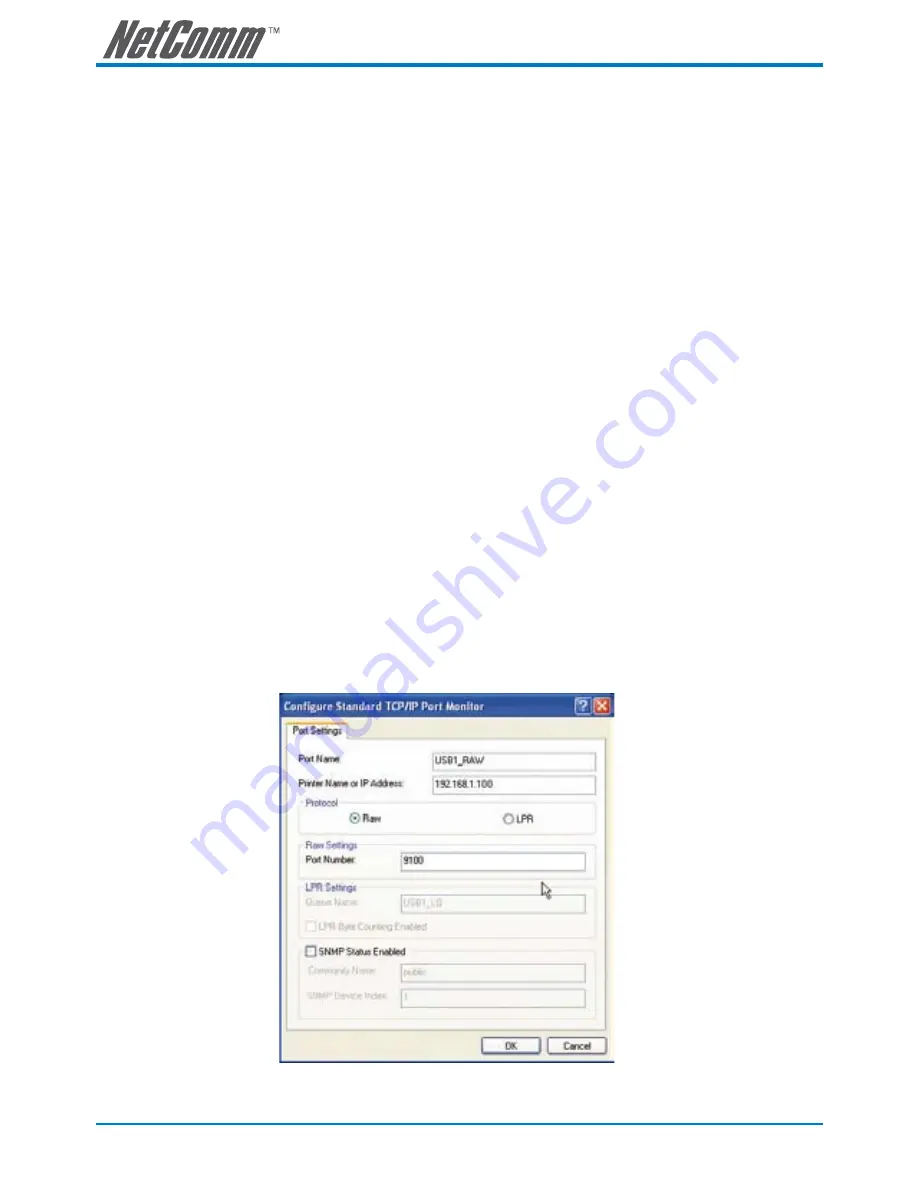
and confirm that the settings are as below. The default Port Number values are 9100,
9101 for USB port 1 and USB port 2, respectively. Refer to the Server’s web pages or the Control Center,
you can get exact values. Click
OK
.
9. Click
Finish
.


