


•
The volumes in the drive drawer cannot be in a Degraded state.
Attention:
Possible loss of data access – If a volume is already in a Degraded state, and you remove drives from the drive
drawer, the volume can fail.
About this task
When you issue the
Set Drawer Service Action Allowed Indicator
CLI command, all drives in the affected drive
drawer are checked to ensure they belong to volume groups or disk pools that have Drawer Loss Protection, as follows:
•
If all drives in the drawer are in volume groups or disk pools that have Drawer Loss Protection, the command succeeds. You
do not need to stop host I/O activity or power down the shelf to perform this procedure.
•
If any drives in the drawer are in volume groups or disk pools that do not have Drawer Loss Protection, a warning is
displayed, indicating that this command could not be completed. To avoid data loss, you must stop all host I/O activity and
power down both the drive shelf and the controller shelf before removing the drive drawer.
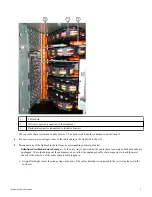
Steps
1. Determine if the drive shelf is powered on.
•
If the power is off, you do not need to issue the CLI command. Go to
on page 5.
•
If the power is on, go to the next step.
2. Type this command on the command line, and press Enter:
SMcli <ctlr_IP1> -p "array_password" -c "set tray [trayID] drawer [drawerID]
serviceAllowedIndicator=on;"
Command
Description
<ctlr_IP1>
The identifier of the controller.
array_password
The password for the storage array. You must enclose the value for
array_password
in double quotation marks ("").
[
trayID
]
The identifier of the drive shelf that contains the drive drawer that you want to
replace. Drive shelf ID values are 0 to 99. You must enclose the value for
trayID
in
square brackets.
[
drawerID
]
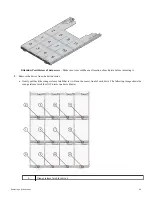
The identifier of the drive drawer that you want to replace. Drawer ID values are 1
(top drawer) to 5 (bottom drawer). You must enclose the value for
drawerID
in
square brackets.
Example
This command ensures you can remove the top-most drawer in drive shelf 10:
SMcli <ctlr_IP1> -p "safety-1" -c "set tray [10] drawer [1]
serviceAllowedIndicator=forceOnWarning;"
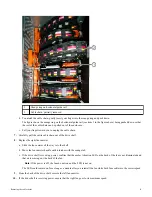
3. Determine if you need to stop host I/O activity, as follows:
•
If the command succeeds, you do not need to stop host I/O activity. All drives in the drawer are in volume groups or disk
pools that have Drawer Loss Protection. Go to
on page 5.
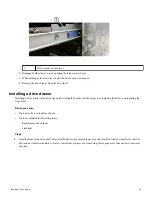
Attention:
Possible damage to drives – Wait 30 seconds after the command completes before you open the drive
drawer. Waiting 30 seconds allows the drives to spin down, which prevents possible damage to the hardware.
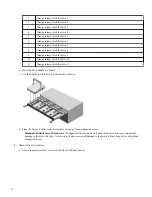
Preparing to remove a drive drawer
3


