background image


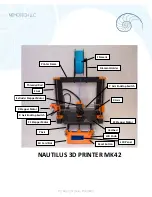
NAUTILUS 3D PRINTER MK42


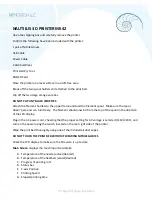
Open the shipping box and carefully remove the printer. 
Confirm the following have been included with the printer: 
1 pair of Nitrile Gloves 
USB Cable 
Power Cable 
2 Alcohol Wipes 
Print Bed Pry Tool 
8GB SD Card 
Place the printer on a level surface in a draft-free area. 
Break off the two spool holders still attached to the print bed. 
Clip off the two large orange wire ties. 

DO NOT CLIP ANY BLACK WIRE TIES


Attach the filament holders to the upper frame and load the filament spool.  Make sure the spool 

doesn’t jam and can turn freely.  The filament should unwind from the top of the spool in the direction 

of the LCD display. 
Plug in the AC power cord, checking that the proper setting for AC voltage is selected (110V/220V), and 

turn on the power using the switch located on the rear right side of the printer. 
Wipe the print bed thoroughly using one of the included alcohol wipes. 

DO NOT TOUCH THE PRINT BED WITHOUT WEARING NITRILE GLOVES


Check the LCD display to make sure the firmware is up to date 

Main Screen

 displays the most important details: 

A.


Temperature of the nozzle (actual/desired) 

B.


Temperature of the heatbed (actual/desired) 

C.


Progress of printing in % 

D.


Status bar 

E.


Z-axis Position 

F.


Printing Speed 

G.


Elapsed printing time 


Summary of Contents for Nautilus MK42

Page 1: ...Nautilus 3D Printer MK42 By Nemotech Printer Guide Updated 2 22 18 questions nemogenesis com ...

Page 2: ... Filament Holder Printer Frame Threaded Rod X Axis Z2 Stepper Motor Z1 Stepper Motor Heatbed LCD Knob LCD Panel Reset Button Z Axis Extruder Stepper Motor X Stepper Motor X Axis Endstop Switch SD Card Slot Y Axis Y Axis Endstop Switch ...

Page 3: ...oesn t jam and can turn freely The filament should unwind from the top of the spool in the direction of the LCD display Plug in the AC power cord checking that the proper setting for AC voltage is selected 110V 220V and turn on the power using the switch located on the rear right side of the printer Wipe the print bed thoroughly using one of the included alcohol wipes DO NOT TOUCH THE PRINT BED WI...

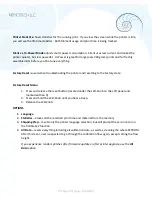
Page 4: ...tate Factory Reset Menu 1 Press and release the reset button located under the LCD Knob on the LCD panel and marked with an X 2 Press and hold the LCD Knob until you hear a beep 3 Release the LCD Knob OPTIONS 1 Language 2 Statistics erases all the recorded print time and material from the memory 3 Shipping Prep resets only the printer language selection but will prompt the ser once to run the Cali...

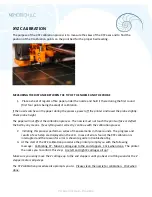
Page 5: ...the bed by any means If everything went correctly continue with the calibration process 2 Initiating this process performs a series of measurements in three rounds The progress and results of each step are displayed on the LCD In case of errors found the XYZ calibration is interrupted and the reason for error is shown to guide in troubleshooting 3 At the start of the XYZ calibration procedure the ...

Page 6: ...nob Next choose the material you will be printing and confirm by pressing the LCD knob The nozzle and print bed will heat to the requested temperature WARNING DO NOT TOUCH THE HEATED NOZZLE OR THE HEATED PRINT BED 2 Press the LCD Knob on the LCD panel to enter the main menu Turn the LCD Knob to UNLOAD FILAMENT and press the LDC Knob to select The extruder will release the remaining black filament ...

Page 7: ...the feed guide 4 Press the LCD Knob to enter the main menu Turn the LCD Knob and scroll to LOAD FILAMENT 5 Press the LCD Knob to select LOAD FILAMENT while simultaneously feeding he filament into the extruder Apply firm even pressure This process can take a few tries Trimming the filament at a sharp angle is recommended ...

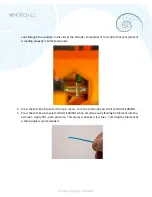
Page 8: ...fore beginning your print 1 Press the LCD Knob to enter the main menu Turn the LCD Knob to scroll to SETTINGS Select MOVE AXIS EXTRUDER until the color is completely changed RUNNING OUT OF FILAMENT DURING A PRINT CHANGING FILAMENT COLOR DURING A PRINT If your filament is running out during a print or you want to change filament color during a print you can easily change it for a new spool 1 Press ...

Page 9: ...e probe By rotating the probe counter clockwise it will raise at 1mm per turn It is very handy for precise adjustments but it can also be pushed in and out when the set screws are loosened completely Then rerun CALIBRATE Z followed by the V2Calibration gcode again FINE TUNING THE FIRST LAYER 1 After finishing the calibration gcode print a simple object The gcode from the supplied SD card is a grea...

Page 10: ...object before the heat bed has properly cooled could result in damage to the object or the heat bed 2 Once cooling is complete use the Print Bed Pry Tool to gently lift the corners of the object Apply gentle upward pressure until the object breaks free PRINTING SPEED Print times will vary depending on object size and print resolution Printing a small object takes a few minutes but printing larger ...

Page 11: ... first check the extruder fan is working properly and that the temperature is set correctly see the Materials List in this Manual for correct temperature settings Also check that the filament was loaded correctly into the extruder If the filament extrudes but in a small volume check the direction If it swirls and goes back up toward the nozzle the nozzle needs to be cleaned To Clean the Nozzle 1 M...

Page 12: ...le for large objects thanks to its minimal thermal expansion Universal material suited also for printable mechanical components Nozzle temperature 240 C Bed temperature 80 to 100 C NOTE Do not use isopropyl alcohol to clean the bed Doing so may cause the adhesion to be too strong Windex or another window cleaner is a great option for PET Pour a small amount on a paper towel and wipe the print surf...

Page 13: ...hed FLEX Flex is a very strong and flexible material suitable especially for flexible prototypes covers etc NOTE Before you start printing from Flex clean all previous material from the nozzle Preheat the nozzle and load PLA to remove any other previous material When loading Flex loosen the extruder idler screws Keep in mind that when printing from Flex the automatic filament exchange function may...

Page 14: ...nd continuously use the TWEAK menu After each improvement don t forget to modify the settings in Slic3r Reset the TWEAK values before every print Slic3r A 3D printer can print almost anything Whether you ve downloaded 3D models from the Internet or created your own models you will need to convert the obj or stl format into a gcode file Gcode is a file format readable by a 3D printer The file conta...

Reviews: