background image

NPB-40 Operation

NPB-40

45

Adjust Pulse Beep Volume

Discussion

There are two ways to adjust the pulse beep volume.

Press the 

Up Arrow

 or 

Down Arrow

 button 

during normal operation to increase or decrese the 
pulse beep volume

Select pulse beep volume adjust through the menu 
structure

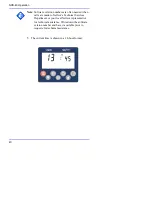
When the pulse beep volume display is shown, the user is 
able to adjust the volume of the pulse beep tone. Each 
activation of an 

Up Arrow

 or 

Down Arrow

 button 

increases or decreases the pulse beep volume and 
increments or decrements by one the number of segments 
shown on the 

Pulse Amplitude

 (blip) bar as a relative 

indicator of the current volume. The minimum pulse rate 
volume is none or OFF (no blip bar segments shown), the 
maximum pulse rate volume is ten (ten segments). 
Attempted adjustments outside the range generate an 
invalid key tone.

The default pulse beep volume is 52 dB(A) shown by 10 
blip bar segments.

Note

: When the NPB-40 times-out (30 seconds) the 

currently shown parameter is set and the NPB-40 
display returns to the normal mode.

Summary of Contents for Oximax NPB-40

Page 1: ......

Page 2: ...Nellcor s Technical Services Department or your local representative Purchase of this instrument confers no express or implied license under any Nellcor Puritan Bennett patent to use the instrument wi...

Page 3: ...s 13 Description of the Display and Indicators 16 Description of Audible Indicators 22 Set up the NPB 40 25 List of Components 27 Connect OXIMAX Sensor to the NPB 40 27 Battery Operation 31 Battery Po...

Page 4: ...Limit Changed Indicator 63 Record Snap Shot Data 64 Discussion 64 Procedure 65 Print Data 66 Printing Data 67 Discussion 67 Procedure 68 Printer Setup Report 72 OXIMAX Sensor Event Record 75 Event Rec...

Page 5: ...Obtaining Technical Assistance 106 Maintenance 109 Return the NPB 40 109 Service 110 Periodic Safety Checks 110 Cleaning 110 Menu Structure 113 Introduction 113 Structure 113 Principles of Operation 1...

Page 6: ...ure 3 Combined Printed Data 71 Figure 4 PD 22T Setup Report 73 Figure 5 NPB 40 Boot with Clip 85 Figure 6 NPB 40 Carrying Case 86 Figure 7 Water Resistant Jacket 87 Figure 8 Printer 87 Figure 9 Therma...

Page 7: ...and Patient Weights 80 Table 4 OXIMAX Sensor Features 83 Table 5 Error Codes 101 Table 6 Menu Structure 114 Table 7 Time Set Menu 115 Table 8 Recommended Separation Distances 137 Table 9 Cable Compli...

Page 8: ...Blank Page...

Page 9: ...rovided by the NPB 40 handheld pulse oximeter when the sensor event record is recorded by the sensor The accuracy of the date time is dependent on the date time already set in and provided by the NPB...

Page 10: ...those specified may result in increased emission and or create invalid readings of the NPB 40 WARNING Failure to cover the OXIMAX sensor site with opaque material in high ambient light conditions may...

Page 11: ...the user to exercise care necessary for the safe and effective use of the OXIMAX NPB 40 handheld pulse oximeter Caution All combinations of equipment must be in compliance with IEC Standard 60601 1 1...

Page 12: ...Safety Information 4 Notes Notes are identified by the NOTE symbol shown above Notes provide additional helpful information...

Page 13: ...invasive spot check measurements of functional arterial oxygen saturation SpO2 and pulse rate of adult pediatric and neonatal patients It can be used in hospital emergency transport and mobile enviro...

Page 14: ...Blank Page...

Page 15: ...p t i o n o f C o n t r o l s I n d i c a t o r s a n d S y m b o l s Identification of Front Panel Buttons and Symbols 1 SpO2 area of display 2 Measured SpO2 3 Pulse beats per minute BPM area of dis...

Page 16: ...lse Amplitude indicator Blip bar 8 Time Colon time date field separator 9 Adjust Time mode indicator 10 Adjust Volume mode indicator 11 Set Limit mode indicator 12 BPM Upper Alarm Limit indicator 13 B...

Page 17: ...ttery indicator 18 Data In Sensor indicator 19 Alarm Volume Adjust indicator 20 Pulse Beep Tone Volume Adjust indicator 21 BPM Lower Alarm Limit indicator 22 Print indicator 23 Motion indicator 24 Pul...

Page 18: ...Description of Controls Indicators and Symbols 10 27 Power button 28 Up Arrow button 29 Backlight button 30 Menu button 31 Data Record Print button 32 Down Arrow button 33 Alarm Silence button...

Page 19: ...PB 40 11 NPB 40 Symbols These symbols are located on the rear panel of the NPB 40 See Instructions for Use Type BF Applied Part Not defibrillator proof Resistant to liquid ingress Date of Manufacture...

Page 20: ...n mark electrical safety Russian regulatory approval Serial number These two symbols are located on the front panel of the NPB 40 Area of the display that displays the measured percent of oxygen satur...

Page 21: ...ion of Controls Indicators and Symbols NPB 40 13 These symbols are also used on the NPB 40 labels Keep away from heat Temperature limitation Protect from moisture Fragile Keep upright Description of C...

Page 22: ...n all cases the alarm silence shall time out after the selected alarm silence duration and auditory alarm capability is reactivated Note Alarms that occur throughout Power On Self Test POST cannot be...

Page 23: ...low SpO2 limits high and low BPM limits alarm volume pulse beep volume and data print The NPB 40 will return to normal operation and incorporate the selected parameter value if there are no button pr...

Page 24: ...to increase the parameter under adjustment by one increment Press and hold the Up Arrow button for more than three seconds to cause the increment to repeat Press the Up Arrow button during normal ope...

Page 25: ...NPB 40 front panel The OXIMAX algorithm automatically extends the amount of data required for measurements of SpO2 and pulse rate dependent on the measurement conditions Throughout normal measurement...

Page 26: ...nged from their power on defaults a decimal point is shown after the SpO2 value 98 Pulse Amplitude indicator blip bar The Pulse Amplitude indicator indicates the dynamic pulse amplitude and rate As th...

Page 27: ...or flashes when 15 or fewer minutes of battery capacity remain The Low Battery indicator displays constantly when the battery capacity reaches critical condition the NPB 40 indicates an error conditio...

Page 28: ...when sensor event data is printed The Data In Sensor indicator displays when the sensor memory is full Upper Alarm Limit indicator The Upper Alarm Limit indicator indicates that the displayed value is...

Page 29: ...djust indicator displays when the NPB 40 is in the pulse beep tone volume adjust mode Adjust Time indicator The Adjust Time indicator displays when the NPB 40 is in the time date set mode Set Limit mo...

Page 30: ...ovided below See Audible Indicators on page 127 for a more detailed definition of the audible indicators Alarm volume tone one pulse at 752 Hz for 500 msec at 52 dB A maximum Beep volume tone one puls...

Page 31: ...0 Hz for 130 msec each at 52 dB A maximum High priority alarm tone continuous pulses at 1 200 Hz 250 msec each at 52 dB A maximum Medium priority alarm tone continuous pulses at 752 Hz 400 msec each a...

Page 32: ...Blank Page...

Page 33: ...peaker is clear of any obstruction and that the speaker holes are not covered Failure to do so could result in an inaudible alarm tone WARNING Disconnect the NPB 40 and Nellcor OXIMAX sensor from the...

Page 34: ...fibrillator proof However it may remain attached to the patient throughout defibrillation or while an electrosurgical unit is in use but the measurements may be inaccurate throughout the defibrillatio...

Page 35: ...ffected by certain ambient environmental conditions OXIMAX sensor application errors and certain patient conditions See the appropriate sections of the manual for specific safety information Safety In...

Page 36: ...ternally applied coloring agents such as nail polish dye or pigmented cream Inaccurate measurements can be caused by incorrect application of the OXIMAX sensor placement of the OXIMAX sensor on an ext...

Page 37: ...the one with the OXIMAX sensor attached there is arterial occlusion proximal to the OXIMAX sensor poor peripheral perfusion Connect a Nellcor OXIMAX SpO2 sensor to the NPB 40 SpO2 sensor port Note An...

Page 38: ...Blank Page...

Page 39: ...s internal batteries used to power the NPB 40 A new set of batteries will provide at least 15 hours of operation Low Battery Indicator The Low Battery indicator displays and flashes and a low priority...

Page 40: ...ger remove the batteries from the NPB 40 before storage Critical Battery Indication When the NPB 40 batteries are critically low the NPB 40 displays an error message Er 521 sounds a high priority alar...

Page 41: ...ull the battery compartment latch downward toward the bottom of the NPB 40 and remove the battery access door 2 Install four AA size batteries orientated as shown in Figure 1 3 Replace the battery acc...

Page 42: ...ure patient safety do not place the NPB 40 in any position that might cause it to fall on the patient WARNING As with all medical equipment carefully route patient cables to reduce the possibility of...

Page 43: ...t on an individual basis by the clinician and will remain in effect until the NPB 40 is turned off Table 2 Parameter Ranges Parameter Ranges Selections Factory Defaults SpO2 Upper Alarm Limit Lower Al...

Page 44: ...splay when the NPB 40 is turned on do not use the NPB 40 Instead contact qualified service personnel your local Nellcor representative or Nellcor s Technical Services Department Note Physiological con...

Page 45: ...the display cycles through the following sequence as POST takes place all display graphics are shown for three seconds the backlight is turned on at this time the display goes blank all display elemen...

Page 46: ...ure 1 Press the Power button to turn on the NPB 40 Note The backlight will remain on throughout POST 2 All display numbers and icons are shown for three seconds The backlight is turned on while all nu...

Page 47: ...for three seconds The software version is identified by two dashes in the SpO2 area of the display The software version number is shown with foremost zeros for software version numbers less than 100 N...

Page 48: ...calls are made to Nellcor s Technical Services Department or your local Nellcor representative for technical assistance Write down the software version number and have it available prior to requests f...

Page 49: ...he NPB 40 sounds a one second tone to indicate that the NPB 40 has passed the test WARNING If you do not hear the POST pass tone do not use the NPB 40 WARNING Ensure that the speaker is clear of any o...

Page 50: ...ow the NPB 40 to search and lock onto a pulse for approximately 10 seconds in non motion conditions When a valid pulse is detected the NPB 40 enters the normal mode and displays patient parameters Mov...

Page 51: ...sor is attached to the NPB 40 and is applied to a patient and the NPB 40 loses the pulse signal the NPB 40 will display two dashes and two dashes and display the Pulse Search icon for five seconds bef...

Page 52: ...e NPB 40 has passed POST The NPB 40 displays dashes and the Pulse Search indicator is not displayed when the NPB 40 fails to detect an OXIMAX sensor Backlight On Off Note The backlight will automatica...

Page 53: ...Up Arrow or Down Arrow button increases or decreases the pulse beep volume and increments or decrements by one the number of segments shown on the Pulse Amplitude blip bar as a relative indicator of t...

Page 54: ...on to increase or decrese the pulse beep volume Note The Beep Tone Volume Adjust indicator flashes when the pulse beep volume is adjusted to zero Procedure Menu Structure With the NPB 40 in the normal...

Page 55: ...or Down Arrow button increases or decreases the alarm volume and increments or decrements by one the number of segments shown on the Pulse Amplitude blip bar as a relative indicator of the current vol...

Page 56: ...With the NPB 40 in the normal mode 1 Press the Menu button six times 2 Press the Up Arrow or Down Arrow button to increase or decrease alarm volume 3 Press the Menu button two times to set the alarm l...

Page 57: ...own parameter and the NPB 40 display returns to the normal mode When the month entry is made the NPB 40 checks the day selection to see if it is correct If the day selection is not valid for the month...

Page 58: ...mode 1 Press the Power button to turn the NPB 40 off 2 Press the Power button to turn the NPB 40 on 3 Press the Menu button while the NPB 40 is in the POST mode until the set hours display is shown Th...

Page 59: ...ion NPB 40 51 5 Press the Menu button to set the hours and display the minutes set display The minutes display 45 will flash 6 Press the Up Arrow button or the Down Arrow button until the desired minu...

Page 60: ...et the minutes and display the day set display The day 29 will flash 8 Press the Up Arrow button or the Down Arrow button until the desired day is shown 9 Press the Menu button to set the day and disp...

Page 61: ...the desired month is shown 11 Press the Menu button to set the month and display the year set display The year 2004 will flash 12 Press the Up Arrow button or the Down Arrow button until the desired...

Page 62: ...user to adjust the alarm silence duration of the high medium and low priority alarms A low battery low priority alarm cannot be silenced Note When the NPB 40 times out 30 seconds the currently shown...

Page 63: ...he display then release the button Alarm silence durations that are available are OFF 30 60 90 and 120 seconds 2 Press the Up Arrow button or the Down Arrow button until the desired alarm silence dura...

Page 64: ...cator will flash while the alarm silence duration is set to off WARNING Do not silence the audible alarm function or decrease the audible alarm volume if patient safety could be compromised Note When...

Page 65: ...n NPB 40 57 1 Press the Alarm Silence button until SEC or OFF is displayed in the pulse rate area of the display then release the button Alarm silence durations that are available are OFF 30 60 90 and...

Page 66: ...on until OFF is shown 3 Press the Alarm Silence button to set the alarm silence duration to OFF and return to normal operation Note The Alarm Silenced indicator will flash and an audible reminder soun...

Page 67: ...auses the increment or decrement to scroll The Alarm Limit Changed indicator is displayed anytime an alarm limit is being changed or has been changed See Alarm Limit Changed Indicator on page 63 Note...

Page 68: ...it is limited to the SpO2 upper alarm limit The SpO2 low alarm limit cannot be set equal to or higher than the SpO2 upper alarm limit 2 Press the Up Arrow or Down Arrow buttons to increase or decrease...

Page 69: ...t 4 Press the Up Arrow or Down Arrow buttons to increase or decrease the shown limit parameter 5 Press the Menu button to set the limit value The BPM lower alarm limit is shown Note The pulse rate low...

Page 70: ...ton to set the limit value The BPM upper alarm limit is shown Note The pulse rate upper alarm limit range is 31 to 250 The lower value of the pulse rate upper alarm limit is limited to one number abov...

Page 71: ...return to normal operation Note Limit changes will only be in effect as long as the NPB 40 remains turned on When the NPB 40 is turned off the default limits will be restored in the NPB 40 When the NP...

Page 72: ...tient data event records snap shots Data event records can be printed Events are retained in the NPB 40 memory while the NPB 40 remains on and cleared when the NPB 40 is turned off or powers itself of...

Page 73: ...own Note The number 1 in the SpO2 field is the identification ID number of captured snap shots Note When the Data button is pressed and there is no empty event memory location available the NPB 40 dis...

Page 74: ...printer model PD 22T prior to operation of the printer with the NPB 40 Note The NPB 40 must be IR linked to a compatible printer in order to print When the print data display is shown press the Data b...

Page 75: ...urns to the normal mode Summary report data is purged after it is printed or on time out due to printer communication failure Printing or time out due to printer communication failure does not purge s...

Page 76: ...n sensor memory the Data In Sensor icon is displayed on the print data display If both types of data are stored both icons are displayed If no data are stored neither icon is shown blank display Note...

Page 77: ...rientate the printer and NPB 40 as shown in Figure 2 The alignment of the infrared ports of the printer and the NPB 40 must not exceed two feet 61 cm separation and be within 15 degrees of centerline...

Page 78: ...NPB 40 Operation 70 3 Press the Menu button seven times The print display is shown 4 Press the Data button to start printing During printing the stored snap shot number is display for each snap shot...

Page 79: ...NPB 40 Operation NPB 40 71 The NPB 40 prints all available data Figure 3 illustrates all the print information that may be available Figure 3 Combined Printed Data...

Page 80: ...Blank Page...

Page 81: ...0 73 Printer Setup Report The printer is shipped with a PD 22 Setup Report See Figure 4 for a copy of the printer setup report The setup report lists the preset condition of the PD 22T printer Figure...

Page 82: ...NPB 40 Operation 74...

Page 83: ...X monitors are used Patient event data is stored on the memory chip of adhesive OXIMAX sensors single patient use OXIMAX sensors only The sensor event data are stored recorded with the limit threshold...

Page 84: ...esigned to view patient events from prior areas of care or transport history while monitor trend should be used to view data or events from a patient currently being monitored The monitor s Data In Se...

Page 85: ...asurements OXIMAX Sensor Event Record Data The NPB 40 records a patient s OXIMAX sensor SpO2 event history from the OXIMAX sensor s memory chip allowing a patient s event history to travel with the pa...

Page 86: ...RNING Do not use a damaged OXIMAX sensor or extension cable Do not use an OXIMAX sensor with exposed optical components WARNING Use only Nellcor approved OXIMAX sensors and extension cables with the N...

Page 87: ...conditions OXIMAX sensor application errors and patient conditions WARNING Do not immerse or wet the OXIMAX sensor WARNING Do not lift the NPB 40 by the sensor or extension cable because the cable cou...

Page 88: ...ting an OXIMAX sensor consider the patient s weight and activity level the adequacy of perfusion and the available OXIMAX sensor sites the need for sterility and the anticipated duration of monitoring...

Page 89: ...0 to 50 kg 22 to 110 lbs OXIMAX adhesive sensor single patient use infant MAX I 3 to 20 kg 6 6 to 44 lbs OXIMAX adhesive sensor single patient use adult nasal MAX R 50 kg 110 lbs OXIMAX OxiCliq nonadh...

Page 90: ...or 40 kg 6 6 lbs or 88 lbs OXIMAX Oxiband sensor reusable pediatric infant OXI P I 3 kg to 40 kg 6 6 lbs to 88 lbs OXIMAX Dura Y multisite sensor reusable For use with the Dura Y sensor Ear clip Reus...

Page 91: ...compatibility testing has been conducted on Nellcor OXIMAX sensors in compliance with ISO 10993 1 Biological Evaluation of Medical Devices Part 1 Evaluation and Testing The OXIMAX sensors have passed...

Page 92: ...84 Optional Accessories The optional accessories offered with the NPB 40 are protective boot with clip page 85 carrying case page 86 water resistant jacket page 87 printer page 87 thermal paper page 8...

Page 93: ...OXIMAX Sensors and Accessories NPB 40 85 Boot With Clip This accessory protects the NPB 40 Figure 5 NPB 40 Boot with Clip 1 Front view 2 Rear view...

Page 94: ...n carrying case is equipped with compartments for the NPB 40 Operator s manual compact disk containing all manuals and sensors The case comes with a carrying strap that is adjustable from 71 cm to 135...

Page 95: ...Sensors and Accessories NPB 40 87 Water Resistant Jacket The water resistant jacket is made of clear plastic to facilitate use of the NPB 40 Figure 7 Water Resistant Jacket Infrared Printer Figure 8 P...

Page 96: ...he NPB 40 uses the printer IrDA infrared interface Refer to the User s Manual supplied with the printer for details on the PD 22T printer Thermal Paper The thermal paper is for the Citizen PD 22 infra...

Page 97: ...Accessories NPB 40 89 DEC 4 extension cable Figure 10 DEC 4 Extension Cable The DEC 4 extension cable provides 1 2 m 4 ft of cable extension between the NPB 40 and the sensor 1 DEC 4 extension cable...

Page 98: ...OXIMAX Sensors and Accessories 90 Blank Page...

Page 99: ...OXIMAX Sensors and Accessories on page 77 Performance Considerations on page 91 Performance Verification The performance of the NPB 40 is verified by following the procedures outlined in the Performa...

Page 100: ...ins such as carboxyhemoglobin methemoglobin and sulphemoglobin are unable to carry oxygen SpO2 readings may appear normal however a patient may be hypoxic because less hemoglobin is available to carry...

Page 101: ...Considerations WARNING Pulse oximetry readings and pulse signal can be affected by ambient conditions OXIMAX sensor application errors and patient conditions WARNING Tissue damage can be caused by inc...

Page 102: ...h ambient light conditions Loss of pulse signal can occur for the following reasons the OXIMAX sensor is applied too tightly a blood pressure cuff is inflated on the same extremity as the one with the...

Page 103: ...onditions may result in inaccurate measurements If patient movement presents a problem try one or more of the following remedies to correct the problem verify that the OXIMAX sensor is properly and se...

Page 104: ...Blank Page...

Page 105: ...Performance Considerations NPB 40 97...

Page 106: ...Performance Considerations 98...

Page 107: ...tal signs by alternate means then make sure the NPB 40 is functioning correctly WARNING The cover should only be removed by qualified service personnel There are no user serviceable parts inside the N...

Page 108: ...play Er followed by the error code Note The error code number may contain up to three digits When an error code other than the ones listed in Table 5 is shown turn the NPB 40 off wait 10 seconds and t...

Page 109: ...5 Error Codes Error Code Action 10 Check replace sensor extension cable 11 1 Replace batteries 2 Notify service personnel 17 Check replace sensor extension cable 19 Check replace sensor extension cab...

Page 110: ...n The current copy of the NPB 40 service manual is available on the Internet at http www mallinckrodt com respiratory resp Serv_Supp ProductManuals html Following is a list of possible errors and sugg...

Page 111: ...h indicator is displayed for more than 10 seconds Check the sensor directions for use to determine if an appropriate sensor is being used and if it is applied properly Check sensor and extension cable...

Page 112: ...4 The Pulse Search indicator lights after successful measurements have been made Check the patient Perfusion may be too low for the NPB 40 to track the pulse Test the NPB 40 on another subject Change...

Page 113: ...ion This device has been tested and found to comply with the limits for medical devices to the EN60601 1 2 second edition and the Medical Device Directive 93 42 EEC These limits are designed to provid...

Page 114: ...rient or relocate the interfering equipment Increase the separation between the interfering equipment and this equipment The NPB 40 generates uses and can radiate radio frequency energy and if not ins...

Page 115: ...on number of the NPB 40 The software version appears in the NPB 40 display each time the NPB 40 successfully completes the power on self test Write the number down and have it available whenever reque...

Page 116: ...Blank Page...

Page 117: ...vices Department 1 800 635 5267 or your local Nellcor representative for shipping instructions including a Returned Goods Authorization RGA number Unless otherwise instructed by Nellcor s Technical Se...

Page 118: ...l Nellcor representative Periodic Safety Checks It is recommended that the following checks be performed every 24 months Inspect the equipment for mechanical and functional damage Inspect the safety r...

Page 119: ...The NPB 40 may be disinfected using a soft cloth saturated with a solution of 10 chlorine bleach in tap water Before attempting to clean an SpO2 OXIMAX sensor read the directions for use enclosed with...

Page 120: ...Blank Page...

Page 121: ...table parameters include high and low SpO2 limits high and low BPM limits alarm volume pulse beep volume and data printing Pressing the Menu button during start up Power On Self Test POST test to acce...

Page 122: ...arameter Press Function 1 SpO2 Low Limit Adjust limit 2 SpO2 High Limit Adjust limit 3 BPM Low Limit Adjust limit 4 BPM High Limit Adjust limit 5 Pulse Beep Volume Adjust volume Indications on blip ba...

Page 123: ...nap shot and sensor event data Table 6 Menu Structure Continued of Presses Parameter Press Function Table 7 Time Set Menu of Presses Parameter Press Function The must be pressed during the NPB 40 POST...

Page 124: ...the year entry is made the NPB 40 checks the day and month selections to see if they are correct If the day or month selection is not valid for the year selected the menu display returns to the day s...

Page 125: ...Menu Structure NPB 40 117 31 November 29 February on a non leap year...

Page 126: ...Blank Page...

Page 127: ...translated into a measurement of functional oxygen saturation SpO2 Because a measurement of SpO2 is dependent upon light from the OXIMAX sensor excessive ambient light can interfere with this measure...

Page 128: ...The pulse oximeter bases its SpO2 measurements on the difference between maximum and minimum absorption measurements at systole and diastole By doing so it focuses on light absorption by pulsatile ar...

Page 129: ...in including measured dysfunctional hemoglobins To compare functional saturation measurements to those from an instrument that measures fractional saturation fractional measurements must be converted...

Page 130: ...color All OXIMAX sensors contain a memory chip carrying information about the OXIMAX sensor which the oximeter needs for correct operation including the OXIMAX sensor s calibration data model type tro...

Page 131: ...in calculating the patient s SpO2 Consult the OXIMAX sensor accuracy grid card included with the pulse oximeter for specific accuracy information for the NPB 40 with different Nellcor OXIMAX sensors T...

Page 132: ...Blank Page...

Page 133: ...0 3 digits Low Perfusion3 70 to 100 2 digits 1 Saturation accuracy will vary by sensor type Refer to the Sensor Accuracy Grid The Sensor Accuracy Grid is shipped with the NPB 40 The latest version of...

Page 134: ...Tolerance Continued 1 Saturation accuracy will vary by sensor type Refer to the Sensor Accuracy Grid The Sensor Accuracy Grid is shipped with the NPB 40 The latest version of the Sensor Accuracy Grid...

Page 135: ...30 Hz 752 Hz On pulse width 20 msec 500 msec Off Interval 20 msec 10 msec Number of pulses in burst 1 Repetition Pause 2 sec N A Priority 1 Beep Volume setting Volume level Adjustable 42 to 52 dB A at...

Page 136: ...10 msec Number of pulses in burst 1 Repetition Pause 2 sec N A Priority 3 Invalid Key Press Volume level Fixed at 45 dB A at one meter Pitch 30 Hz 200 Hz On pulse width 20 msec 50 msec Off Interval 2...

Page 137: ...msec 130 msec Number of pulses in burst 3 Repetition Pause 2 sec N A Priority 5 Valid Key Press Volume level Fixed at 45 dB A at one meter Pitch 30 Hz 800 Hz On pulse width 20 msec 10 msec Off Interv...

Page 138: ...c Number of pulses in burst 1 Repetition Pause 2 sec N A Priority 7 Alarm Silence Reminder Volume level Adjustable 42 to 52 dB A at one meter Pitch 30 Hz 500 Hz On pulse width 20 msec 130 msec Off Int...

Page 139: ...sec 80 msec Number of pulses in burst 1 Repetition Pause 2 sec 0 sec Priority 9 Medium Priority Alarm Volume level Adjustable 42 to 52 dB A at one meter Pitch 30 Hz 752 Hz On pulse width 20 msec 400 m...

Page 140: ...ause 2 sec 0 sec Priority 11 Audible Indicators Continued Audible Indicator Parameter Value Batteries The batteries provide at least 15 hours of battery life with no alarms no printing and with backli...

Page 141: ...5 mW OXIMAX MAX AL 52 5 mW OXIMAX MAX R 52 5 mW OXIMAX Durasensor DS 100A 52 5 mW OXIMAX OxiCliq P 52 5 mW OXIMAX OxiCliq N 52 5 mW OXIMAX OxiCliq I 52 5 mW OXIMAX OxiCliq A 52 5 mW OXIMAX Dura Y D Y...

Page 142: ...torage not in shipping container Temperature 20 C to 60 C 4 F to 140 F Altitude 390 m to 5 574 m 1 280 ft to 18 288 ft Atmospheric Pressure 50 kPa to 106 kPa 14 7 in Hg to 31 3 in Hg Relative Humidity...

Page 143: ...f protection Internally powered equipment on battery power Degree of protection Type BF Applied part Mode of operation Continuous Front panel and case labeling IEC 60878 EN 980 ISO 7000 EN 60417 1 EN...

Page 144: ...0 The NPB 40 is intended for use in an electromagnetic environment in which radiated RF disturbances are controlled The customer or user of the NPB 40 can help prevent electromagnetic interference by...

Page 145: ...12 0 12 0 23 0 1 0 38 0 38 0 73 1 1 2 1 2 2 3 10 3 8 3 8 7 3 100 12 12 23 For transmitters rated at a maximum output power not listed above the separation distance can be estimated using the equation...

Page 146: ...4 ft 1 2 m MAX FAST sensor 30 in 76 2 cm MAX A sensor 1 5 ft 0 5 m MAX AL sensor 3 ft 0 9 m MAX I sensor 1 5 ft 0 5 m MAX N sensor 1 5 ft 0 5 m MAX P sensor 1 5 ft 0 5 m MAX R sensor 1 5 ft 0 5 m SC...

Page 147: ...etic Environment Guidance RF emissions CISPR 11 Group 1 The NPB 40 uses RF energy only for its internal function Therefore the RF emissions are very low and not likely to cause interference in nearby...

Page 148: ...00 4 2 6 kV contact 8 kV air Complies Floors should be wood concrete or ceramic tile If floors are covered with synthetic material the relative humidity should be at least 30 Electrical fast transient...

Page 149: ...ce calculated from the equation applicable to the frequency of the transmitter Radiated RF IEC 61000 4 3 3 V m 80 MHz to 2 5 GHz 3 Vrms Recommended Separation Distance where P is the maximum output po...

Page 150: ...amateur radio AM and FM radio broadcast and TV broadcast cannot be predicted theoretically with accuracy To assess the electromagnetic environment due to fixed RF transmitters an electromagnetic site...

Page 151: ...Specifications NPB 40 143...

Page 152: ...Specifications 144...

Page 153: ...silence duration 54 alarm silence indicator 19 alarm volume 114 anemia 92 audible indicator 127 B biocompatibility testing 83 boot 85 bpm high limit 114 bpm low limit 114 C calculated saturation 121...

Page 154: ...abling audio alarms 56 disinfecting 110 display SpO2 18 display update interval 126 dysfunctional hemoglobins 92 E electromagnetic interference 105 error codes 100 explosion hazard 1 extension cable D...

Page 155: ...tery indicator 19 31 M manufacturer s declaration 136 measured saturation 121 menu structure 113 minute 115 monitor performance considerations 91 monitor displays dashes 44 month 116 motion indicator...

Page 156: ...ata 115 printer 88 pulse beep volume 114 pulse search indicator 20 R recommended separation distances 137 S safety checks 110 saturation calculated 121 fractional 121 functional 121 measured 121 selec...

Page 157: ...ile 13 keep away from heat 13 keep upright 13 protect from moisture 13 resistant to liquid ingress 11 Russian regulatory approval 12 see instructions for use 11 serial number 12 temperature limitation...

Page 158: ...Index 152 performance 91 W warning 1 water resistant jacket 87 wavelength 132 wavelength sensor 132 Y year 116...

Page 159: ...Index NPB 40 153...

Page 160: ......

Page 161: ...ivision 4280 Hacienda Drive Pleasanton CA 94588 U S A Telephone Toll Free 1 800 635 5267 Authorized Representative Tyco Healthcare UK LTD 154 Fareham Road Gosport PO13 0AS U K 2004 Nellcor Puritan Ben...

Reviews: