Installation instructions
en
23
¡
The appliance corresponds to protection class I and
must only be operated with a protective earth con-
nection.
¡
The fuse protection must correspond to the power
rating specified on the appliance's rating plate and
to local regulations.
¡
The appliance must be disconnected from the
power supply whenever installation work is being
carried out.
¡
If the plug is no longer accessible following installa-
tion, an all-pole isolating switch with a contact dis-
tance of at least 3 mm must be present.
¡
The appliance must only be connected to a protect-
ive contact socket that has been correctly installed.
¡
Contact protection must be guaranteed by the in-
stallation.
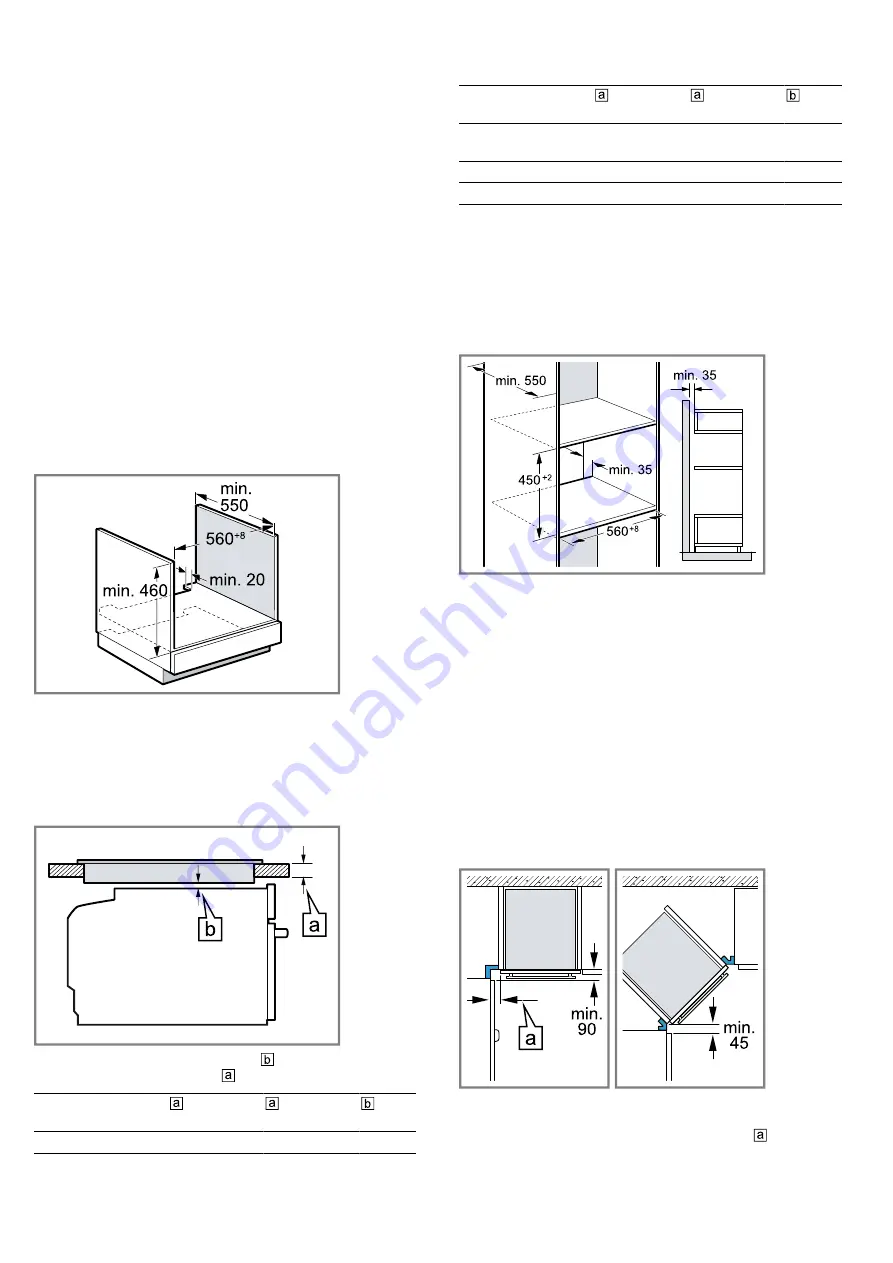
17.5 Installation below a worktop
Observe the installation dimensions and the safety
clearances when installing below a worktop.
To ventilate the appliance, the intermediate floor must
have a ventilation cut-out.
The worktop must be secured to the fitted unit.
17.6 Installing below a hob
If the appliance is installed below a hob, the following
minimum dimensions must be adhered to (including
substructure, if applicable).
The minimum worktop thickness is based on the re-
quired minimum clearance .
Hob type
raised in
mm
flush in
mm
in
mm
Induction hob
48
49
5
Hob type
raised in
mm
flush in
mm
in
mm
Full-surface in-
duction hob
58
59
5
Gas hob
38
49
5
Electric hob
38
41
2
Observe the installation instructions for the hob.
17.7 Installation in a tall unit
Observe the installation dimensions and the safety
clearances in a tall unit.
To ventilate the appliance, the intermediate floor must
have a ventilation cut-out.
If the tall unit has another back panel in addition to the
element back panels, this must be removed.
Do not fit the appliance too high up; it must be pos-
sible for accessories to be removed easily.
17.8 Combination with a warming drawer
First fit the warming drawer. Follow the installation in-
structions for the warming drawer.
Slide the appliance, on the warming drawer, into the fit-
ted cabinet. When sliding in the appliance, do not dam-
age the warming drawer's panel.
17.9 Corner installation
Observe the installation dimensions and the safety
clearances when installing in a corner.
To ensure that the appliance door can be opened, you
must take the minimum dimensions into consideration
when installing in a corner. The dimension is de-
pendent on the thickness of the unit front and the
handle.
Summary of Contents for C17UR02.0B
Page 1: ...Microwave Oven en User manual and installation instructions C17UR02 0B ...
Page 25: ......
Page 26: ......
Page 27: ......


