background image

16

TROUBLESHOOTING

The following list represents possible anomalies you may encounter with subsequent troubleshooting
procedures. Please refer to this checklist prior to contacting a service representative.
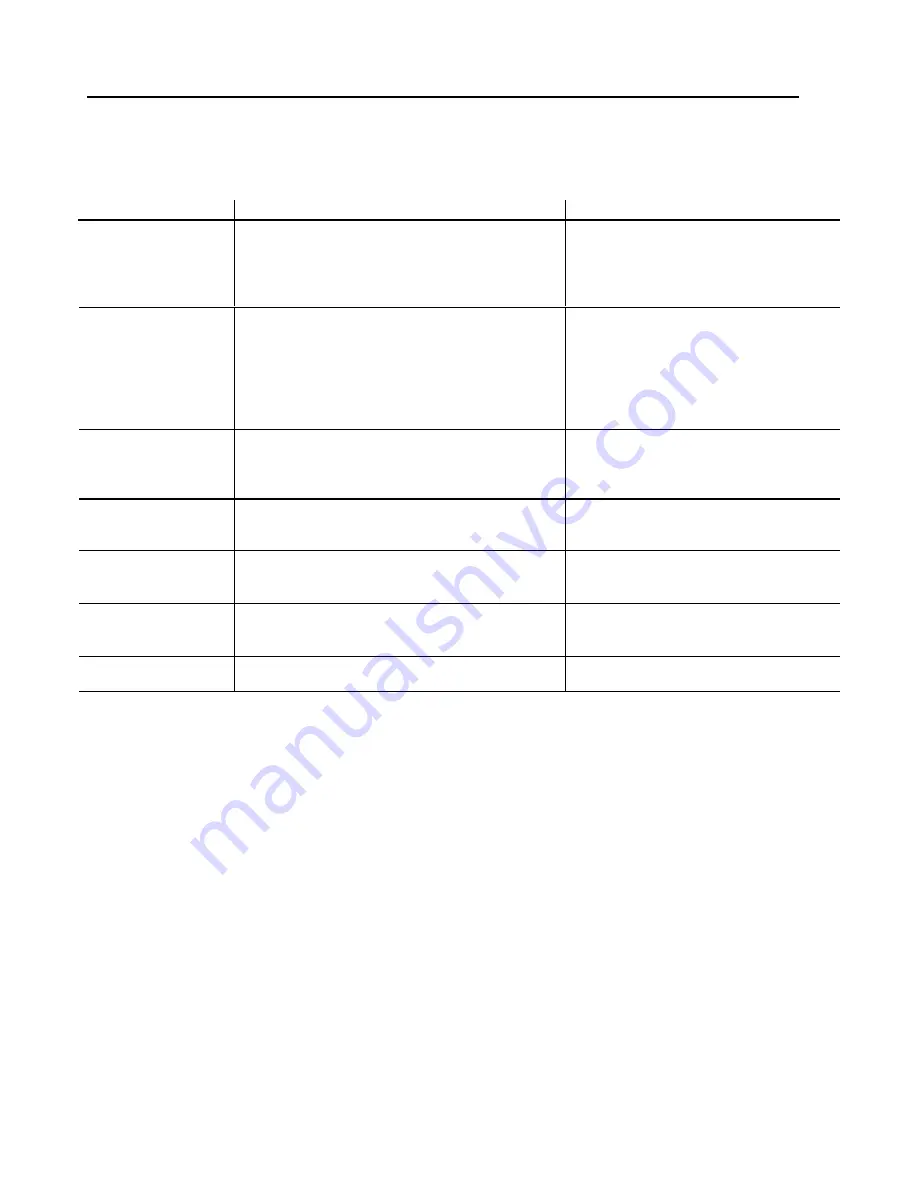
Trouble condition

Cause

Remedy

No Picture

1.  Power cord disconnected?
2.  Power switch on?
3.  Signal cable properly connected?
4.  Monitor in power save mode?

1.  Connect power cord
2.  Turn the power switch on
3.  Connect the signal cable properly
4.  Press any key on your computer

Color is abnormal

1.  Magnetic object nearby? (such as speaker)
2.  Direction of screen changed

during operation?

3.  Signal cable properly connected?

1.  Move object farther away
2.  Wait about 20 minutes after,

turning OFF the power switch on
so that degauss circuit within
monitor starts.

3.  Connect signal cable properly

Picture runs or
scrolls

1.  Signal cable properly connected?
2.  Input signal outside of the required

frequency range?

1.  Connect signal cable properly
2.  Change resolution of PC to that

listed on Page 6

Display image is
too dark

Brightness and contrast at minimum?

Adjust brightness and contrast

Display image is
too large or small.

1.  Horizontal size control needs adjusting?
2.  Vertical size control needs adjusting?

1.  Adjust to desired size.
2.  Adjust to desired size.

Image is distorted

Is the earth’s magnetic field interfering with
display?

Face monitor east for best image
quality.  Then use degauss function.

Function key
doesn’t work

Caused by light interference
getting through the remote receiver.

Unplug AC cord for 10 seconds, then
plug in again to reset microprocessor.

Summary of Contents for XV2930

Page 1: ...INSERTED REFRAIN FROM OPENING THE CABINET AS THERE ARE HIGH VOLTAGE COMPONENTS INSIDE REFER SERVICING TO QUALIFIED SERVICE PERSONNEL DOC COMPLIANCE NOTICE This Class B digital apparatus meets all requ...

Page 2: ...it during electrical storms or if unit will not be used over a long period Do not open the cabinet which has potential dangerous high voltage components inside If the unit is damaged in this way the w...

Page 3: ...n connection with the product WHAT WE WILL PAY FOR AND WHAT WE WILL NOT PAY FOR We will pay labor and material expenses for covered items but we will not pay for the following Removal or installation...

Page 4: ...uthorized Visual Systems Division Dealers and network of factory trained independent service providers If you are experiencing a problem with you monitor please contact the authorized NEC Visual Syste...

Page 5: ...O Vp p d input impedance 75 ohms e Dot rate 50MHz max Horizontal sync a Type TTL b Polarity positive or negative c Input impedance 1 K ohm Min d Frequency RGB 31 KHz to 38 KHz Video 15 734 KHz NTSC 6...

Page 6: ...ution Refresh 640 640 640 480 720 400 640 480 800 600 800 600 R a t e 60 72 70 66 6 60 317 56 25 Hz Pixel timing 5 39 722 31 746 35 311 33 06 25 27 8 Nsec Hor visible 640 640 720 640 800 800 dots Hor...

Page 7: ...audio signals used with video equipment like a VCR Laser disc or DVD player 4 RGB SOUND INPUT These terminals are for audio signal when the monitor is used in RGB mode 5 AV OUTPUT These terminals can...

Page 8: ...8 LOCATION OF CONTROLS ON FRONT PANEL LOCATION OF CONTROLS ON FRONT PANEL Front View...

Page 9: ...9 LOCATION OF CONTROLS ON FRONT PANEL LOCATION OF CONTROLS ON FRONT PANEL...

Page 10: ...High leakage current earth connection essential before connecting supply 1 Connect the video cable AV S Video or RGB cable and audio cable to your monitor 2 Connect the AC power cord to your monitor...

Page 11: ...splay will appear next to the button indicating that the mute function is enabled To disable the mute function simply press the button again the On Screen Display will disappear and sound will start c...

Page 12: ...tion and moving to the right pressing the menu button continuously will circulate the selection eventually returning to the starting position After you have selected a category you can increase or dec...

Page 13: ...to adjust the vertical position of the displayed image Press the adj button to move image down Press the adj button to move image up H Size Select this icon to adjust the horizontal size of the displ...

Page 14: ...ecrease sharpness Press the adj button to increase sharpness Pincushion Select this icon to adjust the amount of tapering on each side of the displayed image Press the adj button to decrease the amoun...

Page 15: ...NC VIDEO POWER CONSUMPTION on green Pulse Pulse Active Pw maximum power saving yellow No pulse Pulse Not used 30W power saving yellow Pulse No pulse Not used 30W power saving yellow No pulse No pulse...

Page 16: ...urning OFF the power switch on so that degauss circuit within monitor starts 3 Connect signal cable properly Picture runs or scrolls 1 Signal cable properly connected 2 Input signal outside of the req...

Reviews: