English
English-23
Th
is monitor uses RXD, TXD and GND
lines for RS-232C control.
Th
e reverse type cable (null modem cable)
should be used for RS-232C control.
Th
is Plasma monitor can be controlled via personal
computer using an RS-232C connection.
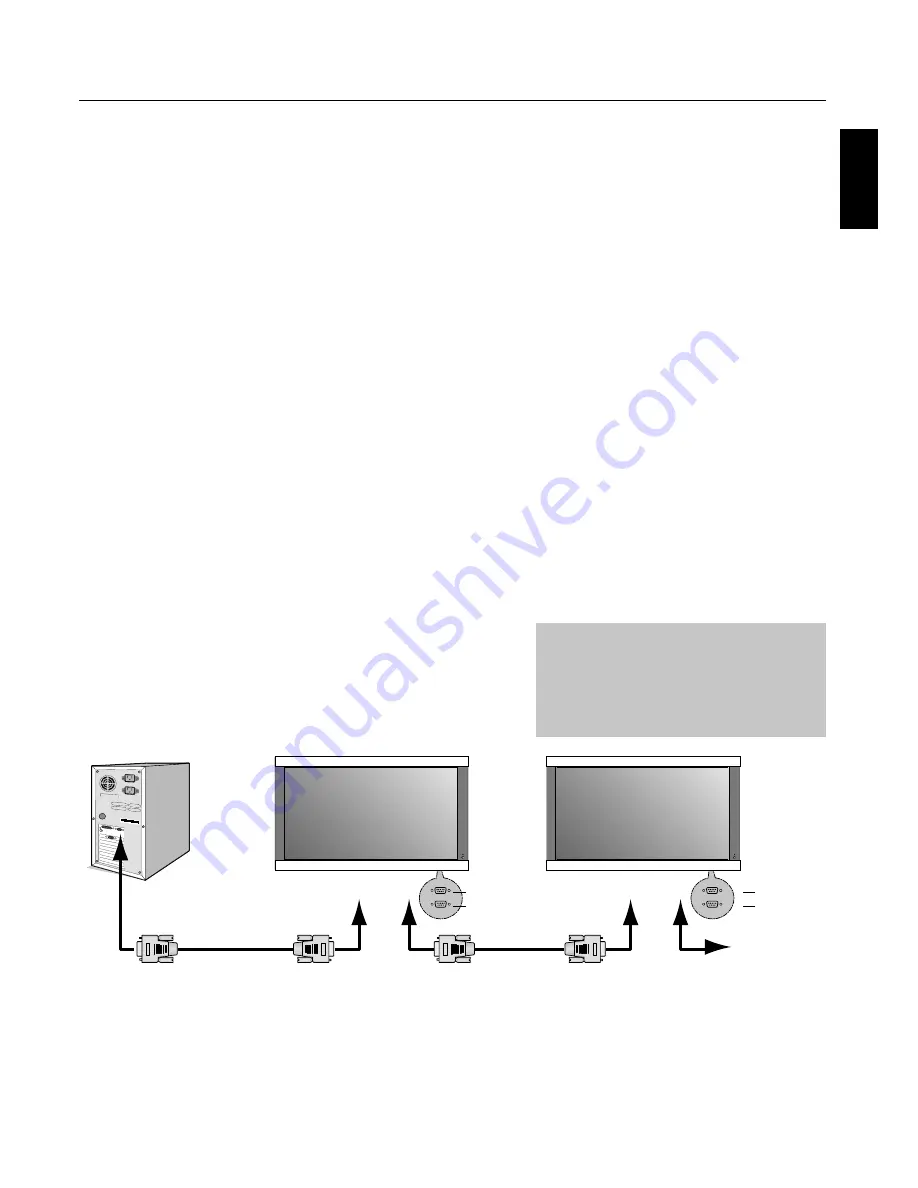
MONITOR ID and RS-232C CONTROL
Up to 26 individual monitors can be controlled through a
daisy chain via RS-232C connection.
1. Connect PC to the monitor.
Connect a PC’s RS-232C control output to the monitor's
RS-232C input. You can then connect the
RS-232C output from this monitor to another monitor’s
RS-232C input. Up to 26 monitors can be connected
using RS-232C.
2. Set Monitor ID and RS-232C Control mode.
For proper operation, the Monitor ID should be
set in the OSD menu of each monitor that is in the
chain. Th
e Monitor ID can be set under the “SETUP”
menu in the OSD. Th
e Monitor ID number can be set
within a range from 1 to 26 or set to "ALL". No two
monitors should share the same Monitor ID number.
It is recommended to number each monitor in a daisy
chain sequentially from 1. Th
e fi rst monitor in the daisy
chain is designated as the primary monitor. Subsequent
monitors with the chain are secondary monitors.
In the “FUNCTION” menu on the fi rst monitor in the
RS-232C daisy chain set the "RS232C CONTROL"
to "NORMAL". Set the "RS232C CONTROL" to
“SECONDARY” on all other monitors.
Functions that can be controlled via RS-232C:
Powering ON or OFF
Switching input signals
NOTE: If your PC (IBM or IBM compatible) is equipped
only with a 25-pin serial port connector, a 25-pin
serial port adapter is required. Contact your dealer
for details.
NOTE: In order to function, the RS-232C OUT terminal
can only be connected to another monitor of the
same model. Do not connect to other types of
equipment.
•
•
RS-232C
PC
(Out)
RS-232C Cable
RS-232C Cable
RS-232C (IN)
RS-232C (OUT)
IN
OUT
IN
OUT
RS-232C (IN)
RS-232C (OUT)


