102
6. Installation and Connections
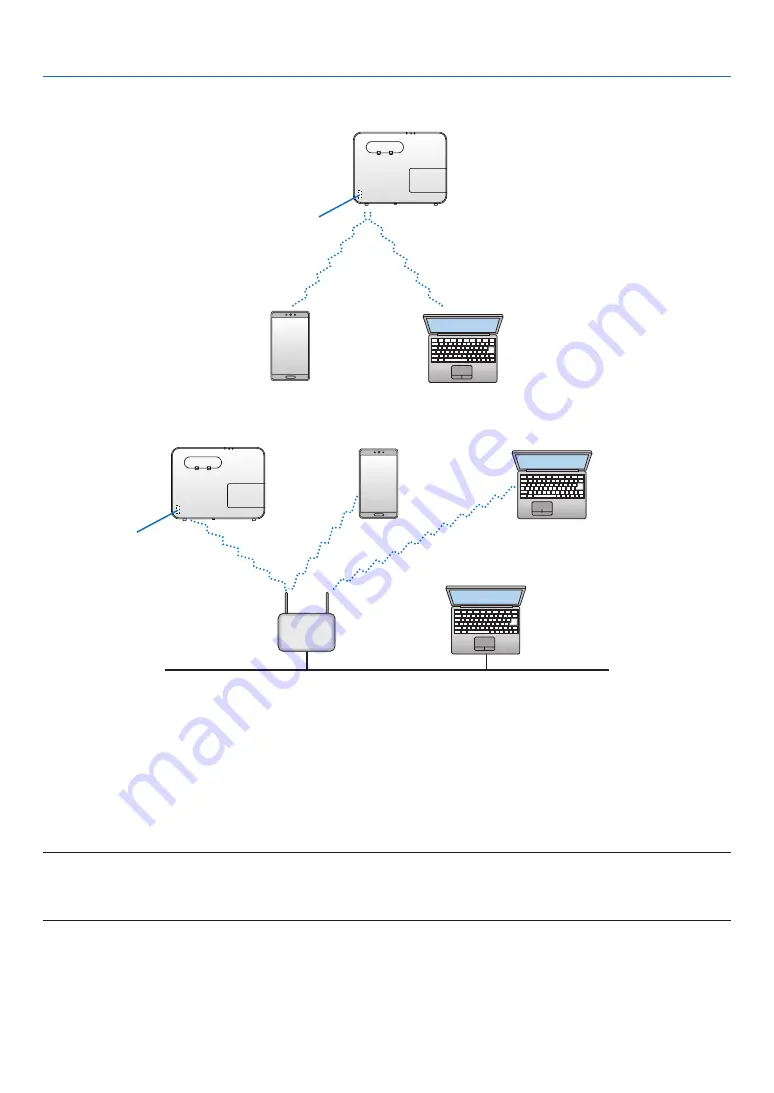
Connection Example (1) [SIMPLE ACCESS POINT]
Set the projector as SIMPLE ACCESS POINT for connecting to terminals as computers and smart phones.
USB Wireless LAN Unit
Connection Example (2) [INFRASTRUCTURE]
Connect the projector to wired/wireless LAN via wireless LAN access point.
USB Wireless LAN Unit
Wired LAN
Wireless access point
1. Connect a computer to the projector via wired LAN. (
→
)
2. Use the computer’s browser to display the projector’s HTTP server. (
→
page
3. Use an HTTP server to set the wireless LAN. (
→
page
Select either [SIMPLE ACCESS POINT] or [INFRASTRUCTURE] for [WIRELESS] in [SETTINGS] of [NETWORK
SETTINGS] and then perform detail settings in [SETTING].
4. Click [APPLY] to connect to the wireless LAN.
NOTE:
• To use the HTTP server function, the projector must be connected to a network. First, connect the projector to a network by the wired LAN
and then perform required settings for the wireless LAN on the HTTP server.
• If network conflict is occurred, the STATUS Indicator starts to blink in orange. In this case, change the IP address.
If you want to change the wireless LAN setting on the projector after setting it on the HTTP server, perform setting
change on the on-screen menu. (
→
)


