


3. Projecting an Image (Basic Operation)
SELE
CT
MENU
EXIT
ENT
ER
STAT
US
LAM
P
AUTO
ADJ.
SOU
RCE
FOCU
S
STATUS
LAMP
AUTO ADJ.
SOURCE
STATUS
LAMP
AUTO ADJ.
SOURCE
POWER
SOURCE
PIC-MUTE
ASPECT
MENU
UP
MAGNIFY
PAGE
OFF
POWER
ON
PIC-MUTE
DOWN
STATUS
LAMP
AUTO ADJ.
SOURCE
Standby
Blinking
Power On
Steady orange light
Blinking green
light
Steady green
light
(
→
page
75
)
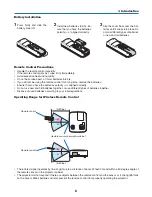
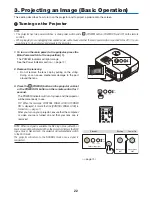
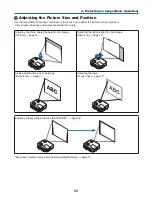
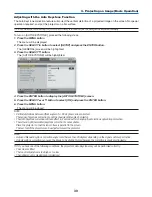
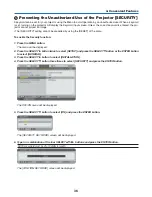
This section describes how to turn on the projector and to project a picture onto the screen.
1
Turning on the Projector
NOTE:
• The projector has two power switches: a main power switch and a
(POWER) button (POWER ON and OFF on the remote
control).
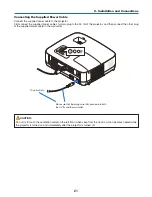
• When plugging in or unplugging the supplied power cable, make sure that the main power switch is pushed to the off (
) posi-
tion. Failure to do so may cause damage to the projector.
1. To turn on the main power to the projector, press the
Main Power switch to the on position ( I ).
The POWER indicator will light orange.
See the Power Indicator section.(
→
page
75
)
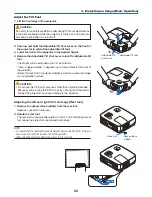
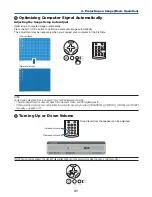
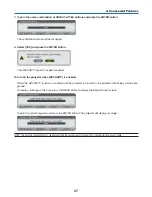
2. Remove the lens cap
• Do not remove the lens cap by pulling on the string.
Doing so can cause mechanical damage to the part
around the lens.
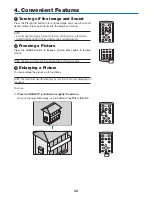
3. Press the
(POWER) button on the projector cabinet
or the POWER ON button on the remote control for 1
second.
The POWER indicator will turn to green and the projector
will become ready to use.
TIP:
When the message “CONTROL PANEL LOCK IS TURNED
ON” is displayed, it means that the [CONTROL PANEL LOCK] is
turned on. (
→
page
61
)
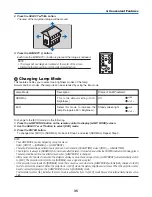
After you turn on your projector, ensure that the computer
or video source is turned on and that your lens cap is
removed.
NOTE: When no signal is available, the NEC logo, blue (default), or
black screen will be displayed. When the projector displays the NEC
logo, a blue or black screen, the projector will automatically switch
to the ECO mode.
The projector will return to the NORMAL mode once a signal is
connected.


