background image

Express5800/1080Xd Installation Procedures   5

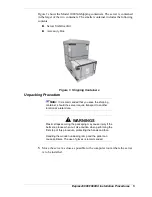
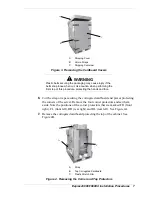
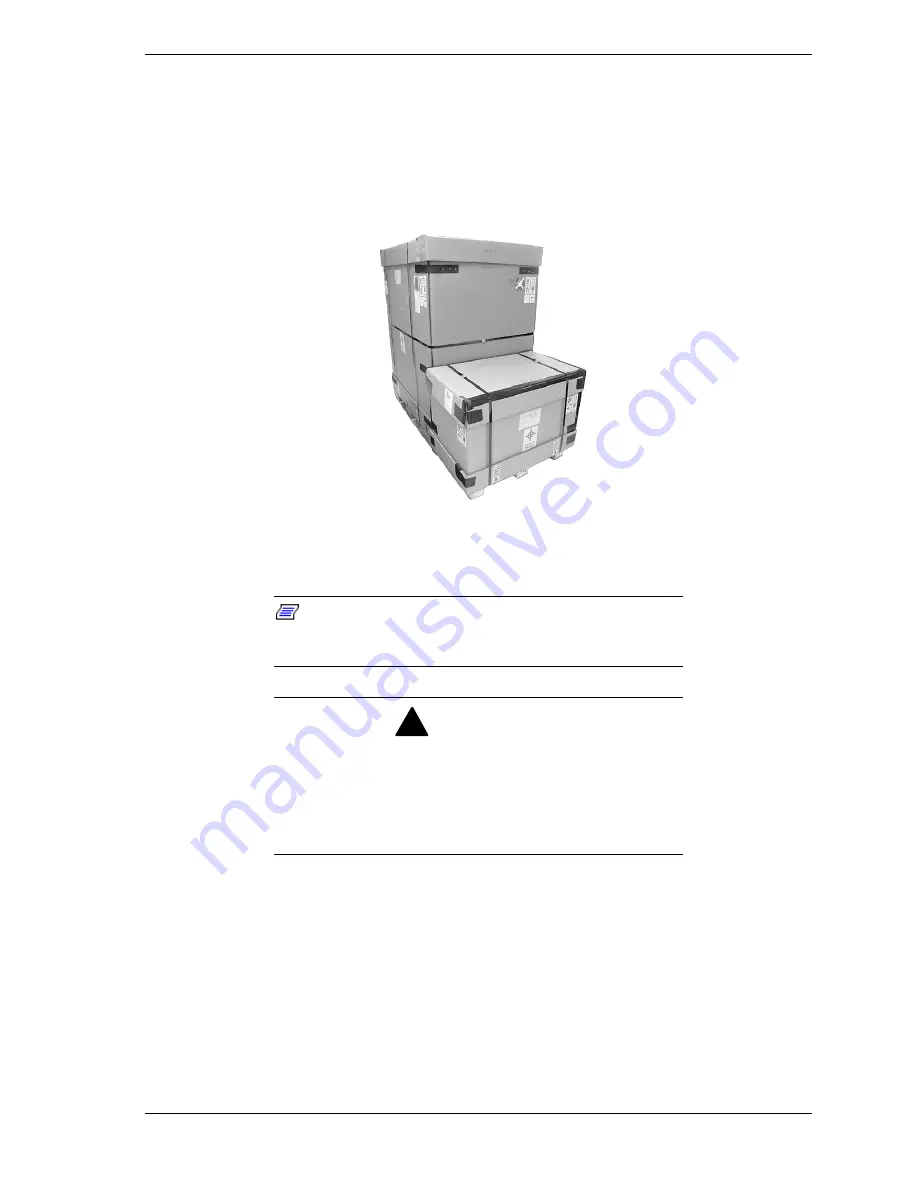
Figure 1 shows the Model 1080Xd shipping containers. The server is contained
in the larger of the two containers. The smaller container includes the following
contents:

!


Server Stabilizer Kit

!


Accessory Box

Figure 1.  Shipping Containers

Unpacking Procedure

Note: 

It is recommended that you save the shipping

container, should the server require transport to another
location at a later date.

!

WARNINGS

Plastic straps securing the packaging may cause injury if the
belts snap loose when cut. Use caution when performing the
first step of this procedure, protecting the hands and face.

Handling the wooden unloading ramp and the pallet can
cause splinters. The use of gloves is recommended.

1. 

Move the server as close as possible to the computer room where the server
is to be installed.

Summary of Contents for NEC Express5800 Series

Page 1: ...I n s t a l l a t i o n P r o c e d u r e s EXPRESS5800 1080Xd...

Page 2: ...of each product is dependent upon factors such as system configuration customer data and operator control Since implementation by customers of each product may vary the suitability of specific product...

Page 3: ...nventions 1 Safety Notices 2 Safety Notices for Users Outside of the U S A and Canada 3 If You Need Help 3 Selecting a Site 3 Unpacking the Server 4 Unpacking Procedure 5 Installing the Side Stabilize...

Page 4: ......

Page 5: ...the components and the sequence of steps you will perform Symbols and Conventions This guide uses the following text conventions and graphics symbols Warnings cautions and notes have the following mea...

Page 6: ...ation should be given to installing the equipment in an environment compatible with the a maximum rated ambient temperature of 35 C Reduced air Flow Installation of the equipment in a rack should be s...

Page 7: ...urrent wiring regulations in your country In the USA those wiring standards are regulated by Underwriter Laboratories UL in the U K by the Institution of Electrical Engineers IEE and in Canada by the...

Page 8: ...r in it s shipping container for at least 24 hours at room temperature before removing any packaging This will prevent damaging condensation from occurring WARNING The server weighs approximately 440...

Page 9: ...recommended that you save the shipping container should the server require transport to another location at a later date WARNINGS Plastic straps securing the packaging may cause injury if the belts sn...

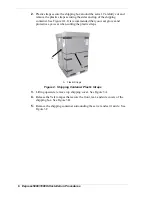
Page 10: ...2A It is recommended that you wear gloves and protective eye wear when cutting the plastic straps A A A Plastic Straps Figure 2 Shipping Container Plastic Straps 3 Lifting upwards remove top shipping...

Page 11: ...ng the hands and face 6 Cut the strap or tape securing the corrugated cardboard end pieces protecting the corners of the server Remove the four corner protectors and set them aside Note the positions...

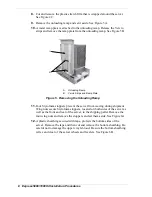
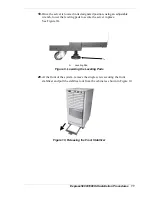
Page 12: ...ving the Unloading Ramp 11 Four Styrofoam stoppers prevent the server from moving during shipment Wing nuts secure Styrofoam stoppers located on both sides of the server as well as the front and rear...

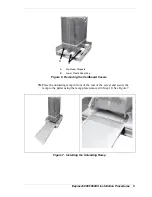
Page 13: ...toppers B Lower Plastic Sheathing Figure 6 Removing the Cardboard Covers 13 Place the unloading ramp in front of the rear of the server and secure the ramp to the pallet using the ramp plate removed i...

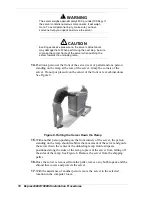
Page 14: ...rear of the server Grasp the corners of the server Do not put pressure on the center of the front or rear cabinet doors See Figure 8 Figure 8 Rolling the Server Down the Ramp 15 With another person pu...

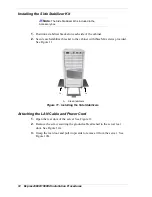
Page 15: ...e wrench lower the leveling pads to secure the server in place See Figure 9A A A Leveling Pad Figure 9 Lowering the Leveling Pads 20 At the front of the system remove the single screw securing the fro...

Page 16: ...ach stabilizer bracket to the cabinet with three M4 screws provided See Figure 11 A A A Side Stabilizers Figure 11 Installing the Side Stabilizers Attaching the LAN Cable and Power Cord 1 Open the rea...

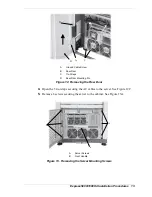
Page 17: ...e Wraps D Rear Door Mounting Pin Figure 12 Removing the Rear Door 4 Open the 3 tie wraps securing the AC cables to the server See Figure 12C 5 Remove 6 screws securing the server to the cabinet See Fi...

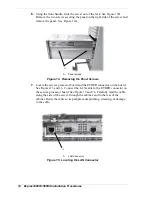
Page 18: ...oving the Panel Screws 7 Locate the service processor board and the ETHER connector on the board See Figures 15 and 16 Connect the LAN cable to the ETHER connector on the service processor board See F...

Page 19: ...ide the server partway back into the cabinet leaving enough to provide access to the AC connection box located at the bottom right corner of the server See Figure 17 9 Remove four screws securing the...

Page 20: ...ting the AC Cable to the AC Junction Box Green wire to TB2 green screw head Black wire to TB1 1 White wire to TB1 2 Figure 19 Connecting the AC Cable to the AC Junction Box 11 Install the cover on the...

Page 21: ...e 13A 13 Route the AC cables over the three tie wraps and secure the tie wraps See Figure 21A A A Secured AC Cables Figure 21 Securing the Cables 14 Slide the two pins on the inside of the rear door i...

Page 22: ......

Page 23: ...xx...

Page 24: ...455 01691 000...

Reviews: