4-20 Upgrading Your System
8.
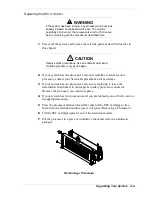
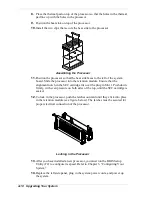
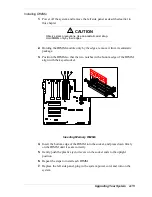
Holding the board by its top edge or upper corners, firmly press the board
into an expansion slot on the system board. The tapered foot of the option
board retaining bracket must fit into the mating slot in the expansion slot.
Installing an Option Board
9.
Align the rounded notch in the option board retaining bracket with the
alignment tab in the expansion slot frame. The retaining bracket fits into the
space that was occupied by the expansion slot cover.
10.
Be sure to push the bracket slot up against the expansion slot frame. If this is
not done, the bracket may interfere with an adjacent bracket.
11.
Install the previously removed expansion slot retainer bar by pressing its top
fastener into the top of the expansion slot frame. The bottom tapered tab of
the expansion slot retainer bar fits into the mating slot on the bottom of the
expansion slot frame.
12.
Connect any external cables (if they are needed) to the installed option
board.
13.
Replace the left side panel, plug in the system power cord, and power on the
system.
Summary of Contents for NEAX Express
Page 1: ...U s e r s G u i d e NEAX Express...
Page 2: ......
Page 3: ...U s e r s G u i d e NEAX Express...
Page 10: ...viii Contents...
Page 36: ...1 20 System Overview...
Page 80: ...3 30 Configuring Your System...
Page 136: ...5 22 Problem Solving...
Page 137: ...A System Cabling System Cabling Before You Begin Static Precautions Standard Configuration...
Page 142: ...A 6 System Cabling...
Page 180: ...C 20 Emergency Management Port...
Page 181: ...D Platform Event Paging...
Page 192: ...10 Glossary...
Page 198: ...Index 4...
Page 199: ...xx...
Page 200: ...456 01509 000...

