26
3. Installation Flow
The following shows the job flow for installing the BBU. For details, see the respective
chapters.
Start
Check BBU and accessories.
Check notes on installation.
Install BBU.
Check connections and
set write cache mode.
End
Chapter 1
Describes how to check the BBU and
accessories in the package and the
notes on installation.
Chapter 2
2. Check from Utility
Describes connection checking
procedure after battery installation and
the setting of the write cache mode.
Chapter 2
1. Installation Procedure
Describes how to install the BBU.
Summary of Contents for N8103-126
Page 22: ......
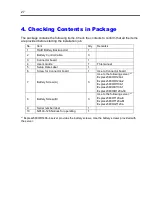
Page 24: ...2 3 1 2 2 2 1...
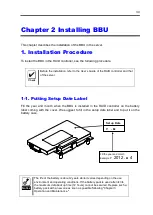
Page 26: ...4 Y M Set up Date A 3 6 32x5 8 3 B 3 2 5x4x15 1...
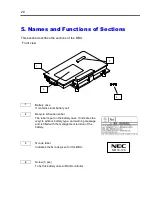
Page 27: ...5 5 2 3 1 1 2 3 N8103 126...
Page 28: ...6 Y M Set up Date 6 4 5 N8103 126 XXXXXXX RAID Battery Backup Unit 7 4 RAID 5 RAID 6 7 N...
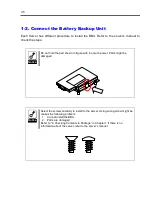
Page 29: ...7 8 8 9 10 8 N8103 126 45cm 75cm 95cm 9 1 10 2 RAID...
Page 32: ...10 2 1 RAID RAID 1 1 2 2 72 3 Set up Date Y M Y 2012 M 4...
Page 33: ...11 1 2 1 4 1...
Page 38: ...16 2 3 WebBIOS 1 POST Ctrl H WebBIOS 2 Controller Properties 3 Next...
Page 39: ...17 4 RAID Battery Back Up Present Battery Back Up 2 Present none Battery Back Up none 24...
Page 40: ...18 5 WebBIOS Virtual Drives 6 Properties Go...
Page 41: ...19 7 Current Write Write Back with BBU Default Write Write Back with BBU 9 RAID...
Page 42: ...20 3 1 NEC NEC 2 2 1 RAID Universal RAID Utility WebBIOS 2 2 2 2 3...
Page 43: ...21 3 2 2 Universal RAID Utility 24 Universal RAID Utility 9 NEC Set up Date Y M Y 2012 M 4...
Page 44: ...22 4 Learn Cycle 1 RAID 3 4...
Page 46: ...24 5...


