background image

12

ADJ–

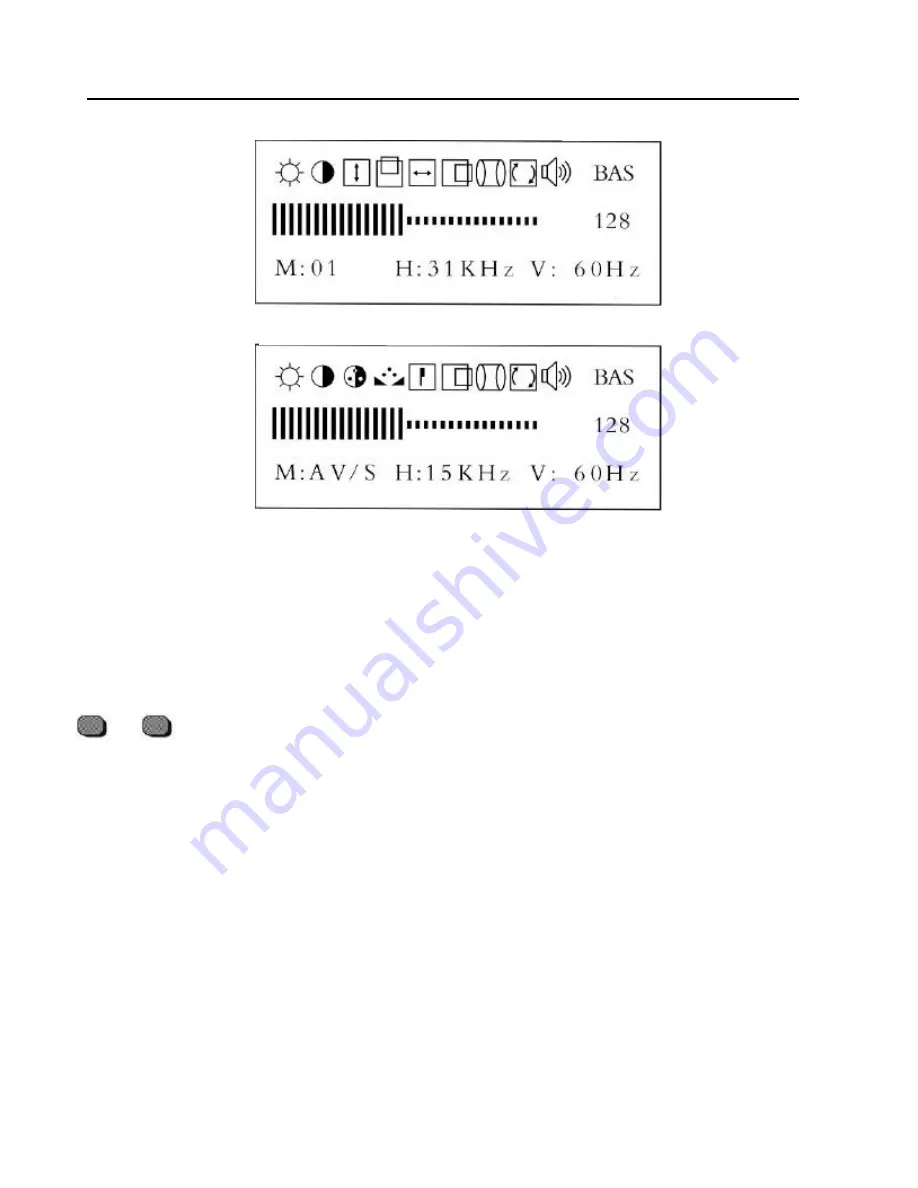
The On-Screen Display menus of RGB mode and AV/S mode appear below.

  RGB menu On Screen Display

  To change monitor settings of the Master Picture Menu, you must choose a

category, and then adjust the value of each categories. Here’s how to select
a category:

Press the menu + or menu - button while the master picture menu is on
screen. Each time the menu + button is pressed, a red menu icon is
changed for that selection. Beginning with the starting position, and moving
to the right, pressing the menu + button continuously will circulate the
selection, eventually returning to the starting position.


After you have selected a category, you can increase or decrease a display
setting. Here’s how to adjust a setting: Press the menu +/– button.  While
the master picture menu is on screen, use the menu + or menu– select key
to choose a category. Once you have selected a category, press adj + or
adj - button. Each time the adj + adjust button is pressed, the settings for
the category selected will increase. Each time the adj –button is pressed,
the settings for the category selected will decrease.

ADJ+

AV/S menu On Screen Display

Summary of Contents for MultiSync XV29

Page 1: ... INSERTED REFRAIN FROM OPENING THE CABINET AS THERE ARE HIGH VOLTAGE COMPONENTS INSIDE REFER SERVICING TO QUALIFIED SERVICE PERSONNEL DOC COMPLIANCE NOTICE This Class B digital apparatus meets all requirements of the Canadian Interference Causing Equipment Regulations WARNING This equipment has been tested and found to comply with the limits for a Class B digital device pursuant to Part 15 of the ...

Page 2: ...nit during electrical storms or if unit will not be used over a long period Do not open the cabinet which has potential dangerous high voltage components inside If the unit is damaged in this way the warranty will be void Moreover there is a serious risk of electric shock 6 Do not attempt to service or repair the unit NEC is not liable for any bodily harm or damage caused if unqualified persons at...

Page 3: ...in connection with the product WHAT WE WILL PAY FOR AND WHAT WE WILL NOT PAY FOR We will pay labor and material expenses for covered items but we will not pay for the following Removal or installation charges Costs of initial technical adjustments set up including adjustment of user controls These costs are the responsibility of the NECTECH dealer from whom the product was purchased Payment of shi...

Page 4: ...authorized Visual Systems Division Dealers and network of factory trained independent service providers If you are experiencing a problem with you monitor please contact the authorized NEC Visual Systems Division dealer from which it was purchased If this is a reseller who is unable to provide service call the Service Account Administrator at 800 836 0655 DOA POLICY A product is considered DOA if ...

Page 5: ...1 O Vp p d input impedance 75 ohms e Dot rate 50MHz max Horizontal sync a Type TTL b Polarity positive or negative c Input impedance 1 K ohm Min d Frequency RGB 31 KHz to 38 KHz Video 15 734 KHz NTSC 60Hz Vertical sync a Type TTL b Polarity positive or negative c Input impedance 1 K ohm Min d Frequency 50 Hz To 90 Hz 4 Connector type 15 pin D type RCA JACK and S Video terminal 5 Pin assignments fo...

Page 6: ...lution Refresh 640 640 640 480 720 400 640 480 800 600 800 600 R a t e 60 72 70 66 6 60 317 56 25 Hz Pixel timing 5 39 722 31 746 35 311 33 06 25 27 8 Nsec Hor visible 640 640 720 640 800 800 dots Hor total 800 832 900 864 1056 1024 dots Hor front porch 16 16 18 64 40 24 dots Hor sync 96 40 108 64 128 72 dots Hor back porch 48 136 54 96 88 128 dots Hor blanking time 160 192 180 224 256 224 dots Ve...

Page 7: ... audio signals used with video equipment like a VCR Laser disc or DVD player 4 RGB SOUND INPUT These terminals are for audio signal when the monitor is used in RGB mode 5 AV OUTPUT These terminals can output video and audio signals that your monitor is using Connect these to a second monitors video and audio inputs 6 RGB INPUT This terminal is for RGB analog signal use with IBM PC compatibles or M...

Page 8: ...8 LOCATION OF CONTROLS ON FRONT PANEL LOCATION OF CONTROLS ON FRONT PANEL Front View ...

Page 9: ...9 LOCATION OF CONTROLS ON FRONT PANEL LOCATION OF CONTROLS ON FRONT PANEL ...

Page 10: ...f High leakage current earth connection essential before connecting supply 1 Connect the video cable AV S Video or RGB cable and audio cable to your monitor 2 Connect the AC power cord to your monitor 3 Plug the AC power cord to a properly grounded outlet 4 Turn on your computer or video equipment 5 Turn on your monitor s power by pushing the power button The power indicator should be illuminated ...

Page 11: ...isplay will appear next to the button indicating that the mute function is enabled To disable the mute function simply press the button again the On Screen Display will disappear and sound will start coming from the speakers Press this button to return the display to the factory preset default value These items will not recall AV Pincushion Rotation Bass and Treble RGB Rotation Bass and Treble Pre...

Page 12: ...ition and moving to the right pressing the menu button continuously will circulate the selection eventually returning to the starting position After you have selected a category you can increase or decrease a display setting Here s how to adjust a setting Press the menu button While the master picture menu is on screen use the menu or menu select key to choose a category Once you have selected a c...

Page 13: ...n to adjust the vertical position of the displayed image Press the adj button to move image down Press the adj button to move image up H Size Select this icon to adjust the horizontal size of the displayed image Press the adj button to decrease H Width Press the adj button to increase H Width H Position Select this icon to adjust the horizontal position of the displayed image Press the adj button ...

Page 14: ...decrease sharpness Press the adj button to increase sharpness Pincushion Select this icon to adjust the amount of tapering on each side of the displayed image Press the adj button to decrease the amount of side pincushion Press the adj button to increase the amount of side pin cushion Rotation Select this icon to adjust the screen tilt of the displayed image This is used to compensate for earth ma...

Page 15: ...YNC VIDEO POWER CONSUMPTION on green Pulse Pulse Active Pw maximum power saving yellow No pulse Pulse Not used 30W power saving yellow Pulse No pulse Not used 30W power saving yellow No pulse No pulse Not used 30W Note The power management function requires TTL horizontal and vertical sync Power saving is invalid if display is in AV mode ...

Page 16: ...turning OFF the power switch on so that degauss circuit within monitor starts 3 Connect signal cable properly Picture runs or scrolls 1 Signal cable properly connected 2 Input signal outside of the required frequency range 1 Connect signal cable properly 2 Change resolution of PC to that listed on Page 6 Display image is too dark Brightness and contrast at minimum Adjust brightness and contrast Di...

Reviews: