background image

English-51

English

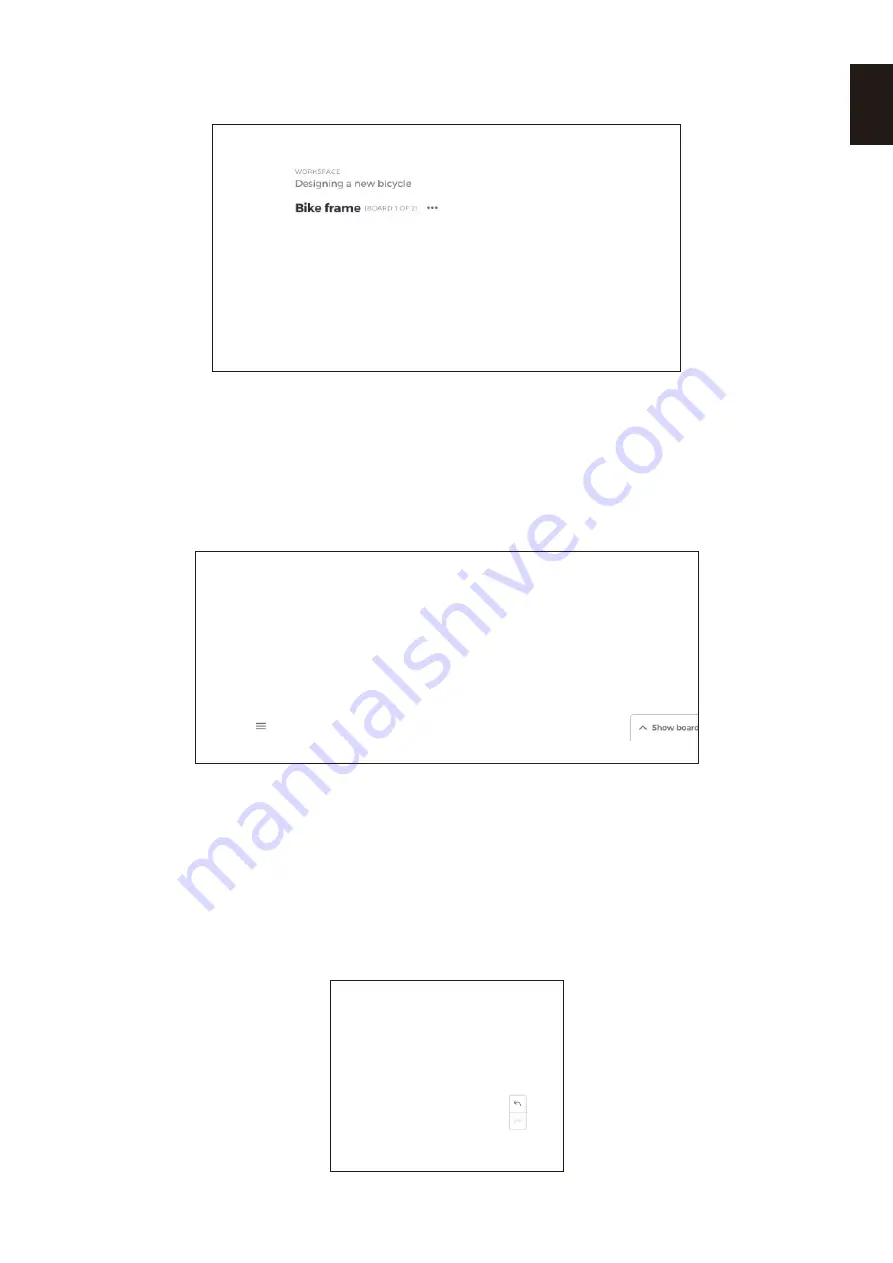
3.21 Renaming, duplicating and deleting a board

To rename, duplicate or delete a board, tap the three dots in the top left-hand corner of your board.

Choose to either:


● Rename


● Duplicate


● Delete board

3.22 Saving, opening and exiting boards

To save a board, choose the menu icon in the bottom left of the screen.

From here you can:


● New. Open a new board


● Open. Open a previously saved board


● Save/Save As…. Save your current board


● Exit. Exit Mosaic Canvas

3.23 Undo and redo

To undo or redo an action, choose the undo redo button at the right-hand side of the display.

Summary of Contents for MultiSync CB651Q

Page 1: ...MultiSync CB651Q MultiSync CB751Q MultiSync CB861Q Please find your model name in the label on the rear side of the monitor MODEL CB651Q CB751Q CB861Q LCD MONITOR User s Manual ...

Page 2: ...Operation English 20 Power ON and OFF Modes English 20 Power Indicator English 21 Aspect English 21 Displayable playable files English 22 OSD On Screen Display Controls English 25 General setting English 25 Audio setting English 26 Screen setting English 27 Display setting English 28 Adjust setting 1 English 29 Application English 30 Settings English 31 Network functions English 32 OS User Manual ...

Page 3: ... accordance with the instructions may cause harmful interference to radio communications However there is no guarantee that interference will not occur in a particular installation If this equipment does cause harmful interference to radio or television reception which can be determined by turning the equipment off and on the user is encouraged to try to correct the interference by one or more of ...

Page 4: ... points errors or omissions please contact us 4 Notwithstanding article 3 NEC will not be responsible for any claims on loss of profit or other matters deemed to result from using this device Adobe and the Adobe logo are either registered trademarks or trademarks of Adobe Systems Incorporated in the United States and or other countries Statement The image shown in this manual is indicative only If...

Page 5: ...play in accordance with the table below If a power cord is not supplied with this equipment please contact NEC For all other cases please use the power cord with the plug style that matches the power socket where the monitor is located The compatible power cord corresponds to the AC voltage of the power outlet and has been approved by and complies with the safety standards in the country of purcha...

Page 6: ... a year to remove dirt and dust When using a LAN cable do not connect to a peripheral device with wiring that might have excessive voltage Do not use the monitor in high temperature humid dusty or oily areas Do not use monitor under rapid temperature and humidity change condition and avoid cold air from air conditioning outlet directly as it may shorten the lifetime of the monitor or cause condens...

Page 7: ...terioration or discoloration on the LCD panel surface Cleaning the Cabinet Unplug the power supply Gently wipe the cabinet with a soft cloth To clean the cabinet dampen the cloth with a neutral detergent and water wipe the cabinet and follow with a dry cloth NOTE DO NOT clean with benzene thinner alkaline detergent alcoholic system detergent glass cleaner wax polish cleaner soap powder or insectic...

Page 8: ...gnal Cable Power cord 1 Clamper Setup Manual Remember to save your original box and packing material to transport or ship the monitor 1 Type and number of power cords included will depend on the where the LCD monitor is to be shipped When more than one power cord is included please use a power cord that matches the AC voltage of the power outlet and has been approved by and complies with the safet...

Page 9: ...ds mounting interfaces that comply with UL1678 standard in North America NEC strongly recommends using size M8 screw 20 22 mm thickness of bracket and washers in length If using screws longer than 20 22 mm check the depth of the hole Recommended Fasten Force 1000 1200N cm Bracket hole should be under Φ 8 5 mm Prior to mounting inspect the installation location to ensure that it is strong enough to...

Page 10: ... Attach Mounting Accessories Be careful to avoid tipping the monitor when attaching accessories B A D C inch Spec A x B Standard screw C x D Quantity CB651Q 600 x 400 mm M8 x 25 mm 4 CB751Q 800 x 400 mm M8 x 25 mm 4 CB861Q 800 x 600 mm M8 x 25 mm 4 Mounting accessories can be attached with the monitor in the face down position To avoid damaging the front face place the protective sheet on the tabl...

Page 11: ...NOTE Unless your monitor is purchased as part of a special bundle package no Option Boards will be in the box or installed in the monitor These are optional accessories available for separate purchase Please contact your supplier for a list of Option Boards available for your monitor Make sure the board is inserted into the slot in the correct orientation Do not apply excessive force to manipulate...

Page 12: ...nel 1 2 3 1 Tap to enter energy saving press at least 2 seconds to enter standby mode 2 Remote control signal receive Receive the remote signal 3 USB2 0 Front Connect USB devices such as mobile hard disk U disk USB Keyboard and mouse USB drives etc ...

Page 13: ...tput interface personal computer with HDMI output set top box or another video device 4 VGA IN External computer image input 5 AUDIO IN External computer audio input 6 SPDIF Optical output 7 RS 232C Serial interface used for mutual transfer of data between devices 8 AUDIO OUT Audio output to the external speaker NOTE This connector is not a Headphone terminal 9 LAN Connecting RJ 45 terminals 0 AC ...

Page 14: ...nd Touch function Green Lock and unlock Buttons function Yellow Lock and unlock Touch function Blue Freeze and zoom One key for blank screen Backspace key p Direction key press this button for upwards selection t Direction key press this button for left selection u Direction key press this button for right selection q Direction key press this button for downwards selection q Enter Confirmation key...

Page 15: ...hin 30 and within a distance of about 4 m 13 ft Handling the remote control Do not expose to strong shock Do not allow water or other liquid to splash on the remote control If the remote control gets wet wipe it dry immediately Avoid exposure to heat and steam Except to install the batteries do not open the remote control Caution Important the remote control system may not function when direct sun...

Page 16: ... B C A Press and slide to open the cover B Align the batteries according to the and indications inside the case C Replace the cover CAUTION Incorrect usage of batteries can result in leaks or bursting NEC recommends the following battery use Place AAA size batteries matching the and signs on each battery to the and signs of the battery compartment Do not mix battery brands Do not combine new and o...

Page 17: ...ption For USB and mini D Sub 15 pin please use a shielded signal cable with ferrite core For D Sub 9 Pin and HDMI please use a shielded signal cable Use of other cables and adapters may cause interference with radio and television reception 6 Switch on the power of all the attached external equipment When connected with a computer switch on the power of the computer first 7 Operate the attached ex...

Page 18: ... with a built in resistor turns down the sound Before making connections First turn off the power of all the attached equipment and make connections Refer to the user s manual included with each separate piece of equipment We strongly recommend connecting or disconnecting a USB storage device to the monitor when the monitor s main power is off Connected equipment Connecting terminal Input signal n...

Page 19: ...ower cord and switch power on 4 Start external computer 5 Press key and the equipment is power on 6 Press the INPUT key to switch to VGA HDMI channel NOTE External computer input equipment s best resolution is 3840 2160 Recommended computer configuration 1GB Available Hard Drive 2 0GHz Processor 1GB Memory More than 256 color display cards VGA OUT HDMI OUT Audio OUT USB Interface Support Resolutio...

Page 20: ...ort cable to connect central control equipment and machine certain function of the machine can be controlled via central control equipment such as machine ON OFF and adjustment of sound volume etc LAN Connection Internet Network Cable LAN USB Connection USB Device USB Cable USB ...

Page 21: ...o Yes Connecting a Player or Computer with HDMI Please use an HDMI cable with the HDMI logo It may take a moment for the signal to appear Some display cards or drivers may not display an image correctly Please check display card when image is compressed with 1920 x 1080 To output HDMI audio set HDMI1 HDMI2 or HDMI3 at INPUT in the OSD or choose HDMI1 HDMI2 or HDMI3 by the remote control INPUT butt...

Page 22: ...itor power indicator will turn blue while powered on NOTE The Main Power switch must be in the ON position in order to power up the monitor using the remote control or the Power button OFF Main Power Switch Power Button POWER ON button Using the remote control ON ...

Page 23: ...king between blue and red fastly Shutting down or received remote control signal NOTE If the indicator is blinking red in a combination of long and short a certain failure might have occurred please contact your supplier Aspect Source Aspect ratio VGA 4 3 16 9 HDMI 4 3 16 9 PTP Point To Point optimize touch performance when 3840 x 2160 input not available under System or not 3840 x 2160 input timi...

Page 24: ...G MP3 Xvid SP MP3 MPEG2 MPEG Audio Layer2 Abbreviation MP2 MJPEG ADPCM MJPEG LPCM H 264 ADPCM H 264 LPCM m4v H 264 AAC mkv MPEG4 MP2 H 264 AAC H 265 AAC VP8 Vorbis VP9 Vorbis mov MPEG4 ADPCM MPEG4 LPCM MPEG4 MP3 MPEG4 AAC H 264 MP3 H 264 AAC H 265 AAC MJPEG ADPCM MJPEG LPCM mp4 MPEG4 MP3 MPEG4 AAC H 264 MP3 H 264 AAC H 265 AAC H 264 HE AAC mpg mpeg MPEG1 MP3 MPEG1 MP2 MPEG2 MP3 MPEG2 MP2 MPEG2 AAC...

Page 25: ...ier Level 5 1 4K 2K 60 fps Motion JPEG MJPEG baseline decoding 1280 720p 30fps Resolution bmp Up to 8000x8000 gif Up to 8000x8000 jpeg jpg Progressive up to 7000x7000 Base line up to 8000x8000 png Interlace up to 8000x8000 Non Interlace up to 8000x8000 Movie bit rate Up to 135 Mbps Audio sample rate Up to 48 kHz Audio bit rate MP2 Up to 384 kbps MP3 Up to 320 kbps ADPCM Up to 384 kbps LPCM Up to 1...

Page 26: ...e drawing below If the physical size of the USB device is larger than than the supported sizes listed below please use a USB extension cable Unlimited USB memory Extension cable Under 20 mm NOTE Check the format if this device cannot recognize the connected USB memory It is not guaranteed to work with all USB memories sold commercially Please connect the USB memory to the USB port FAT32 format sup...

Page 27: ...t the Home input HDMI1 Select the HDMI1 input HDMI2 Select the HDMI2 input HDMI3 Select the HDMI3 input VGA Select the VGA input Volume Direct Too soft Increase or decrease output volume level Too loud Brightness Direct Brightness of backlight is reduced 1 The switching of the signal input take a few seconds Click the button in the upper right corner to enter the settings for Audio screen Display ...

Page 28: ...eble Too weak To accentuate or reduce the high frequency range of audio signals Too strong Balance Left side speaker louder Adjust left and right speaker balance Right side speaker louder Sound Mode Standard Standard Meeting Sound quality suitable for the conference Class Sound quality suitable for the classroom Custom Custom sound quality Mute Direct Return the sound volume to the previous level ...

Page 29: ...ion Aspect ratio 16 9 Displays all picture in 16 9 aspect ratio 4 3 Displays all picture in 4 3 aspect ratio PTP Display the picture point to point Point To Point to optimize touch performance when 3840 x 2160 input not avalilable under system or not 3840 x 2160 input timing ...

Page 30: ...ignal Too strong Picture Mode Standard For general windows environment and monitor default setting HighBright Higher brightness setting Cinema A setting that boosts dark tones best suited for movies Custom Displays a picture on a screen set by Image Settings adjustments Color Temp Standard Greenish white Cold Bluish white Warm Reddish white 1 Adjust the Brightness when you are using the monitor in...

Page 31: ...ition of the image within the Display area of the LCD Too high Clock Too narrow Press remote u to expand the width of the image on the right of the screen Too wide Press remote t to narrow the width of the image on the left Phase Adjusts the visual noise on the image Auto 2 Adjust H V Position Clock and Phase automatically 1 Only VGA input 2 For best results use the Auto Adjust in conjunction with...

Page 32: ...English 30 Application Click with the touch pen or Click with the touch pen Then click with the touch pen ...

Page 33: ...Default startup channel Select the source Standby after startup black screen Turn off the backlight NOTE Press the Screen Off button on the remote control to return the screen Timer switch Close power off reminder Boot time Off time Select the time of each and select day of the week or everyday or the business days Input setting Change the Input name to Nickname Other Setting Floating Style Settin...

Page 34: ... turn on or off for the detection from AMX Device Discovery when connecting to a network supported by an AMX s NetLinx control system 1 HINT When using a device that supports AMX Device Discovery all AMX NetLinx control systems will recognize the device and download the appropriate Device Discovery Module from an AMX server Select this setting if AMX Device Discovery will detect the device ...

Page 35: ...system for intelligent tablet computers You can instantly access the Launcher interface by opening the machine as shown in Fig 1 1 Figure 1 1 Launcher interface Click the button on the right bottom to access the apps as shown in Fig 1 2 Figure 1 2 APPS OS User Manual ...

Page 36: ...ings Figure 2 1 Sidebar button 2 1 Back key Click to return to the last operating interface 2 2 Home key Click to return to the desktop 2 3 Recent tasks Click to pop out the window and thumbnails of recently used applications are displayed Tap thumbnail to start or switch applications To delete the thumbnail of the application Swipe flick the thumbnail to be deleted left or right By tapping Clean ...

Page 37: ...freezing tools 1 Zoom in Click the button to zoom in the current screen 2 Zoom out Click the button to zoom out the current screen 3 Return Click the button to return to the original size of the screen 4 Exit Click the button to exit the screen freezing 2 6 Small tools Click to pop out the tool choice box including spotlight count down stop watch and air class 2 6 1 spotlight Click the icon to ope...

Page 38: ...6 2 1 Initial interface of the count down Figure 2 6 2 2 Count down interface 2 6 3 stop watch Click the button to start the stop watch as shown in Fig 2 6 3 1 Such functions as stop watch pausing the stop watch continuing the stop watch and reset are included Figure 2 6 3 1 Stop watch 2 6 4 Air class Click enter the class After students scan the QR code to join the class teacher click ENTER THE C...

Page 39: ...choice or multiple choice to select the question type Fig 2 6 4 1 1 Voter Answer Click Begin to start answering question After students answer the question their names turn blue Fig 2 6 4 1 2 Voter Answers statistics Click Finish to finish answering questions and you can access the answers statistics page Fig 2 6 4 1 3 Answers statistics ...

Page 40: ...Click the explanation button on the answers statistics to access the teaching page Users can view the question explanation while checking the answers situation Fig 2 6 4 1 5 Explain 2 6 4 2 Judge Click the button and the answer bar appears on the lowest corner of the teaching interface Fig 2 6 4 2 1 Judge ...

Page 41: ...lick Finish to finish answering questions and you can access the answers statistics page Choose the right answer s and calculate the accuracy Fig 2 6 4 2 3 Answers statistics Explain Click the explanation button on the answers statistics to access the teaching page Users can view the question explanation while checking the answers situation Fig 2 6 4 2 4 Explain ...

Page 42: ... pressing the OK key Fig 2 6 4 3 1 Responder 2 6 4 4 Selector Click the button to access the selector User can randomly pick not less than one person in air class Fig 2 6 4 4 1 Selector Set the number of people and click START it will randomly pick the name from air class Fig 2 6 4 4 2 Select result ...

Page 43: ... mobile phone The message comments are showing on the tablet computer in real time Fig 2 6 4 5 1 Message 2 6 4 6 Manager Click the Manager button to pop out the QR code for ease of students in the class to join in air class Fig 2 6 4 6 1 Manager 2 7 Input switch Click to move to the input signal selection screen ...

Page 44: ...cation AirPlay iOS iOS AirPlay Android Android application Web Chrome Less than 1920x1080 is supported 3 3 Installation and activation Both Canvas and Connect are pre installed on the CB series display There is no requirement to activate the software To launch either application tap the icon on the CB series home screen Getting the App Mosaic client app is available through Android and iOS app sto...

Page 45: ...c Connect a session ID will be generated The user can also create a new session from Mosaic Connect by clicking or tapping on new session at the bottom of the screen 3 6 Joining a session If it s the user s first time using Mosaic Connect they need to visit www connectmosaic com where they ll find instructions on how to join a session Please note this page will adapt to attendee s hardware i e Win...

Page 46: ...be shown on the home screen 3 8 Joining via AirPlay To join via airplay swipe up on your Apple device and select screen mirroring To start presenting select the name of the display you would like to present to you can find this on the top right hand corner of the home screen You will be prompted to enter a password the password is the same as the session ID Once connected your name will appear on ...

Page 47: ...from the main display Users of Mosaic Connect can use the home screen to invite an attendee to present To do so go to the home screen and double tap a user s name Before sharing their screen each user will get a prompt asking them to confirm if they would like their screen to be wirelessly presented If they select Yes it will be shown on the main display If they select No Mosaic Connect will remai...

Page 48: ...er and IP address Allows user to edit and save the room name making the solution easily recognised if the user has more than one version deployed 3 14 Display Here the user can change the background image that appears on the Connect home screen Also includes recommended image size ...

Page 49: ...nd connections Users can choose to turn on off AirPlay connections and Cloud connections 3 16 Security Users can choose to allow local connections only i e connect to sessions while on the same network They can enable or disable a PIN ...

Page 50: ...ries home screen Launching Mosaic Canvas will open up a blank workspace and toolbar as follows 3 18 Mosaic Canvas toolbar The Mosaic Canvas toolbar contains the following tools and subsets Pen Pen thickness Pen colour Line tool Arrow tool Cursor Cursor Object grouping Highlighter Highlighter thickness Highlighter colour Shape Shape fill Shape style Shape thickness Text Sticky Note Eraser Attachmen...

Page 51: ... the local device User can choose to download a Current board the board they are working on or All boards every board in that session To download boards Tap download PDF in the top right hand corner Select Current board or All boards Choose folder this is where you ll save the board ...

Page 52: ...vas allows users to add multiple boards To add a board Select add board from the bottom of the screen Add either new board or a duplicate board Note choosing duplicate board makes a copy of your existing board Give your board a name Press add ...

Page 53: ...Rename Duplicate Delete board 3 22 Saving opening and exiting boards To save a board choose the menu icon in the bottom left of the screen From here you can New Open a new board Open Open a previously saved board Save Save As Save your current board Exit Exit Mosaic Canvas 3 23 Undo and redo To undo or redo an action choose the undo redo button at the right hand side of the display ...

Page 54: ...lick Note to browse files and quick screenshot saved by the whiteboard Picture Click Picture to browse the stored pictures formats like jpg jpeg png bmp and gif are supported Media Click Media to browse the stored videos formats like avi flv m4v mkv mov mp4 mpeg mpg 3gp and ts are supported Search In the input box on the right upper corner of the interface enter the resource name you want to searc...

Page 55: ...k to cut the currently selected resource 7 Deleting Click to delete the selected resource 8 Pasting When there is any resource being copied or cut currently the button is available Users can paste the copied cut resource to the specified location as required You can execute the pasting operation only when the default folder is displaying all resource locations 9 Renaming Click to rename the select...

Page 56: ...d resources will be ordered according to resource type 3 Size When ordering according to size is selected the displayed resources will be ordered according to resource size 4 Time When ordering according to time is selected the displayed resources will be ordered according to resource time Tile Click to display the resources in the form of icon The resources are displayed in the form of icon by de...

Page 57: ...g wallpaper and others Storage Show the storage about this device Sound Touch sound and sound output settings Apps all apps in this device 5 4 Personal Setting language input Startup and shutdown Security Input Setting Other Setting etc Language Input Set display language keyboard and input method Startup and shutdown Set Startup channel Standby after startup black screen Input Setting Change the ...

Page 58: ...r One Key Optimize Click to optimize memory clean the disk garbage and check hardware problem in one key Memory Clean Click to optimize the memory Fig 7 2 Memory Clean Garbage Clean Click to clean the disk garbage Fig 7 3 Garbage Clean Version information Click to view the system version and touch pen version information of the machine Exit Click to exit the Keeper and return to the main interface...

Page 59: ...ards from the bottom of the screen to access the Touch Menu Fig 8 1 General Setting OPTION Select the OPTION input Home Select the Home input HDMI Select the HDMI input VGA Select the VGA input The switching of the signal input will take a few seconds ...

Page 60: ...rom third party credited authorities Network communication is protected using the latest in technology to secure all video audio and data Using the TLS and DTLS cryptography protocols previously referred to as SSL we provide protection using a 2048 bit asymmetric key in conjunction with a 256 bit symmetric session key More information on network ports used can be found further within this document...

Page 61: ...ct using the 6 digit meeting ID connection is attempted locally however if this is not possible then the connection is made via XMPP The host can also specify a PIN which is configured at the box directly and on each client connecting would request confirmation of the PIN Cloud If Mosaic Connect has access to the Mosaic Connect Cloud then it will be able to allow devices connecting to it from outs...

Page 62: ...etwork architecture of Mosaic Connect internal and external connections In a typical configuration Mosaic Connect is connected to an existing network infrastructure either using a static IP or DHCP Clients can connect either via the access point on the Mosaic Connect unit or via the existing network infrastructure When connected locally then signalling data is communicated over port 443 TLS and vi...

Page 63: ...col filtering on these ports then the following protocols will need to be allowed HTTP HTTPS DTLS XMPP Bonjour protocols SRTP DNS STUN TURN ICE Our SaaS provides services at the following FQDNs netcheck connectmosaic com api connectmosaic com xmpp connectmosaic com stt01 connectmosaic com stt02 connectmosaic com stt03 connectmosaic com stt04 connectmosaic com stt05 connectmosaic com Proxy support ...

Page 64: ...com port may not work When controlling the monitor connected with an RS 232C cable please refer to the Control command diagram See page 66 or see the External_Control pdf file on the NEC website RS 232C Cable Computer NOTE If your computer is equipped only with a 25 pin serial port connector a 25 pin serial port adapter is required Contact your supplier for details For the pin assignment please se...

Page 65: ... for RS 232C control The reverse type cable null modem cable not included should be used for RS 232C control 2 PIN ASSIGNMENT RS 232C input output Pin No Name 1 6 5 9 D Sub 9 pin Monitor side 1 NC 2 TXD 3 RXD 4 NC 5 GND 6 NC 7 NC 8 NC 9 NC This LCD monitor uses RXD TXD and GND lines for RS 232C control When attached converter is used 2 pin TXD and 3 pin RXD are interchanged ...

Page 66: ...ork Settings and the Alert Mail Settings by using an HTTP server function To use a LAN connection you are required to assign an IP address Example of LAN connection Server Hub NOTE Use a category 5 or higher LAN cable LAN cable not supplied Controlling the LCD monitor via LAN Control ...

Page 67: ...to the monitor RS 232C terminal Connecting an external device to the RS 232C terminal of the monitor with an RS 232C cable LAN port Connecting an external device to the LAN port of the monitor with a LAN cable For further information regarding the type of LAN cable to use please consult your network administrator ...

Page 68: ...30 41 02 30 30 36 30 30 30 31 31 03 72 0d or 01 30 41 30 45 30 41 02 31 31 30 36 30 30 31 31 03 72 0d Input Source Select HDMI2 01 30 41 30 45 30 41 02 30 30 36 30 30 30 31 32 03 71 0d or 01 30 41 30 45 30 41 02 31 31 30 36 30 30 31 32 03 71 0d Input Source Select HDMI3 01 30 41 30 45 30 41 02 30 30 36 30 30 30 38 32 03 78 0d or 01 30 41 30 45 30 41 02 31 31 30 36 30 30 38 32 03 78 0d Input Source...

Page 69: ...ing displayed for a long period of time should be avoided To alleviate image persistence put the monitor into standby via remote control or turn the monitor s main power off for as long as the previous image was displayed For example if an image was on the monitor for one hour and a residual image remains the monitor should be in standby or main power off for one hour to erase the image NOTE As wi...

Page 70: ...ol sensor of the monitor The remote control system may not function when direct sunlight or strong illumination strikes the remote control sensor of the monitor or when there is an object in the path The Timer Switch function is not working properly The Timer Switch function will be disabled when the OFF TIME is set If the OFF TIME function is enabled and the power to the LCD monitor is turned off...

Page 71: ... bit 2 ch AUDIO Output Stereo Mini Jack Analog Audio Stereo L R 150 mVrms 32 ohm Speaker Output Internal Speaker 12 W 12 W Stereo Control RS 232C In LAN 9 Pin D sub RJ45 10BASE T 100BASE TX x 1 USB Hub USB2 0 Front 2 Side port 3 Side port For touch 2 Bottom port 1 Power Supply 4 0 1 6 A 100 240 V AC 50 60 Hz Power Consumption 160 W Max 400 W Operational Environment Temperature Humidity Altitude 0 ...

Page 72: ...it 2 ch AUDIO Output Stereo Mini Jack Analog Audio Stereo L R 150 mVrms 32 ohm Speaker Output Internal Speaker 12 W 12 W Stereo Control RS 232C In LAN 9 Pin D sub RJ45 10BASE T 100BASE TX x 1 USB Hub USB2 0 Front 2 Side port 3 Side port For touch 2 Bottom port 1 Power Supply 4 3 1 8 A 100 240 V AC 50 60 Hz Power Consumption 210 W Max 430 W Operational Environment Temperature Humidity Altitude 0 40...

Page 73: ...AUDIO Output Stereo Mini Jack Analog Audio Stereo L R 150 mVrms 32 ohm Speaker Output Internal Speaker 12 W 12 W Stereo Control RS 232C In LAN 9 Pin D sub RJ45 10BASE T 100BASE TX x 1 USB Hub USB2 0 Front 2 Side port 3 Side port For touch 2 Bottom port 1 Power Supply 6 2 2 5 A 100 240 V AC 50 60 Hz Power Consumption 365 W Max 620 W Operational Environment Temperature Humidity Altitude 0 40 C 10 90...

Page 74: ...m in USA Model CB651Q GLM310A G CB751Q GLA210A G CB861Q GLA410A G Test voltage 115V 230V mode Power consumption LED color Normal Operation 1 159 7W 158 8W CB651Q Blue 201 8W 200 1W CB751Q 361 6W 355 7 CB861Q Energy Saving Mode 1 2 A key energy saving 19 0W 18 8W CB651Q Red and blue alternation 24 2W 24 1W CB751Q 19 1W 18 9W CB861Q Energy Saving Mode 1 3 AUTO STANDBY Less than 0 5W Red Power Off Le...

Page 75: ...le follow applicable legislation or agreement you may have The mark on electrical and electronic products may only apply to the current European Union Member States Outside the European Union If you wish to dispose of used electrical and electronic products outside the European Union please contact your local authority and ask for the correct method of disposal For EU The crossed out wheeled bin i...

Page 76: ...WWW MPEGLA COM 2 MPEG 4 Visual THIS PRODUCT IS LICENSED UNDER THE MPEG 4 VISUAL PATENT PORTFOLIO LICENSE FOR THE PERSONAL AND NON COMMERCIAL USE OF A CONSUMER FOR i ENCODING VIDEO IN COMPLIANCE WITH THE MPEG 4 VISUAL STANDARD MPEG 4 VIDEO AND OR ii DECODING MPEG 4 VIDEO THAT WAS ENCODED BY A CONSUMER ENGAGED IN A PERSONAL AND NONCOMMERCIAL ACTIVITY AND OR WAS OBTAINED FROM A VIDEO PROVIDER LICENSE...

Page 77: ...er to each document Next page and later Open Source Software Version License picasso 2 5 2 Apache License 2 0 gson 2 3 1 2 7 0 2 8 0 Apache License 2 0 RxJava 2 1 0 2 1 1 2 1 13 Apache License 2 0 RxAndroid 2 0 1 2 0 2 Apache License 2 0 RxBinding 2 0 0 Apache License 2 0 Arouter 1 3 0 Apache License 2 0 EventBus 2 4 0 3 0 0 Apache License 2 0 netty 4 1 2 Apache License 2 0 okhttp 3 2 0 3 4 1 3 8 ...

Page 78: ...tions for copying distribution and modification follow TERMS AND CONDITIONS FOR COPYING DISTRIBUTION AND MODIFICATION 0 This License applies to any program or other work which contains a notice placed by the copyright holder saying it may be distributed under the terms of this General Public License The Program below refers to any such program or work and a work based on the Program means either t...

Page 79: ...his License since you have not signed it However nothing else grants you permission to modify or distribute the Program or its derivative works These actions are prohibited by law if you do not accept this License Therefore by modifying or distributing the Program or any work based on the Program you indicate your acceptance of this License to do so and all its terms and conditions for copying dis...

Page 80: ...fty percent 50 or more of the outstanding shares or iii beneficial ownership of such entity You or Your shall mean an individual or Legal Entity exercising permissions granted by this License Source form shall mean the preferred form for making modifications including but not limited to software source code documentation source and configuration files Object form shall mean any form resulting from...

Page 81: ...erms and conditions for use reproduction or distribution of Your modifications or for any such Derivative Works as a whole provided Your use reproduction and distribution of the Work otherwise complies with the conditions stated in this License 5 Submission of Contributions Unless You explicitly state otherwise any Contribution intentionally submitted for inclusion in the Work by You to the Licens...

Page 82: ...POSE ARE DISCLAIMED IN NO EVENT SHALL THE COPYRIGHT HOLDER OR CONTRIBUTORS BE LIABLE FOR ANY DIRECT INDIRECT INCIDENTAL SPECIAL EXEMPLARY OR CONSEQUENTIAL DAMAGES INCLUDING BUT NOT LIMITED TO PROCUREMENT OF SUBSTITUTE GOODS OR SERVICES LOSS OF USE DATA OR PROFITS OR BUSINESS INTERRUPTION HOWEVER CAUSED AND ON ANY THEORY OF LIABILITY WHETHER IN CONTRACT STRICT LIABILITY OR TORT INCLUDING NEGLIGENCE...

Page 83: ...icensor makes available through a website or Software either now or in the future Software means the Licensor s product which comprises a software application for use of streaming video wirelessly from a computer to a software based receiver installed on a secondary computer by means of local Wi Fi network and or through Cloud Services Software License s means a license key s or registration code ...

Page 84: ...th the functions described on our website for a period of 30 days from the date that the Software License was provided to you Warranty Period 9 2 if within the Warranty Period you notify us in writing of any defect or fault in the Software as a result of which it fails to perform substantially in accordance with the description on our website we will at our sole option either repair or replace the...

Page 85: ... Agreement or if you fail to comply with any term or condition of this License Agreement or if you voluntarily return the Software to the Licensor You agree upon such termination to destroy the Software together with all copies in any form 16 General 16 1 This Agreement shall be construed in accordance with the laws of the United Kingdom without regard to its conflict of laws provisions The terms ...

Reviews: