English-22
6. Press SELECT to start the calibration. Front sensor calibration may take several minutes depending on user setting.
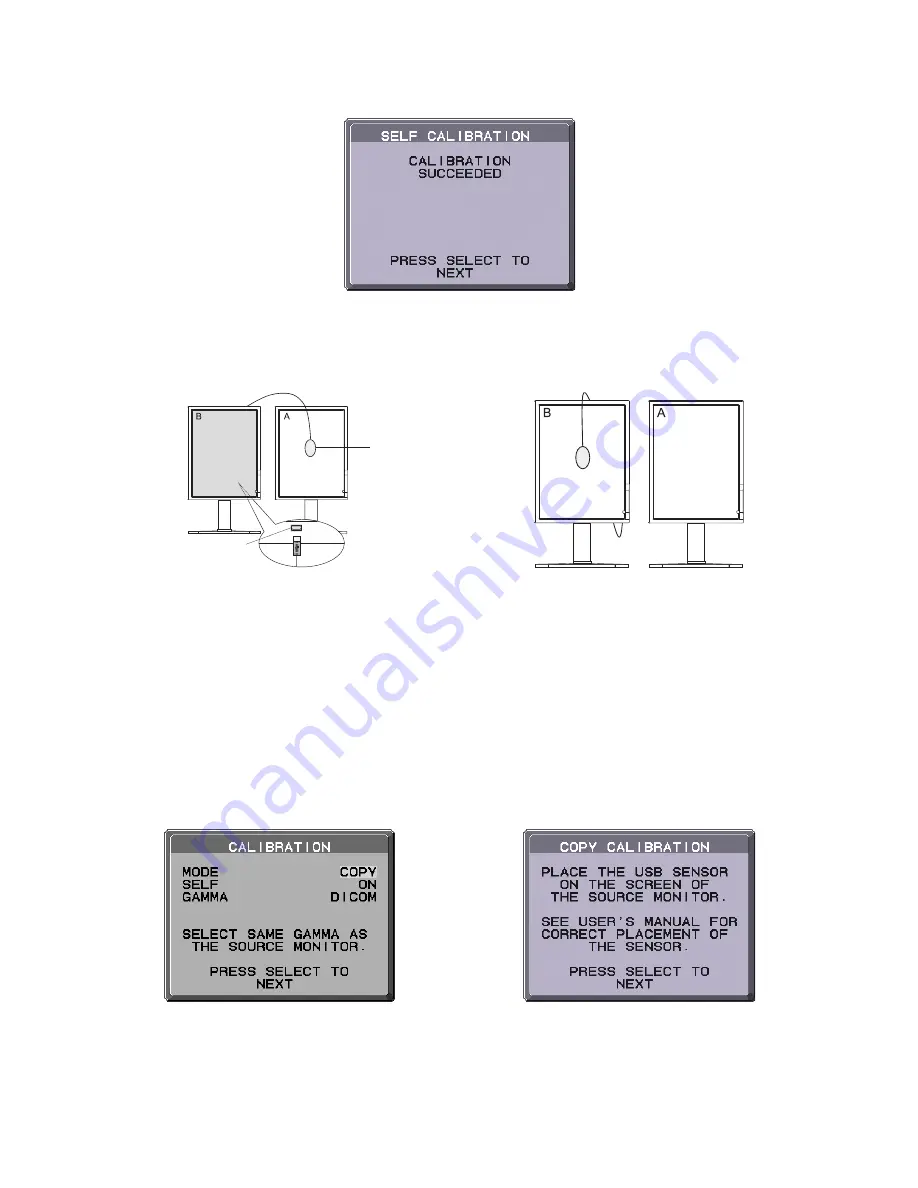
7. After the CALIBRATION SUCCEEDED message appears (
Figure 6
), press SELECT. To end the calibration mode, press
“EXIT”.
Figure 6
Copy Calibration
1. To show the CALIBRATION menu, plug-in the USB sensor to the sensor port (
Figure 7
) or select the CALIBRATION in the
advanced menu (page 20).
Sensor Port
USB Sensor
Sensor port is located at
the back of the monitor.
Figure 7
Display A
– SOURCE display of White point* and luminance to copy.
Display
B
– TARGET display which performs a copy calibration.
Figure 8
NOTE:
Display A must display a white screen.
Enter the Advanced OSD by pressing RESET and EXIT.
Use LEFT and RIGHT keys to move into Tag A and select SELF TEST MODE.
2. Select COPY in the Mode selection in Display B (
Figure 9
).
3. Select ON or OFF in the SELF selection. If ON selected, SELF Calibration execute with COPY Calibration. Select the
target GAMMA. Please select the same target GAMMA as Display A. Press SELECT to go to the next section.
4. The procedure will ask for the USB sensor to be placed on the center of the Display A panel (
Figure 10
). Tilt the display
panel approximately 5° backward and place the USB sensor in the center of the display panel (
Figure 7
).
NOTE:
Place the USB sensor flat against the LCD to avoid external light contamination. DO NOT press the calibrator
against the display panel.
Figure 9
Figure 10
* MD212MC/MD213MC only.


