


© Pro Advantage by NDC. All rights reserved
PS-733 Rev 00-3/10
9/23
3. Testing
How to run a test:
The
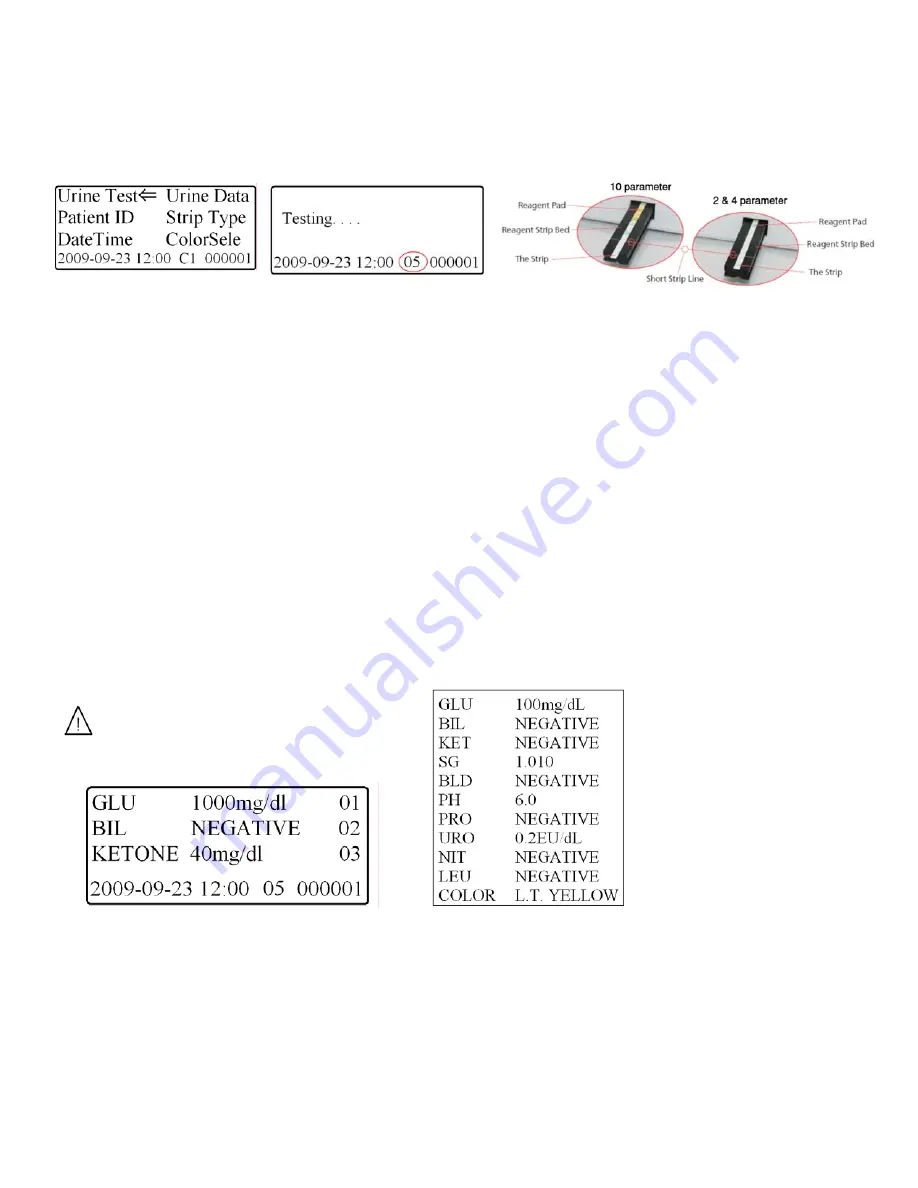
Urine Test
screen is accessed by using the arrow keys to highlight
Urine Test (
see Fig. 3), and then press the
“YES” key to enter the testing mode (see Fig. 4).
Figure 3: Main Menu Screen Figure 4: Testing Screen
Figure 5: Strip Alignment
After the Testing Screen is entered (Fig. 4), the analyzer will give the user 5 seconds to dip the urine reagent strip
into the urine sample, blot the strip lengthwise, and place the strip on the strip bed. The analyzer will beep once
confirming that the strip has been placed on the strip bed, and then the analyzer will count down from 60 seconds
to 0 (testing time). At 14 seconds remaining in the testing period the analyzer will move the strip bed into the
analyzer to begin reading the color of each parameter.
Once the testing time has expired the results will appear on the screen (see Fig. 6). The analyzer will also print
the results automatically i
f the analyzer has been set up to automatically print results. The date, time, patient ID,
and color will be printed along with the test results (see Fig. 7).
The test results displayed on the screen and the printout will include the following information:
•
Patient ID or both
•
Test
date
•
Time
•
Color
•
Results
From the strip bed, remove the used urinalysis strip and dispose of it according to your standard laboratory
procedures. Wipe the strip bed, if necessary. Report the results to a laboratory supervisor or physician.
Figure 6: Results Screen
Figure. 7: Print Out
The results will be displayed on the LCD
screen until another test is run, or until the
user chooses to return to the main menu.


