iSTAR USERS MANUAL V.1.1. JANUARY 2013. © 2013 NCTECH LIMITED.
PAGE: 9
1.
To charge the battery, connect the DC power supply to the camera and switch on at the mains plug socket.
2.
When the power cable is attached, an audible “beep” will be heard.
3.
After a short time of charging the battery icon will display.
The battery will charge whether the camera is on or off. The camera can be switched on and used whilst the battery is
charging.
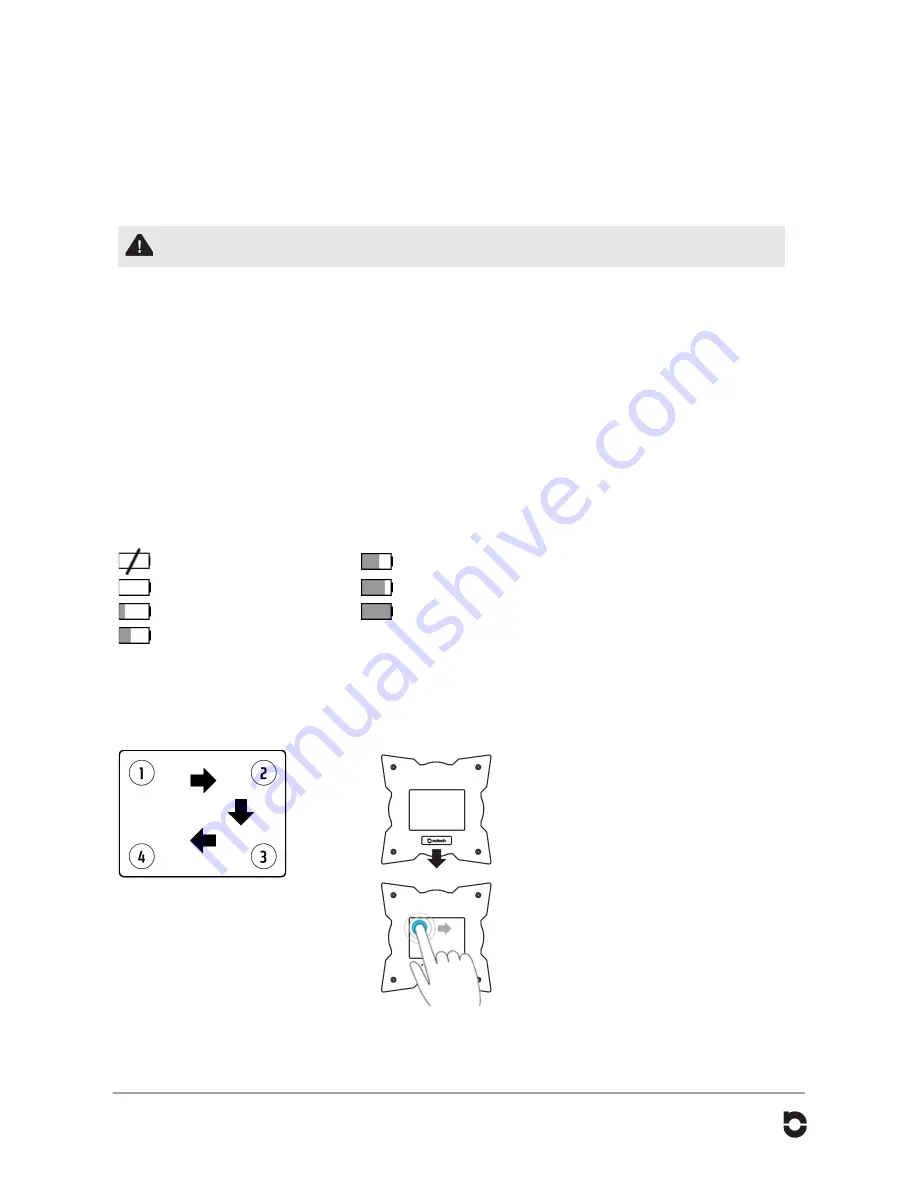
The battery level will be indicated at one of seven levels.
No battery or No Charge
50% battery charge
Low battery charge
75% battery charge
Minimum battery power
100% battery charge
25% battery charge
When the camera is powered from the mains, a red battery icon will flash on screen to indicate that the battery level is low
and is charging.
1.
Ensure that the power adaptor is attached to
the camera or the battery is installed.
2.
Position the camera so that the NCTech logo
is pointing towards you.
3.
To start the camera, tap the four corners of the
touch screen in order from 1 to 4. An audible
beep will be heard.
4.
The iSTAR logo will appear on screen for
approximately 15 seconds whilst the camera
boots up.
The iSTAR menu screen will appear and the
camera is now ready for operation.
Getting started
Installing the battery
For safety reasons, the battery is shipped with a very low charge and will need to be fully charged prior to using the
camera.
Before installing the battery, please read the battery safety operating instruction first
1.
Place the camera with the touch screen facedown on a flat solid surface and unscrew the battery cover and slide
open.
2.
Connect the battery to the connector within the camera and insert the battery so that the wires are at the top.
3.
Slide the battery cover on, taking care not to trap the wires.
4.
Screw the battery cover down.
Charging the battery
Checking the battery level
Turning on the camera
Summary of Contents for iSTAR 360
Page 1: ......


