iSTAR USERS MANUAL V.1.1. JANUARY 2013. © 2013 NCTECH LIMITED.
PAGE: 13
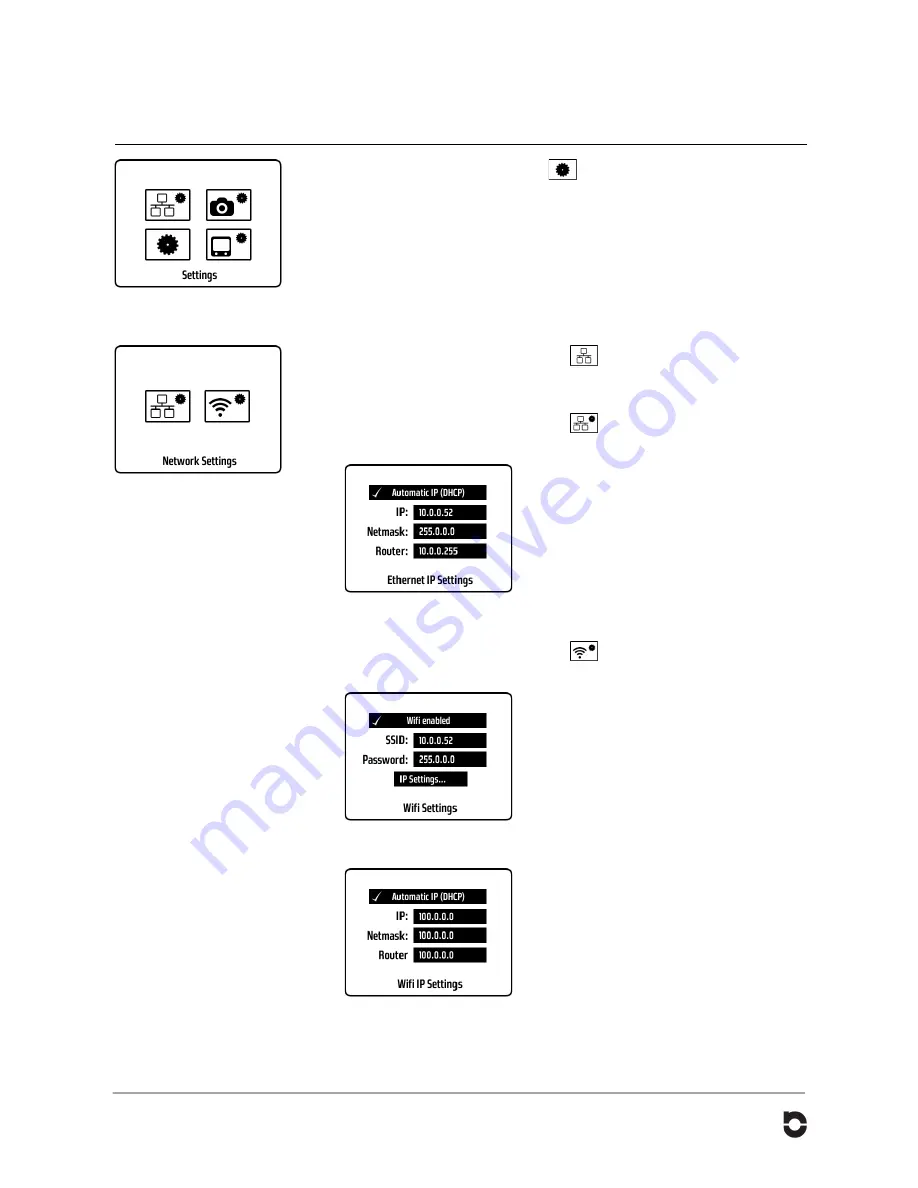
Settings
From the start menu, press the icon
to navigate to the “Image Review”
screen.
Network settings
From the Settings menu, press the icon
to navigate to the “Network
Settings” screen.
Ethernet IP Settings
From the Settings Menu, press the icon
to navigate to the “Network
Settings” screen.
1.
To network iSTAR with an Ethernet cable,
make sure the cable is connected.
2.
If connected to a DHCP enabled router the
Automatic IP should be enabled in iSTAR to
obtain its network settings.
3.
To use manual network settings, touch the
“Automatic IP” button to toggle between
Automatic and Manual settings.
WiFi Settings
From the Settings Menu, press the icon
to navigate to the “WiFi Settings”
screen.
1.
To enable WiFi on iSTAR, press the “WiFi
enabled” tick to toggle between ON or OFF.
2.
Press the SSID button to locate a WiFi
network.
3.
Once selected, press the Password button
to display the keypad and enter the WiFi
password.
4.
Press OK to save the password and return
to Wifi settings.
WiFi IP Settings
Press the “Automatic IP” button to switch on
automatic IP.
To enter manually, un-tick the button if it is
ticked and enter the settings by clicking on
the IP, Netmask, and Router buttons.
Summary of Contents for iSTAR 360
Page 1: ......


