background image

30

Advantage Install

Dispenser Power Option 1

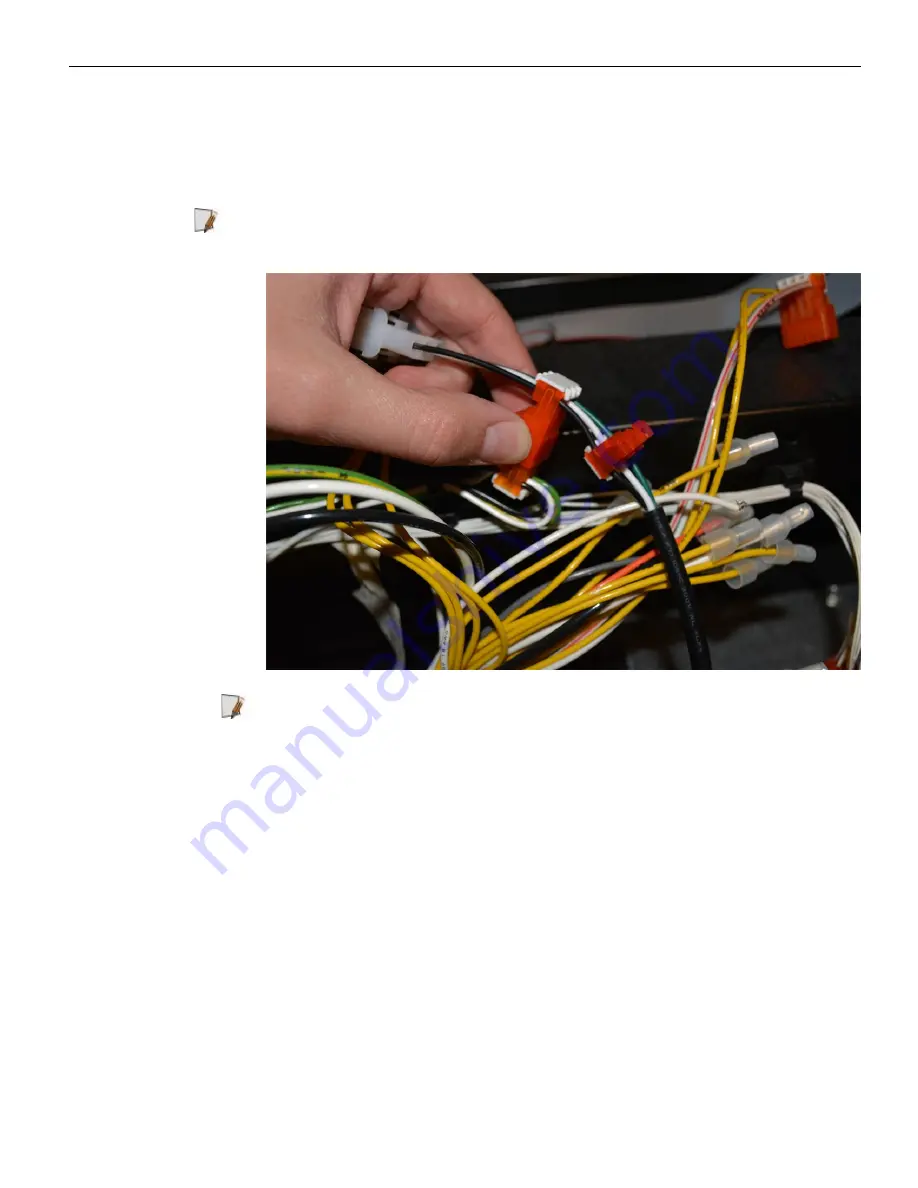
If a Bus line is present, remove the Bus Blank Plug from the Advantage Power
cable bus connection and connect the cable to the main power bus line
previously identified in the dispenser as indicated below.

Note:

If an older style connection is present, connect the corresponding plugs.

Removing the Bus Blank Plug is not necessary with an older connection type.

Note:

For Side B installation, attach the second PSU Advantage Power cable to

another open Bus connector or the open Bus connector on the Side A power
cable.

Dispenser Power Option 2

Connect the white female end connector of the Advantage Power cable to the
previously marked 3 pin male connector.

Summary of Contents for Retrofit OPTIC 5 Touch

Page 1: ...Installation Instructions Optic 5 Touch Advantage Door NCR Kit Number 6005 0013 8801 497 0522374 Issue A Revision B...

Page 2: ...terms and conditions of an agreement you have with NCR NCR s copyright notice must be included It is the policy of NCR Corporation NCR to improve products as new technology components software and fi...

Page 3: ...n for end users System Administrator and Maintenance Technician NCR Field Engineering and VAR OEM Hardware and System Integrators Notice This document is NCR proprietary information and is not to be d...

Page 4: ...these should they be required Locate the switch or circuit breakers that shut off all power to all fueling equipment and dispensing devices Total Electrical Shut Off Before Access Any procedure requi...

Page 5: ...nderstand the procedures before beginning work Follow the Regulations Regulations in OSHA Occupational Safety and Health Administration national state and local codes including customer requirements m...

Page 6: ...jury or death Signal Words Warning Alerts you to a hazard or unsafe practice which will result in death or serious injury Warning Alerts you to a hazard or unsafe practice that could result in death o...

Page 7: ...rt of defective missing wrong component Description of Failure please be specific For example display will not power on Customer Requestor s contact name phone number and or e mail address Address to...

Page 8: ...tear are not included in the warranty In general damages due to the following are not covered by the warranty Improper or insufficient maintenance Improper use or unauthorized modifications of the pr...

Page 9: ...the defective equipment Serial Number of the defective equipment Equipment location in the store Description of the problem including any system error codes error condition or guidance to the area of...

Page 10: ...viii...

Page 11: ...r 7 Options Door Disassembly 12 Remove Internal Components 19 Dispenser Power Option 1 19 Dispenser Power Option 2 20 Advantage Install Install the PSU assembly 27 27 27 30 30 Install the Dispenser Cu...

Page 12: ...x...

Page 13: ...8801 InvencoLink Converter One per dispenser to be Installed on Side A PSU Bracket Kit Component List Part Number QTY Description 497 0522360 1 Optic 5 Touch PSU 006 8617757 2 PSU Attachment Screws 49...

Page 14: ...2...

Page 15: ...ety Glasses GVR 751 Key Medium Flathead Screwdriver 6 or small and medium Phillips Screwdriver Socket Wrench and Assorted Hex Sockets or Nut Drivers 3 8 and 1 4 Could vary by pump s Needle Nosed Plier...

Page 16: ...4...

Page 17: ...Recommended Materials 5 Recommended Materials The following tools are not provided in the kit Cable Restraints or Zip Ties Cloth Rags All Purpose Lubricant Adhesive Remover Rust Penetrator Oil...

Page 18: ...6...

Page 19: ...pening the dispenser 1 Identify the security bolt locations either 2 or 4 bolts depending on the pump configuration and disengage them from the dispenser using a 3 8in nut driver Note The security bol...

Page 20: ...8 Kit Deinstallation Narrow Frame Dispenser 2 Unlock and open the dispenser a Unlock the two dispenser electronic options doors to access the inner latches using GVR security key...

Page 21: ...llation 9 b If a Narrow Frame dispenser open the Electronics options door as in sub step a and then disengage the slide latch located inside the dispenser Pull up on the slide latch to open the other...

Page 22: ...10 Kit Deinstallation Inside view of Narrow Frame Slide Latch c disengage the 3 for narrow frame or 4 for wide frame inner latches holding the main dispenser door...

Page 23: ...Kit Deinstallation 11 Wide Frame Latch Locations Narrow Frame Latch Locations d Open the large dispenser door...

Page 24: ...stallation e Determine Side A and Side B Side A will have the Electronics sled extend out from its side Options Door Disassembly 1 Disconnect all cables connected to the inner Electronics Options Left...

Page 25: ...Kit Deinstallation 13 a Disconnect the ribbon cable and LED power from the One line display or Monochrome Display One Line Display...

Page 26: ...14 Kit Deinstallation Monochrome Display b Disconnect ribbon cable from the Card Reader...

Page 27: ...Kit Deinstallation 15 c Disconnect ribbon cable from the Soft Keys d If present disconnect the ADA solution ribbon cable e If present remove the customer keypad connections...

Page 28: ...nect any remaining cables or cable restraints holding the cables Place all disconnected cables inside the dispenser 2 Prepare to remove the left side Electronic Door a Use a pair of needle nose pliers...

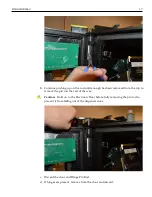
Page 29: ...oved from the top to remove the pin rod the rest of the way Caution Hold on to the Electronic Door before fully removing the pin rod to prevent it from falling out of the dispenser door c Discard the...

Page 30: ...f any cleaning solutions or solvents used 3 Unplug the printer a Access the back of the printer by opening the directly opposite Electronic Options door on the other side of the dispenser b Unplug all...

Page 31: ...D comm cable tied together Dispenser Power Option 2 will have connections directly to the transformer and a CRIND comm cable b Follow the respective steps once the power option is identified Dispenser...

Page 32: ...20 Kit Deinstallation Dispenser Power Option 2 a Identify the main six pin CRIND power cable connected to the DC Transformer and disconnect...

Page 33: ...Kit Deinstallation 21 b Mark the 3 pin AC connector connected to the standard card reader form the jbox and disconnect This connection will be used during the installation process...

Page 34: ...nly a Identify and mark the dispenser two wire comm cable connected to the CRIND Board assembly Disconnect the comm cable The dispenser connected end will be used in the installation process If a grou...

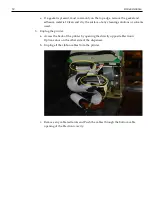
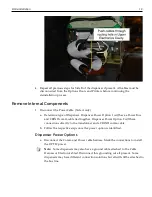
Page 35: ...Remove the Electronics Sled Side A only a Identify any other cables connecting the Electronics Sled components to the DC Transformer or AC line Disconnect all cables and grounding wires b Pull out the...

Page 36: ...Pull up from the hinge point as shown below until the Sled is clear of the Sled rails Discard the Board Sled 4 Remove the Printers a From the underside of the Electronic cavity locate the printer att...

Page 37: ...he printer and hardware Note If grounding wire is connected to printer disconnect and discard c Repeat for side B All printers must be removed to properly access the Sled Rail bolts 5 Remove the Sled...

Page 38: ...26 Kit Deinstallation b Unbolt the sled rails and discard Move to the installation steps...

Page 39: ...the Side A PSU bracket Follow the Cub Installation Instructions 497 0514466 Acquire the Cub Retrofit Kit UL Listed by Report Retrofit kit part number 6009 0008 8801 Install the PSU assembly 497 05223...

Page 40: ...eviously installed in the bottom of the Electronic cavity If installing the B side PSU install in the Side B Electronic cavity Note When placing the PSU assembly install so that the center printer cab...

Page 41: ...e PSU 2 Wire the PSU to the main power a Route the universal Power Connector pigtail on the PSU Assembly into the lower electronic cabinet through the printer cable hole Attach the Advantage Power cab...

Page 42: ...w Note If an older style connection is present connect the corresponding plugs Removing the Bus Blank Plug is not necessary with an older connection type Note For Side B installation attach the second...

Page 43: ...Power cable to another open Bus connector or the open Bus connector on the Side A power cable Plug in the OPTIC Cub dispenser Cables 1 Install the GVR two wire comm cable Side A only a Route the GVR A...

Page 44: ...32 Advantage Install b Connect the previously identified dispenser two wire come cable to the Advantage comm cable adapter Comm Option 1...

Page 45: ...33 Comm Option 2 2 Install the Network and Data cables to the Dispenser Cub a Install the yellow CAT network cable 497 0513384 into the Cub LAN 1 terminal for Side A Note Use the LAN 2 terminal for Si...

Page 46: ...stall the new OPTIC door a Remove the Hinge Pin Rod and Hinges from the OPTIC 5 Dispenser Door 497 0527961 b Fit the two hinges into place on the left side of the dispenser door as shown below using t...

Page 47: ...om the front fit the bottom of the door into the hinge point and align the previously installed hinges with the OPTIC 5 door hinge pin rod channel d Install the Hinge Pin Rod from the top of the Dispe...

Page 48: ...dvantage Install Note In order to properly install the Hinge Pin Rod the main dispenser door must be fully opened e Install the Grounding Wire 497 0513687 to the door using the provided screw 006 8625...

Page 49: ...Advantage Install 37 f Attach the Grounding Wire to the PSU grounding stud using the preinstalled nut Note Do not remove any other preinstalled components when installing the Grounding Wire...

Page 50: ...38 Advantage Install 2 Wire the OPTIC 5 a Plug In the main power cable that is pre installed on the PSU assembly into the back of the OPTIC Terminal...

Page 51: ...Advantage Install 39 b Plug the open end of the Yellow Cat5e Network Cable the one that was plugged into terminal LAN1 for Side A LAN2 for Side B into the OPT Input Output terminal labeled as...

Page 52: ...a zip tie Route away from gaskets and sharp edges Secure with a zip tie to keep cables in place with enough service loop to fully open the OPTIC 5 door and avoid any cable strain c Attach the groundi...

Page 53: ...Advantage Install 41 Repeat the previous installation steps if installing on a two sided dispenser Close the main dispenser doors a Engage the latches b Engage the security bolts Wide Frame...

Page 54: ...Dial Display doors if Narrow Frame Close and lock all Electronic Options Doors Return power to the dispenser Caution Follow local regulations for certification and inspection prior to returning power...

Reviews: