2-42
Hardware Installation
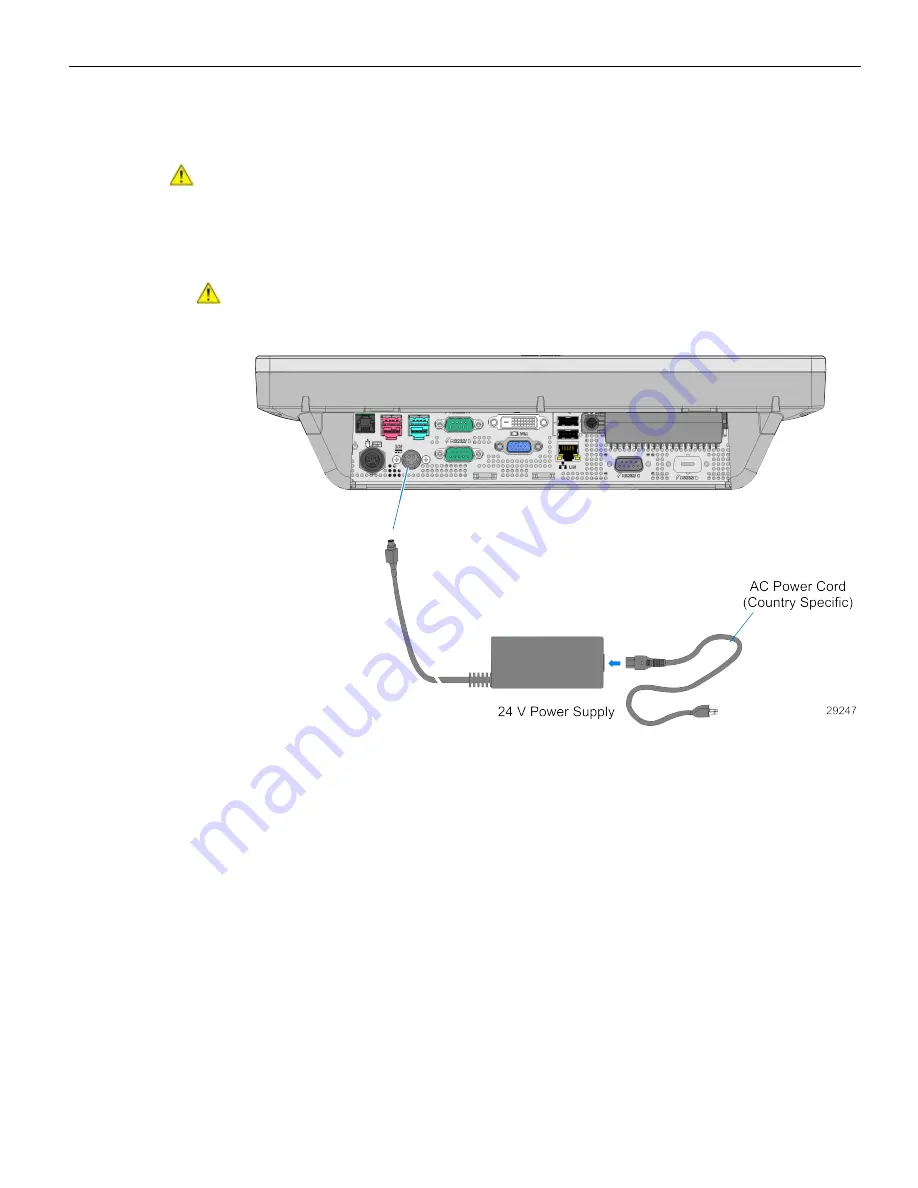
Connecting AC Power
The 7610 receives power from an external 24 V power brick.
Caution:
The 7610 requires the NCR 24 V power supply that is shipped with the
terminal. Use of other power bricks may cause damage to the unit.
1. Connect the Power Supply cable to the DC Power connector on the terminal.
2. Connect the AC Power Cord to the Power Supply and to an AC outlet.
Caution:
Do not connect or disconnect the 24V Power Cable from the terminal
with the AC Power Cord connected to an AC outlet.
Summary of Contents for RealPOS 25
Page 1: ...USER GUIDE NCR RealPOS 25 7610 POS Release 2 0 B005 0000 2017 Issue D...
Page 10: ...x...
Page 40: ...1 30...
Page 58: ...2 48 Hardware Installation Cable Connections Using DVI Interface...
Page 60: ...2 50 Hardware Installation Cable Connections Using DVI Interface...
Page 62: ...2 52 Hardware Installation Cable Connections Using DVI Interface...
Page 74: ...2 64 Hardware Installation Dual Display Clone 1 Select Multiple Displays...
Page 82: ...2 72...
Page 94: ...3 84...
Page 102: ...4 92...
Page 112: ...6 102...
Page 116: ...7 106...
Page 121: ...2x20 Customer Display Interface 8 111 CP437...
Page 122: ...8 112 2x20 Customer Display Interface CP852...
Page 123: ...2x20 Customer Display Interface 8 113 CP858...
Page 124: ...8 114 2x20 Customer Display Interface CP866...
Page 125: ...2x20 Customer Display Interface 8 115 CP932...
Page 126: ...8 116...
Page 132: ...9 122...
Page 134: ...A 2 Powered Serial Port Settings Motherboard 1 x...
Page 135: ...Powered Serial Port Settings A 3 Motherboard 2 x...
Page 136: ......
Page 138: ...B 6 Display Color Adjustment Windows 7 Select Color Enhancement on a Windows 7 system...


