


7197 Series II Service Manual
Chapter 3: Diagnostics
June
2011
41
Diagnostic Modes
This function allows the user to put the printer into the following diagnostic modes:
Off, Normal Mode: this the normal operating mode of the printer.
Datascope Mode: the receipt printer prints incoming commands and data in
hexadecimal format.
Receipt Test Mode: the receipt printer prints two code pages.
The diagnostic modes are enabled or disabled by using the Configuration Menu. See
“Configuration the Printer,” for instructions on how to enter the Configuration Menu.
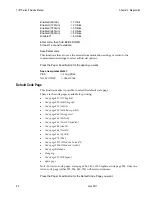
Press the Paper Feed Button for the diagnostics mode you want.
** SET DIAGNOSTICS MODE ?
YES
-> Long Click
NO
-> Short Click
OFF, Normal Mode*
-> 1 Click
Data Scope Mode
-> 2 Clicks
Receipt Test Mode
-> 3 Clicks
Enter code, then hold Button DOWN
At least 1 second to validate
Datascope Mode
Datascope Mode allows the user to test the printer’s communications. When in Datascope
Mode the printer receives all communications, but instead of executing the commands it
prints them out on receipt paper as hexadecimal numbers in the order received. For
example, the ASCII character “A” is printed as the hexadecimal number 41 an so on.
To run the Datascope Mode:
1.
After you have enabled the Datascope Mode through the Configuration Menu, exit the
Configuration Menu.
2.
Run a transaction from the host computer.
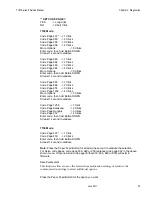
All commands and data sent from the host computer will be printed as hexadecimal
numbers as shown in the illustration.
30 31 32 33 34 35 36 37 38 39 40 41
:
0 1 2 3 4 5 6 7 8 9 @ A
41 42 43 44 45 46 47 48 49 50 51 52
:
A B C D E F G H I J K L
To exit the Datascope Mode:
1.
Enter the Configuration Menu again
2.
Disable the Datascope Mode
3.
Exit the Configuration Menu
The printer is in Normal Mode and can communicate with the host computer.
Receipt Test Mode
To run the Receipt Test Mode:
1.
Enable the Receipt Test Mode through the Configuration Menu. See “Configuring the
Printer,” for instructions on how to enter the Configuration Menu.
Summary of Contents for 7197 II SERIES
Page 5: ...v EMC 100 240 1 5 0 8 50 60 24 2 3 3 125 NCR NCR EMC 360 NCR EMC A A...
Page 7: ...vii A NCR NCR NCR A...
Page 35: ...7197 Series II Owner s Manual Chapter 2 Setting Up and Using the Printer 21 September 2011...
Page 37: ...7197 Series II Owner s Manual Chapter 2 Setting Up and Using the Printer 23 September 2011...
Page 38: ...7197 Series II Owner s Manual Chapter 2 Setting Up and Using the Printer 24 September 2011...
Page 253: ...7197 Series II Owner s Guide Appendix B Print Characteristics 228 Februrary 2012 Code Page 932...
Page 272: ...7197 Series II Owner s Guide Appendix B Print Characteristics 247 Februrary 2012...


