background image

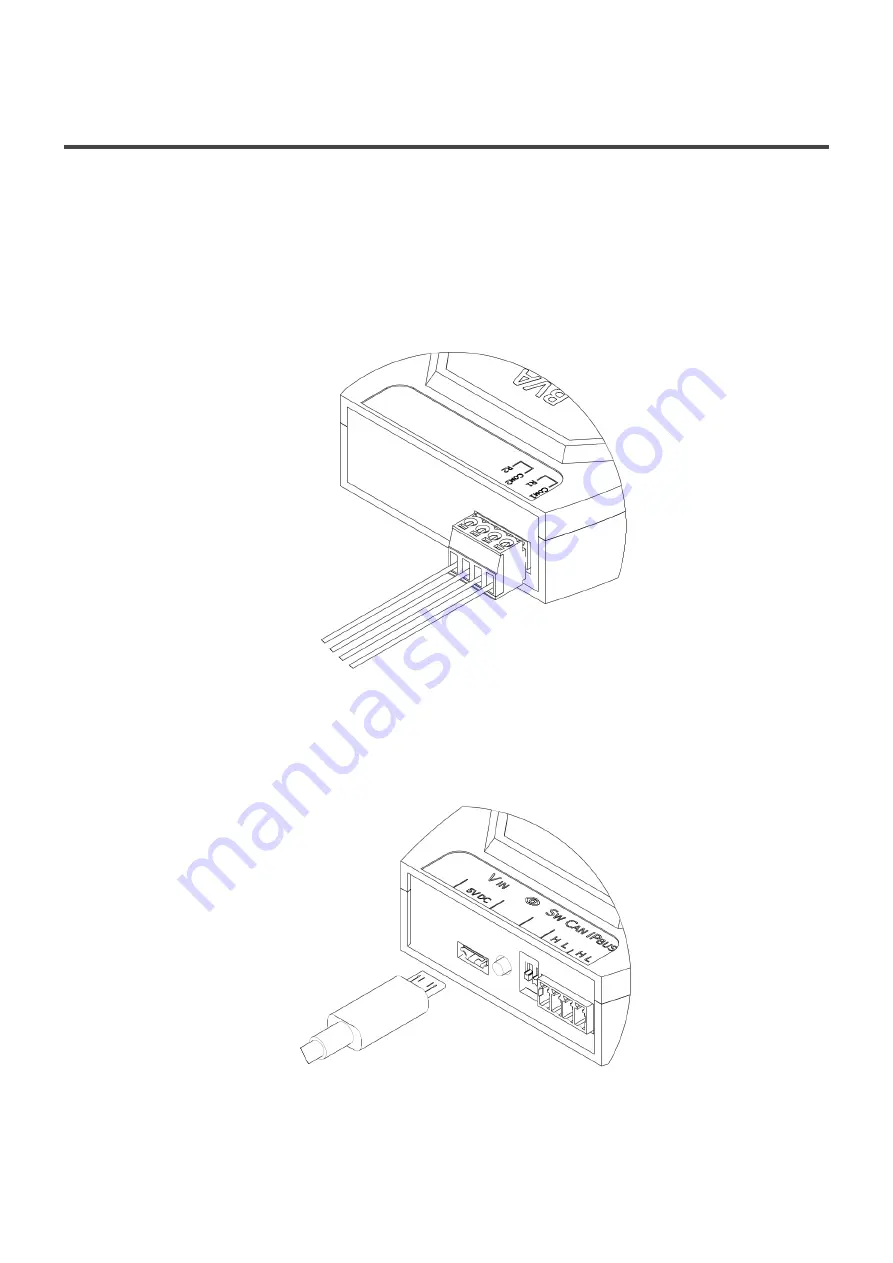
3.1.2. Installation of BVA 2 relays at lift
stops

1. Identify the buttons and the wiring that activates each button and its common contact.
2. Prepare the necessary wiring for installing the device: power, relay connection and common

contact wiring.

3. Identify the connection wires of buttons to the device, depending on relay configuration at

Net4Machines Smart Control

App. Relay 1 common contact is independent from that of relay 2.

4. Wire the corresponding contacts of the button to the pluggable terminal of 4 positions and connect

to the BVA

5. Prepare the wiring for the power supply of the device. For productos versions v3.0 and older, it is

necessary to supply power to BVA thanks to a DC-DC converter with a type B microUSB
connector. The converter must be connected to an electrical line with a voltage between 7 – 50
VDC. Plug the converter microUSB to the BVA.

6. Place the device at an isolated location from water and humidity.
7. Use the complements supplied to fix the product if necessary.
8. Connect the power supply of the facility and check that the power LED is powered on.

Nayar Systems

BVA - 1_en

Page 11 of 29

Summary of Contents for BVA

Page 1: ...BVA 1 Last update Jul 18 2022 Nayar Systems Copyright 2022 Nayar Systems...

Page 2: ...f BVA 8 3 1 1 Installation of BVA 12 relays at lift car s 9 3 1 2 Installation of BVA 2 relays at lift stops 11 3 2 Configuration 13 3 2 1 Account Management 14 3 2 2 Creating new installation and add...

Page 3: ...cument may void the warranty The device must be manipulated only by qualified and skilled professionals with specific technical knowledge to avoid a failure of the device due to inappropriate manipula...

Page 4: ...e are two versions of this product depending on the number of relays BVA 12 relays and BVA 2 relays BVA 12 relays is designed to be connected on buttons on lift car and BVA 2 relays rear external butt...

Page 5: ...lays 12x Relay connections BVA 12 relays Type of contact Normally open NO Maximum output current charge 2A Maximum switching Voltage 220 VDC 250 VAC Operating range 20 70 C Dimensions without compleme...

Page 6: ...ws whether the device has Internet connectivity Internet connectivity is only required when configuring the BVA Device without Internet connectivity Device with Internet connectivity Active local conn...

Page 7: ...Fi network created by another Nayar Systems device For example if there is a Nayar Switch installed it is possible to connect to its Wi Fi network by pressing the Nayar Switch Discover button and the...

Page 8: ...mon contacts BVA 12 relays 4 position connector 4 position connector including 2 relay connections relay 1 and 2 and two independent common contacts COM1 and COM2 In such a way that COM1 contact corre...

Page 9: ...BVA 12 relays 1 Device per floor compatible with 1 or 2 buttons BVA 2 relays In the following example the installation consists of 1 cabin and 3 floors so the following elements are required 1x BVA 1...

Page 10: ...s Furthermore switching off the power supply of the facility is recommended to be sure that the working environment is safe It may be necessary to disassemble the lift car operating panel or external...

Page 11: ...tacts of the button to the pluggable terminal of 14 positions and connect to the BVA 5 Prepare the wiring for the power supply of the device For productos versions v3 0 and older it is necessary to su...

Page 12: ...Nayar Systems BVA 1_en Page 10 of 29...

Page 13: ...acts of the button to the pluggable terminal of 4 positions and connect to the BVA 5 Prepare the wiring for the power supply of the device For productos versions v3 0 and older it is necessary to supp...

Page 14: ...Nayar Systems BVA 1_en Page 12 of 29...

Page 15: ...apply the configuration of devices BVA and Smartphone are connected through wireless connection by proximity using a 2 4GHz radio link Any later modification of configuration may be done presentially...

Page 16: ...s that new users must follow 1 Access the following link https sso nayarsystems com sign up 2 Enter your e mail address which will later become your user and click on the Create user button 3 When you...

Page 17: ...com if you do not see this email please remember to check your SPAM junk mail folders 5 After opening the email click on Access manager to manage the account password 6 Enter and confirm the new pass...

Page 18: ...7 Finally click on Go to Home to log in with your credentials Nayar Systems BVA 1_en Page 16 of 29...

Page 19: ...Nayar Systems BVA 1_en Page 17 of 29...

Page 20: ...is desired to configure BVA devices please skip until the next step Create an installation by clicking on the button located at the bottom on the right of the application Hereinafter it is necessary t...

Page 21: ...cility It is recommended to give a descriptive name to the facility Click on NEXT 5 Introduce the number of cabins and floors of the lift It is necessary to include the total amount of floors even tho...

Page 22: ...he lift car substituting 0 per G and adding precise description of each floor substituting Floor 0 per Ground Floor Click on the ADD button to create the facility which is not configured It is necessa...

Page 23: ...r App will look like by clicking on the drop down menu at the top right of the app and then on PREVISUALIZE If it is desired that the installer company logo is shown please contact support nayarsystem...

Page 24: ...Nayar Systems BVA 1_en Page 22 of 29...

Page 25: ...e been used for Ground Floor Floor 1 and Floor 2 respectively Pressing on Check the connections it is possible to observe an example of the connection of the buttons and relays 2 From this step it is...

Page 26: ...re Click on the Discover button of the device to link If the device has not been configured before it would be necessary to wait for 10 seconds until it is configured otherwise an alert message will b...

Page 27: ...s with up and down touch Simple A single button for both purposes Without device For installations where it is not desired to install a BVA device Configure the relays as they are going to be connecte...

Page 28: ...n the Discover button of the device to link If the device has not been configured before it would be necessary to wait for 10 seconds until it is configured otherwise an alert message will be shown Th...

Page 29: ...e moreover the App does not need an Internet connection to work It is an accessible App which fulfils WCAG 2 0 standards It presents the following additional functionality Screen reading assistant Voi...

Page 30: ...support In case of any incident with your BVA device when needed technical support please contact Nayar Systems after sales services 34 964 06 69 95 support nayarsystems com Nayar Systems BVA 1_en Pa...

Page 31: ...ms Net4Machines Smart Control App Verify that the relays used for wiring are the same as configured on the Nayar Systems Net4Machines Smart Control App The wiring of relay connections is incorrect Che...

Reviews: