background image

2. Common Operation

1. To turn on/off the unit

In power off mode, press the POWER button to turn on the unit.
In power on mode, long press the POWER button on the front panel or briefly press
the POWER button on the remote controller to turn off the unit.

2. To select function mode

Press the MODE button to select RADIO, DISC (After
inserting a disc), USB(After inserting a USB storage),
CARD(After inserting a MMC or SD card),AUX mode.

During playback, tapping the

icon after popping up

Keyboard interface can pop up Mode Menu as right.
then tap one icon in it to select your desired mode.

3. To adjust sound level

Rotate the VOL knob on the front panel or press or hold
the + or - button on the remote controller to directly adjust the volume level.

4. To mute sound

Press the MUTE button on the remote controller to turn on/off MUTE mode.
Briefly pressing the POWER button on the front panel also can turn on/off MUTE mode.
In MUTE mode, the MUTE mode can be released by pressing the following buttons:
MUTE, EJECT, VOL or +/-, POWER(on the front panel), MODE.

5. To display and adjust the clock time

Press the CLK button to display clock time on the small monitor of the front panel.
Long press the CLK button to change the color of the hour of the clock, then rotate
the VOL knob on the front panel or press the + or - button on the remote controller to
adjust the hour; and then briefly press the SEL button to change the color of the minute
of the clock, then rotate the VOL knob on the front panel or press the + or - button on
the remote controller to adjust the minute.

6. To select a preset EQ mode

Press the EQ button to select the preset music equalizer curves: POP, ROCK,CLAS,
EQ FLAT . The sound effect will be changed.

7. To remove the front panel

Press the RELEASE button on the front panel to detach the front panel from the unit,
then you can remove the front panel.

8. To select a optimal angle of the front panel

Press the ANG button repeatedly to select a optimal angle as follows:

-->ANGLE0-->ANGLE1-->ANGLE2--> ANGLE3--> ANGLE4-->

9. To turn on/off LOUD mode

Press the LOUD button on the remote controller to turn on/off LOUD mode.
When turning on LOUD mode, it will enhance bass level immediately when the bass is
not enough.

10.To reset the unit

Press the RESET button to rehabilitate the distorted program to zero when display is
wrong or sound is distorted or the function buttons are not effective.

Mode Menu

It allows you to enter the order in which you want some chapters/tracks in
DVD/VCD/MP3/WMA/CD to play.

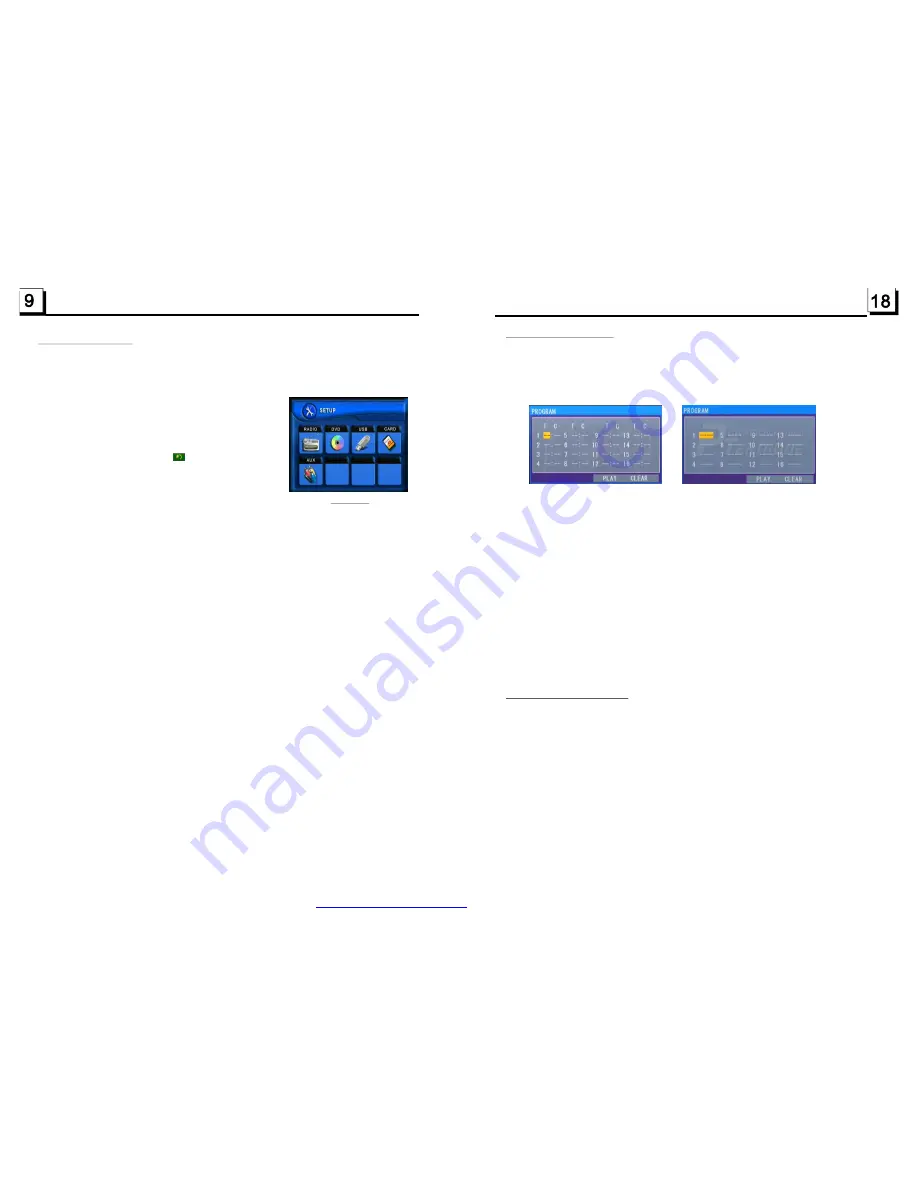
1 During playback, press the PROG button to enter a program interface as

follows:

for DVD

for VCD/MP3/WMA/CD

2 Use the direction buttons to move cursor onto the desired place for inputting

the sequence number.

3 Use the number button to input desired sequence number of title/chapter/

track with desired sequence.

4 Use the direction button to move cursor onto Play item, then press the OK

button to play the programmed titles/chapters/tracks in programmed order;
only pressing the PLAY button also can play the programmed titles/chapters
/tracks in programmed order.

*

To exit program playback, firstly press the STOP button, then press the PLAY

button to enter sequence playback; or press the PROG button twice again.

*

To remove the all programmed sequence numbers, move the cursor onto

Clear item, then press the OK button.

*

To change the programmed sequence, move the cursor onto the item you

want to change, input the desired sequence number.

*

During VCD playback, if it is in PBC ON mode, at the same time of entering

the state of program playback, it turns off PBC mode.

1. The root menu is displayed on the monitor when beginning to switch on IMAGE

mode. At the time, it plays MP3/WMA file.(the TITLE or MENU button is not
available).
In the root menu, the left file sort icon is for MP3/WMA file; the middle file sort
icon is for JPEG file; the right file sort icon is for VIDEO file. If one of these 3
file sort does not exist, you can not move cursor onto the file sort icon.

2. When displaying the root menu, press the direction buttons to select your

desired FOLDER, file or file sort icon, then press the OK or PLAY button to
open the FOLDER, or play the selected file, or play only this sort of file.
When displaying the root menu, you can also use the number buttons to
select the serial number of the file and play the file.
When you select the JPEG file sort icon, press the ^ or > button to select the
first JPEG file, then press the v button to select the desired JPEG file, finally
press the OK or PLAY/PAUSE button to display the JPEG picture in full screen
from the selected JPEG picture.

4.20 Program Playback

4.21 Playback IMAGE files

PDF created with FinePrint pdfFactory trial version 

http://www.pdffactory.com

Summary of Contents for NCD-687

Page 1: ... protection against harmful interference in a residential installation This equipment generates uses and can radiate radio frequency energy and if not installed and used in accordance with the instructions may cause harmful interference to radio elevation reception which can be determined by turning the equipment off and on The user is encouraged to try to correct the interference by one or more o...

Page 2: ...wet hand 3 Switch off the main power when the unit is not in use Disconnect the power plug from the power outlet when you do not intend to use the unit for a prolonged period of time Before moving the unit remove the disc from the unit tray first 4 Do not open the cover or touch any of the components exposed out of the unit only for qualified technicians 5 Do not expose the unit under direct sunli...

Page 3: ...in Random 16 4 14 Playback in Different View Angle 16 4 15 Playback in Zoom Mode 16 4 16 Change the Caption Language 17 4 17 Change the Audio Language 17 4 18 Change the Video Signal System 17 4 19 Look over the Playback Status 17 4 20 Program Playback 18 4 21 Playback IMAGE files 18 4 22 Playback MP4 files 19 4 23 ESP and Function 19 4 24 The DVD System Menu Setup Operation 19 The Region Code 23 ...

Page 4: ...electric shock NO PICTURE SOUND AND INDICATION Ensure that the power switch is on Ensure that the wall inlet is ok Ensure that the power cord is not damaged or the fuse is not blown Ensure that the power plug is connected to the inlet tightly NO SOUND BUT HAVE PICTURE Ensure that the player s audio output has a good connection with monitor s audio input Check whether the audio connector is damaged...

Page 5: ...after inserting disc into disc compartment Why A Because the DVD player and disc has respective region code If the region codes of them are not match with each other the DVD player can not play the disc Appendix The region code of DVD The Motion Picture Association of America MPAA divided the world into 6 regions and named every region a code namely region code The region codes and the countries o...

Page 6: ...T STEREO VSS LT RT When playing a disc with PRO LOGIC Dolby stereo effect choose the item so it will output audio signal with vivid theatre effect STEREO If you choose the item when outputting audio signal with 5 1 channels it will output the left and right channels of signal when outputting audio signal with 2 channels it will output the common 2 channels of stereo signal VSS If you choose the it...

Page 7: ... 5 10 BUTTON 19 6 10 BUTTON 20 USB JACK 21 RESET BUTTON 22 AUX JACK 23 CARD SLOT 9 IR REMOTE SENSOR This item is for selecting the language of the SYSTEM MENU and all operating prompt interface displayed during playback This item is for selecting a audio language This item is for selecting a subtitle language This item is for selecting a disc menu language there is only ANALOG mode i e SPDIF OFF n...

Page 8: ... optional RED FRONT REAR RIGHT SP FRONT WHITE WHITE BLACK GREEN BLACK VIOLET BLACK GRAY BLACK GRAY VIOLET GREEN REAR LEFT SP RED R WHITE L RCA LINE OUT FUSED FILTER BOX 1A 10 A FUSES WIRING CONNECTING SOCKET WIRING CONNECTING PLUG 1 9 Description of the Rear Cabinet Connecting the parking brake line to the parking brake system built in the car Parking brake Parking brake switch inside the car Grou...

Page 9: ...n Mp4 mode then it will automatically play the first file During playback press the STOP button to stop playing and return to the root menu 2 When displaying the root menu press the direction buttons to select your desired FOLDER file or file sort icon then press the OK or PLAY button to open the FOLDER open the files of the file sort icon or play the selected file When displaying the root menu yo...

Page 10: ...habilitate the distorted program to zero when display is wrong or sound is distorted or the function buttons are not effective Mode Menu It allows you to enter the order in which you want some chapters tracks in DVD VCD MP3 WMA CD to play 1 During playback press the PROG button to enter a program interface as follows for DVD for VCD MP3 WMA CD 2 Use the direction buttons to move cursor onto the de...

Page 11: ... stations are preset to the corresponding preset number memory bank The AS operation is implemented in the each bank of the selected band When the AS operation is finished it will scan each preset station for 5 seconds in FM or AM band from M1 as briefly pressing APS button After 3 Radio Operation FM1 FM2 FM3 AM1 AUDIO VIDEO SETUP interface ZOOMx2 ZOOMx3 ZOOMx4 ZOOMx1 2 ZOOMx1 3 ZOOMx1 4 ZOOM OFF ...

Page 12: ...ard 4 Disc MMC SD Card Operation 4 4 11 Playback in Scan Mode 4 12 Playback from a specified chapter track or a specified time 4 13 Playback in Random 4 14 Playback in Different View Angle 4 15 Playback in Zoom Mode 1 In the state of VCD PBC OFF CD playing press the INT button to play the previous 15 seconds part of each track on the disc Press the INT button again to resume normal playback 2 In t...

Page 13: ...up the TFT VIDEO inter face of the SET Menu as right In the interface you can adjust the levels of BRIGHTNESS CON TRAST COLOR and HUE you can also adjust Transparency by tapping USER STDY BRIG SOFT and SHAR Tapping EXIT icon can exit the SET Menu Remark Remark Root interface for MP3 WMA MP4 JPEG Keyboard interface 1 Keyboard interface 2 SET Menu 1 SET Menu 2 During slow forward press the PLAY butt...

Page 14: ... only for MP3 WMA 4 In the state of DVD playing 1 Press the TITLE button on the remote controller to display the title list 2 Press the direction buttons to select your desired title and then press the OK or PLAY button to open the root menu of the selected title 3 Press the direction buttons to select your desired chapter finally press the OK or PLAY button to play the selected chapter During pla...

Reviews: