BHM
01/21/15
NTV-DOC156
rB2
Agreement
:
End user agrees to use this product in compliance with all State and Federal laws. NAV-TV Corp. would not be held liable for
misuse of its product. If you do not agree, please discontinue use immediately and return product to place of purchase. This product is
intended for off-road use and passenger entertainment only.
7 |
P a g e
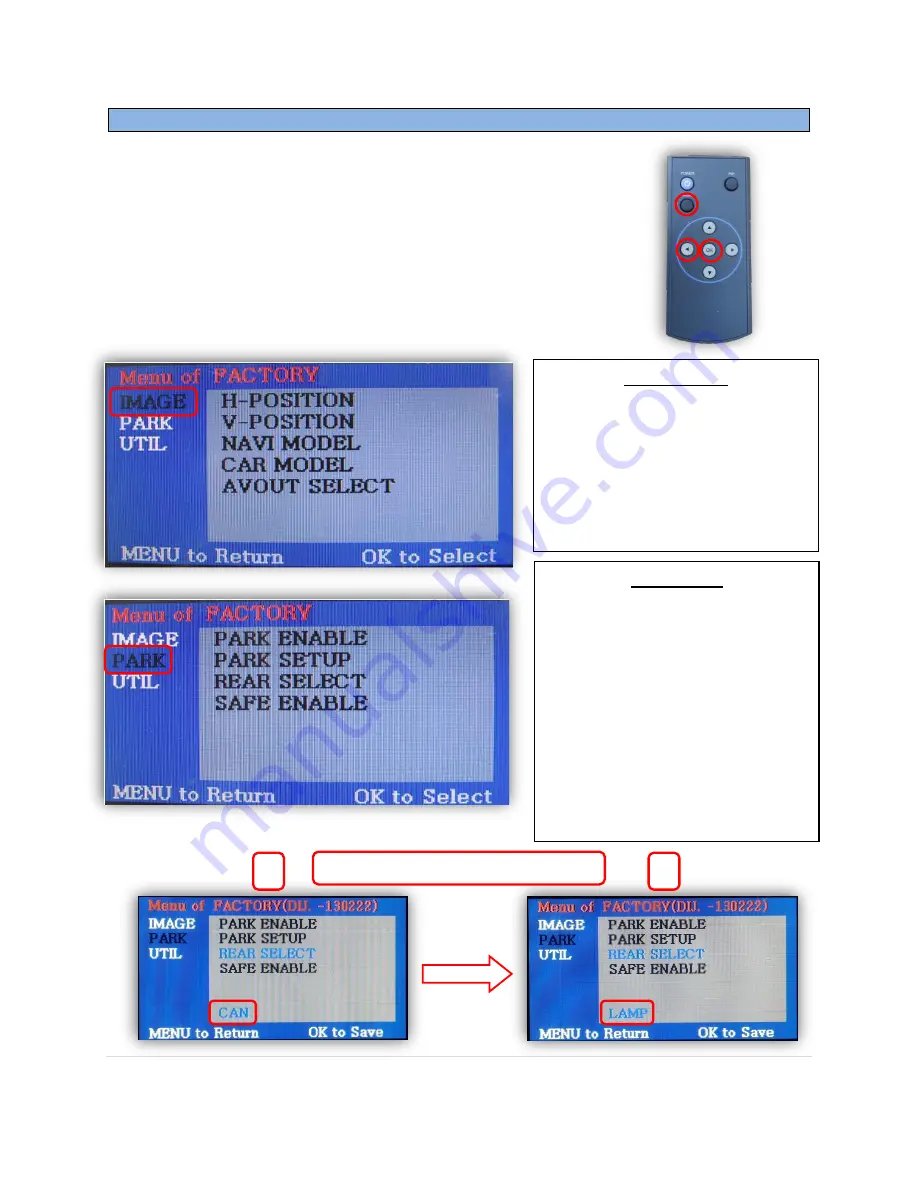
Menu Adjustments
Before you start:
Make sure the car’s ignition is on and radio is booted/settled
You must be in
‘NAVI’ (RGB), ‘AV1’, ‘AV2’ or ‘AV3’
mode (on
display screen)
Use the remote
‘OK’
button to switch modes, or use the
provided input toggle switch
Hold the
LEFT ARROW
for 3 seconds. The
Menu of FACTORY
will appear on screen.
v
IMAGE MENU
-The only setting that may need
necessary adjustment here would
be
CAR MODEL
(BMW/AUDI KITs)
Note: on some kits, this option is
located under ‘UTIL’
-The remaining settings are
optional and install dependent.
PARK MENU
PARK ENABLE:
Rear-CAM
guidelines ON/OFF
PARK SETUP:
Rear-CAM guideline
positioning
REAR SELECT:
Change
rear camera
activation
from CAN to LAMP (gray
wire)
Note: on some kits, this
option is located under ‘UTIL’
SAFE ENABLE:
If
‘ON’
, prevents AV
sources from showing (unless you
ground
Blue ‘PARKING’ wire
)
Rear-Select CAN to LAMP adjustment
1
2