


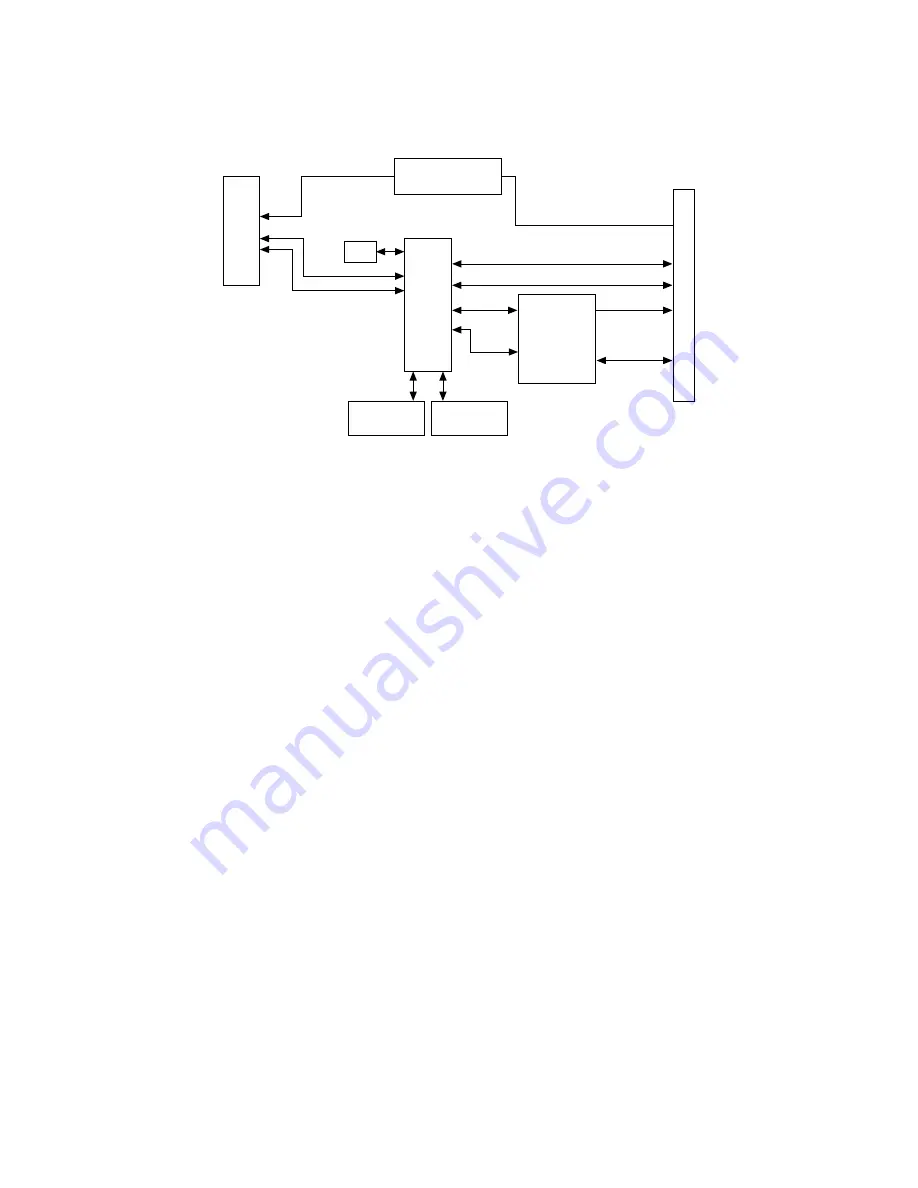
Figure 6. PXIe-7912 and PXIe-7915 Block Diagram
Nanopitch
Connector
(Front
Panel)
+3.3 V
+5 V
GPIO
MGTs
Power Supplies
Flash
FPGA
Clocking
PXI/PXIe
Connectors
Triggers
Triggers
DRAM Bank 0
(2 GB)
DRAM Bank 1
(2 GB)
Clk 100, Clk 10
DStarB, DStarC
PXIe Lanes
12 V, 3.3 V
Making a Measurement with LabVIEW
1. Launch LabVIEW.
2. Select
Help
»
Find Example
.
3. Open the example VI that you want to use by selecting
Hardware Input and
Output
»
FlexRIO
.
4. Follow any setup, configuration, and execution instructions in the VI.
Troubleshooting
If an issue persists after you complete a troubleshooting procedure, search our
KnowledgeBase for additional information our technical support engineers create
as they answer common user questions and resolve unexpected issues.
What Should I Do if the PXIe-7911/7912/7915 Does Not Appear in
MAX?
1. In the MAX configuration tree, expand
Devices and Interfaces
.
2. Expand the
Chassis
tree to see the list of installed hardware, and press <F5> to
refresh the list.
ni.com
14
PXIe-7911/7912/7915 Getting Started


